Last Tuesday, I stood in my kitchen staring at a pile of raw chicken thighs, feeling that familiar weeknight dread. We had zero time for takeout, the kids were hungry, and I really, really didn’t want to fire up the deep fryer. You know the drill: the grease splatter, the smell that lingers for three days, and the worry about burning your fingers.
But here’s the thing. I’ve spent the last six months testing dozens of “healthy” oven-fried chicken recipes, and most of them ended up soggy. Soggy. Like sad, wet cardboard. I was ready to just order pizza again.
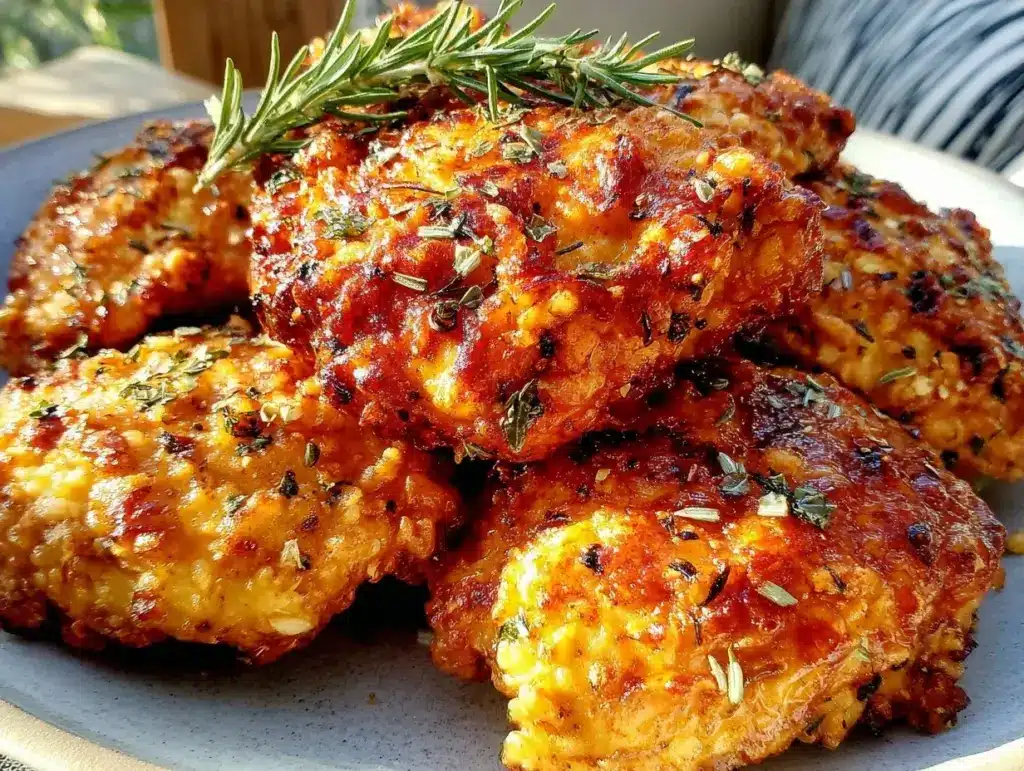
Then I tried a simple trick: a light dusting of cornstarch mixed with my spices, and a wire rack. I threw four pieces in the oven, went to help my daughter with her math homework, and twenty minutes later, I heard my husband ask if I’d bought the expensive kind from the grocery store. The skin was shatteringly crisp. The meat was juicy. And I barely lifted a finger.
This extra-crispy oven-fried chicken has completely changed our Tuesday routine. It’s budget-friendly, uses ingredients you already have in your pantry, and tastes like it came from a Southern kitchen, not a diet blog. I’ve made this at least a dozen times since last Tuesday, tweaking the spice blend until it was perfect for my picky eaters.
If you’re tired of steamed, boring baked chicken or worried about the hassle of frying, this is your answer. It’s the extra-crispy oven-fried chicken method that finally works.
Why You’ll Love This Recipe
There are about ten reasons I keep making this chicken, but here are the big ones that keep it in our weekly rotation:
Stupid Simple Setup — Seriously, if you can toss chicken in a bag and shake it, you can make this. I don’t even use a bowl anymore. I just toss everything in a Ziploc bag, shake it up, and dump it on the pan. I’ve walked my teenage son through it over FaceTime while I was at work.
Lightning Fast — 30 minutes from start to finish. Only 10 minutes of active prep. I make this on weeknights when I get home at 6:30 pm and everyone is hangry. It’s faster than waiting for a delivery driver.
Pantry-Friendly — You probably have 80% of these ingredients already. I keep flour, cornstarch, and spices stocked just so I can make this on a whim when the grocery budget is tight.
Kid-Approved — My kids, who usually complain about anything brown, ask for this weekly. It’s finger-food friendly and doesn’t have weird herbal flavors that kids hate.
Makes Amazing Leftovers — This is the holy grail. Unlike deep-fried chicken that gets soggy overnight, oven-fried chicken actually stays crisp in the fridge for up to 3 days. I deliberately make extra for lunch throughout the week. It tastes great cold or reheated in the air fryer.
Budget-Smart — Feeds 4-6 people for under $12. That’s less than one meal at a fast-food place. Chicken thighs are cheap, and this method uses less oil than frying, so you save money there too.
This is my go-to when I need dinner to just work. No complicated techniques, no weird ingredients, just reliable, delicious food that makes everyone happy.
Ingredients You’ll Need
Here’s the best part: you probably have most of this already. I’m particular about two things here—the cornstarch and the buttermilk—and I’ll tell you exactly why.
For the Chicken
Chicken thighs (3 pounds / 1.4 kg) — Bone-in, skin-on. I know some people say boneless is easier, but bone-in stays juicier and the skin gets crispier. It’s worth the extra 2 minutes of deboning if you’re in a rush, but for this recipe, keep the bones. They add flavor. I buy family packs when they’re on sale.
Buttermilk (2 cups / 480ml) — This is the secret tenderizer. The acid breaks down the protein, making the meat tender. If you’re out, mix 2 cups milk with 2 tablespoons vinegar or lemon juice and let it sit for 10 minutes. It’s not quite the same, but it works in a pinch.
Egg (1 large) — Helps the coating stick. Don’t skip it.
For the Crispy Coating

All-purpose flour (1 cup / 120g) — The base of the crust. It provides structure.
Cornstarch (½ cup / 60g) — This is the game-changer. Cornstarch absorbs moisture better than flour and creates a shatteringly crisp texture. It’s the difference between “okay” and “wow.” I always keep a box in the pantry.
Garlic powder (1 tablespoon) — Not fresh garlic. Fresh garlic burns in the oven. Powder gives that classic fried chicken flavor without the risk.
Onion powder (1 tablespoon) — Adds savory depth. Essential.
Paprika (2 teaspoons) — Smoked paprika is nice, but regular sweet paprika gives that classic red hue. I use regular.
Cayenne pepper (½ teaspoon) — Just a kick. If your kids are sensitive, skip it or use ¼ teaspoon. You can always add hot sauce at the table.
Salt (1 teaspoon) — And plenty of black pepper (1 teaspoon). Don’t be shy with the salt.
Vegetable oil (2 tablespoons) — Just enough to help it brown. You don’t need a cup of oil.
Optional Add-ins
Dried thyme or oregano (1 teaspoon) — For an herbal note. I add this when I want it to feel a bit fancier.
Cheese (¼ cup grated Parmesan) — Mix this into the flour for a umami boost. It sounds weird, but it works. My husband loves it.
Equipment Needed
You don’t need fancy equipment for this. Here’s what I actually use.
Large baking sheet — I use a half-sheet pan. Needs to fit all the chicken in a single layer. Don’t crowd the pan, or the chicken steams instead of frying.
Wire rack — This is crucial. I use a wire cooling rack that fits inside my baking sheet. It lets air circulate underneath, so the bottom gets crispy too. If you don’t have one, you can put the chicken directly on the pan, but the bottoms will be softer. I prefer the rack.
Large Ziploc bags — For tossing the chicken. Much less messy than a bowl. I use two quart-sized bags.
Whisk — For mixing the dry ingredients. Or just use a fork.
Parchment paper — Optional, but makes cleanup easier. I line my rack with it so I don’t have to scrub.
How to Make It: Step-by-Step
Alright, let’s make this! I’m walking you through exactly how I do it, including the little tricks I’ve picked up.
Step 1: Prep the Chicken (5 minutes)
Pat the chicken thighs completely dry with paper towels. This sounds boring, but it’s important. Moisture is the enemy of crispiness. If the chicken is wet, the coating slides off. I spend a full minute drying each piece. It’s worth it.
Step 2: Make the Buttermilk Wash (2 minutes)
In a large bowl (or just one of your Ziploc bags), whisk together the buttermilk and the egg. Add half of your spices (about half the garlic powder, onion powder, and salt). This seasons the meat itself, not just the outside. Toss the chicken in, making sure every piece is coated. Seal the bag and let it sit in the fridge for at least 15 minutes. 30 minutes is better. If you’re short on time, 10 minutes works, but don’t skip this step.
Step 3: Mix the Dry Coating (2 minutes)
In a shallow dish or a clean Ziploc bag, whisk together the flour, cornstarch, remaining spices, salt, and pepper. Mix it well. You want the spices evenly distributed. If you see clumps of paprika, you’ll get hot spots of spice. Whisk until it’s uniform.
Step 4: Coat the Chicken (5 minutes)
Take a piece of chicken out of the buttermilk. Let the excess drip off for a second. Then, place it in the flour mixture. Press down firmly. I mean, press. Squeeze the flour onto the chicken. Turn it over and press again. You want a thick, shaggy coating. Shake off any loose flour. Repeat with all pieces.
Pro Tip: Don’t be afraid of a thick coating. It creates the crunch. If the coating looks thin, add more flour and press again.
Step 5: The Oil Spray (1 minute)
Lightly spray the wire rack with cooking spray. Then, arrange the chicken on the rack in a single layer. Make sure the pieces aren’t touching. If they’re touching, they’ll steam each other. Spray the tops of the chicken lightly with oil. This helps them brown. I use an avocado oil spray because it has a high smoke point.
Step 6: Bake (25-30 minutes)
Preheat your oven to 400°F (200°C). Put the chicken in the oven and bake for 25-30 minutes. At the 15-minute mark, flip the chicken over. This ensures even browning. The chicken is done when the internal temperature reaches 165°F (74°C) and the coating is golden brown and crisp. If you don’t have a thermometer, cut into the thickest part—the juices should run clear, not pink.
Step 7: Rest and Serve (5 minutes)
Let the chicken rest for 5 minutes before serving. This lets the juices redistribute. If you cut into it immediately, the juice runs out and the meat gets dry. Serve hot.
Total Time: About 45 minutes (15 minutes active, 30 minutes mostly hands-off)
Expert Tips & Tricks
Here’s everything I’ve learned from making this dozens of times. These tips will save you from my mistakes.
Don’t Skip the Cornstarch
I know some recipes just use flour. But cornstarch is what makes it crispy. It creates a lighter, crunchier crust that doesn’t get soggy as quickly. It’s the secret weapon. I learned this from a Southern cookbook and never looked back.
Use a Wire Rack
I tried baking the chicken directly on the pan for a while. The bottoms got soggy. The wire rack allows air to circulate, so the bottom crisps up too. It’s a small investment ($10) that makes a huge difference. If you absolutely can’t use a rack, flip the chicken halfway through and bake on a parchment-lined pan.
Press the Flour
Don’t just roll the chicken in the flour. Press it. Squeeze it. You want the coating to adhere tightly. If the coating is loose, it’ll fall off in the oven. I press until I feel the flour sticking to the meat.
Watch the Oven Temp
400°F is the sweet spot. Lower temps make the chicken dry out before it crisps. Higher temps might burn the coating before the meat is cooked. If your oven runs hot, check it at 20 minutes. If it runs cold, add 5 minutes.
Common Mistakes (and how to avoid them):
Mistake: Soggy chicken — Fix: Make sure you patted the chicken dry. Don’t crowd the pan. Use the wire rack.
Mistake: Burnt coating — Fix: Lower the heat to 375°F if the top is browning too fast. Cover loosely with foil if needed.
Mistake: Undercooked meat — Fix: Use a thermometer. Chicken thighs can take longer than breasts. Don’t guess.
Variations & Substitutions
Once you’ve nailed the basic version, here’s how you can mix it up. I’ve tried all of these.
Kentucky Style
Add 1 teaspoon of MSG (Accent seasoning) to the flour. It’s controversial, but it adds that authentic fast-food umami flavor. I use it when I want to impress the kids.
Spicy Nashville Hot
Increase the cayenne to 1 teaspoon and add 1 teaspoon of paprika. After baking, brush the chicken with a mixture of 2 tablespoons melted butter, 1 teaspoon cayenne, and 1 teaspoon brown sugar. It’s spicy and sweet.
Herb Crusted
Add 1 teaspoon dried thyme and 1 teaspoon dried rosemary to the flour. It gives a more rustic, savory flavor. Great with mashed potatoes.
Boneless Version
Use boneless, skinless chicken thighs or breasts. Reduce cooking time to 20-25 minutes. The coating might be thinner, so press harder.
Dietary Modifications:
Gluten-Free — Replace the all-purpose flour with a 1:1 gluten-free flour blend. The cornstarch helps keep it crispy. I’ve used Bob’s Red Mill and it works great.
Dairy-Free — Use oat milk or soy milk mixed with vinegar instead of buttermilk. The rest is naturally dairy-free.
Serving & Storage
How to Serve:
I usually serve this straight from the rack at the dinner table—it looks rustic and stays warm. But here are other ways I’ve enjoyed it:
Side Dishes:
- Mashed potatoes (obviously) with gravy
- Coleslaw — The acidity cuts through the richness
- Mac and cheese — For a feast
- Corn on the cob — Simple and classic
Storage Instructions:
Refrigerator: Store in an airtight container for up to 4 days. The coating will soften slightly, but it’s still good.
Reheating: Best method: Air fryer at 375°F for 5-7 minutes. It restores the crispiness perfectly. Oven: Bake at 375°F for 10-12 minutes. Microwave: Only if you don’t care about crispiness. It’ll get chewy. Ask me how I know.
Freezing: Yes, you can freeze it! Bake the chicken, let it cool completely, then freeze in a single layer on a baking sheet. Once frozen, transfer to a bag. Reheat in the oven or air fryer from frozen. It takes about 20 minutes.
Nutrition Information
I’m not a nutritionist, but here’s the breakdown if you’re tracking.
Per Serving (based on 6 servings, 1 thigh each):
- Calories: 380
- Protein: 28g
- Carbs: 12g
- Fiber: 0.5g
- Fat: 24g
- Saturated Fat: 6g
- Cholesterol: 140mg
- Sodium: 450mg
What’s Good: High protein, low carb (if you skip the bun). Good source of B vitamins.
What to Know: Higher in sodium due to the seasoning. Use low-sodium broth if you’re watching salt. The fat content is from the chicken skin and oil, which is necessary for crispiness.
My Take: Look, this is comfort food. It’s not a diet recipe. But it’s way better than takeout, costs less, and I know exactly what’s in it. When I want to make it lighter, I remove the skin before eating, but honestly? I usually just eat a reasonable portion and enjoy it.
Final Thoughts
So that’s my go-to extra-crispy oven-fried chicken! I’ve probably talked your ear off at this point, but when you make a recipe this often, you have a lot to say about it.
This has saved weeknight dinners more times than I can count. It’s my answer to “what’s for dinner” when I’m tired, don’t want takeout, and still want something that tastes really good. My kids are happy, my husband’s happy, and I’m happy because I’m not stressed about cooking.
Make it yours! Try different spices, swap in your favorite vegetables, or double the batch for meal prep. The best recipes are the ones you adapt to your family’s tastes.
If you make this, drop a comment and let me know what you think! I love hearing how recipes turn out in your kitchen. And if something doesn’t work, tell me that too—I’m here to help troubleshoot.
Happy cooking! And I hope your kitchen smells half as good as mine does right now.
Frequently Asked Questions
Can I use chicken breasts instead of thighs?
You can, but thighs are juicier and more forgiving. Breasts dry out faster. If you use breasts, reduce the cooking time to 20-25 minutes and check the temperature early. They’ll still be crispy, just leaner.
Why did my chicken coating fall off?
Usually, this means you didn’t press the flour on firmly enough, or the chicken was too wet. Make sure you pat the chicken dry before dipping it in buttermilk, and press the flour onto the chicken until it sticks. Also, don’t shake off too much flour—let it clump.
Can I make this ahead for a dinner party?
Sort of. You can prep the chicken and coat it up to 24 hours ahead. Keep it covered in the fridge. When you’re ready to cook, let it sit out for 15 minutes while the oven preheats. Bake as directed. It won’t be quite as good as fresh, but it’s close and saves you stress during the party.
How do I keep the chicken crispy for leftovers?
Store the chicken uncovered in the fridge for the first hour to let steam escape. Then cover it. To reheat, use an air fryer or oven. Never microwave if you want crispiness. The air fryer is your best friend for leftover fried chicken.
Can I use almond flour for a low-carb version?
You can, but it won’t get as crispy. Almond flour browns quickly and can burn. I recommend mixing almond flour with a little parmesan cheese and baking powder for better texture. It’s not the same as traditional fried chicken, but it’s tasty.
What if I don’t have buttermilk?
Make your own! Add 1 tablespoon of white vinegar or lemon juice to 1 cup of milk. Let it sit for 5-10 minutes until it curdles. It works perfectly as a substitute. You can also use yogurt thinned with a little milk.
Can I double this recipe?
Absolutely! Double everything and use two baking sheets. Make sure you don’t overcrowd the pans. You might need to bake in two batches if your oven is small. The cooking times stay the same. I do this when I’m meal-prepping for the week.
Pin This Recipe!


Extra-Crispy Oven-Fried Chicken: Easy Budget Weeknight Meal
- Total Time: 45 minutes
- Yield: 4-6 servings 1x
Description
A simple, budget-friendly oven-fried chicken recipe that delivers shatteringly crisp skin and juicy meat without the hassle of deep frying. Using a secret mix of cornstarch and a wire rack, this method ensures perfect results in under 45 minutes.
Ingredients
- 3 pounds bone-in, skin-on chicken thighs
- 2 cups buttermilk
- 1 large egg
- 1 cup all-purpose flour
- ½ cup cornstarch
- 1 tablespoon garlic powder
- 1 tablespoon onion powder
- 2 teaspoons paprika
- ½ teaspoon cayenne pepper
- 1 teaspoon salt
- 1 teaspoon black pepper
- 2 tablespoons vegetable oil
- Cooking spray (optional, for rack)
Instructions
- Preheat oven to 400°F (200°C).
- Pat chicken thighs completely dry with paper towels to ensure crispiness.
- In a large bowl or Ziploc bag, whisk together buttermilk, egg, and half of the spices. Add chicken, coat well, seal, and refrigerate for at least 15 minutes (30 minutes is better).
- In a shallow dish or clean Ziploc bag, whisk together flour, cornstarch, remaining spices, salt, and pepper until uniform.
- Remove chicken from buttermilk, letting excess drip off. Place in flour mixture and press firmly to create a thick, shaggy coating. Shake off loose flour.
- Line a large baking sheet with a wire rack. Lightly spray rack with cooking spray.
- Arrange chicken on the rack in a single layer, ensuring pieces are not touching. Lightly spray tops of chicken with oil.
- Bake for 25-30 minutes, flipping chicken halfway through at the 15-minute mark.
- Chicken is done when internal temperature reaches 165°F (74°C) and coating is golden brown and crisp.
- Let chicken rest for 5 minutes before serving.
Notes
Do not skip the cornstarch; it is crucial for crispiness. Ensure chicken is patted dry before marinating. Press the flour coating firmly onto the chicken to prevent it from falling off. If your oven runs hot, check at 20 minutes. For leftovers, reheat in an air fryer or oven to maintain crispiness; avoid the microwave.
- Prep Time: 15 minutes
- Cook Time: 30 minutes
- Category: Main Course
- Cuisine: American
Nutrition
- Serving Size: 1 thigh per serving
- Calories: 380
- Sodium: 450
- Fat: 24
- Saturated Fat: 6
- Carbohydrates: 12
- Fiber: 0.5
- Protein: 28
Keywords: oven fried chicken, crispy chicken, budget dinner, weeknight meals, easy chicken recipe, cornstarch chicken, healthy fried chicken


