Last August, as the back-to-school chaos hit full throttle, I found myself scrambling every morning, trying to pack lunches that were both tasty and quick to throw together. My son, who’s notoriously picky, kept turning his nose up at the usual sandwiches. One evening, I was experimenting with leftovers and a half-empty Caesar dressing bottle when I tossed together what I thought would be a “meh” wrap. To my surprise, he devoured it and even asked for it the next day. That’s how this Back to School Chicken Caesar Wrap became our lunchtime hero.
I’ve since tested this recipe multiple times, tweaking the balance of flavors and the make-ahead steps so it’s perfect for busy school mornings. The best part? You can prep most of it the night before, saving you precious time and stress. Plus, it’s packed with protein and greens, making it a lunch I feel good about sending off with my kid. Whether you’re a parent juggling morning madness or just someone looking for a reliable, delicious school lunch idea, this wrap is about to become your new best friend.
Why You’ll Love This Recipe
This Back to School Chicken Caesar Wrap has seriously changed how we do lunches around here. Here’s why it’s such a win:
- Make-Ahead Magic — Most of the components can be prepped the night before, which means mornings aren’t a mad rush. I pack these up for the week on Sunday evenings and it’s smooth sailing.
- Kid-Approved Flavors — The creamy Caesar dressing with tender chicken hits all the right notes. Even my son, who’s picky about greens, gobbles this up because the flavors are balanced just right.
- Easy to Customize — Whether your kid likes extra crunch, no anchovies in the dressing, or a sprinkle of cheese, this wrap adapts. I’ve made it vegetarian by swapping chicken for crispy chickpeas, and it still works.
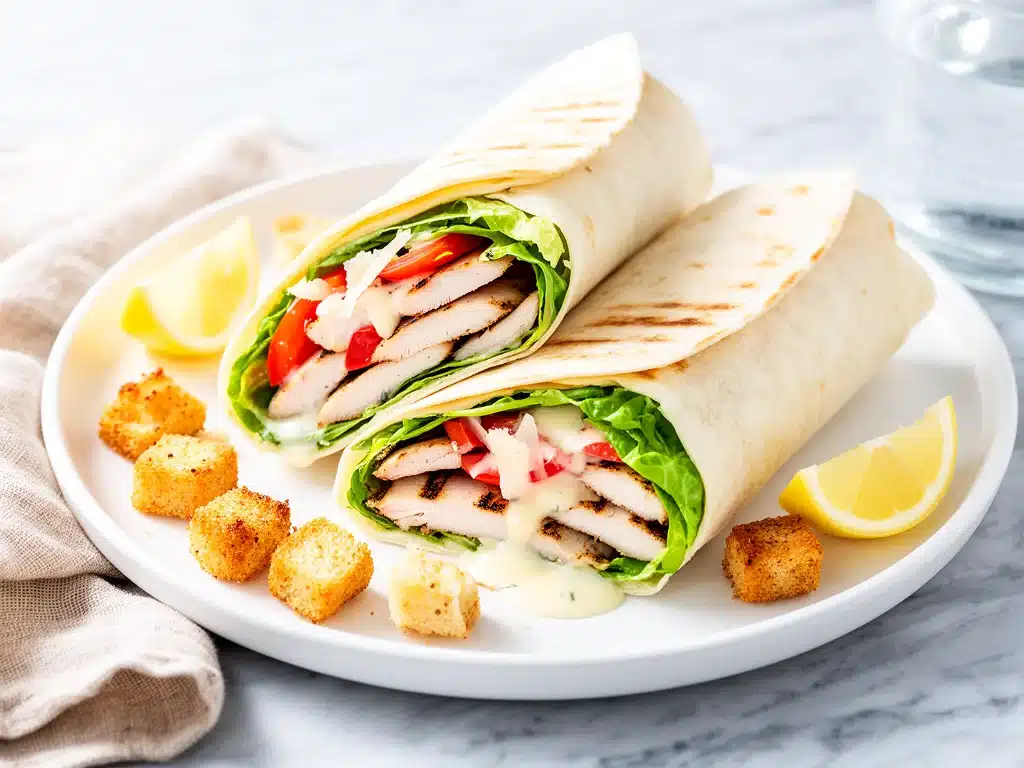
- Portable and Mess-Free — Wrapped tightly in a soft tortilla, it’s perfect for lunchboxes without worrying about spills. I’ve packed it for school, picnics, and even quick office lunches.
- Balanced Nutrition — With protein-packed chicken, fresh romaine, and a touch of healthy fat from the dressing, it’s a satisfying meal that keeps energy up through the afternoon slump.
This wrap is my secret weapon for stress-free school mornings and happy, full kids. Once you try it, I bet it’ll be yours too.
Ingredients You’ll Need
Here’s the thing about this recipe: most of the ingredients are pantry or fridge staples, and a few key items make all the difference.
- Cooked chicken breast (2 cups / about 300g, shredded or diced) — Leftover rotisserie chicken works perfectly here. I usually prep mine ahead, but grilled chicken is great too.
- Romaine lettuce
- Caesar dressing
- Parmesan cheese
- Large flour tortillas
- Croutons
- Lemon juice
- Black pepper
Optional add-ins: diced avocado, cherry tomatoes, or crispy bacon bits. I love adding bacon for a special weekend lunch.
Equipment Needed
You don’t need anything fancy here, just some basics you probably already have.
- Cutting board and sharp knife — For chopping lettuce and slicing chicken. A dull knife makes life harder, trust me.
- Mixing bowl — To toss your chicken, lettuce, and dressing together.
- Spoon or tongs — For mixing without mashing the greens.
- Measuring cups and spoons — To keep the dressing and cheese balanced.
- Plastic wrap or parchment paper — For wrapping the finished wraps, especially if you’re prepping ahead.
How to Make It: Step-by-Step

Alright, here’s the step-by-step. I’m sharing everything including the little hacks that save time and keep the wrap fresh.
Step 1: Prep Your Ingredients (5-7 minutes)
Start by shredding or dicing your cooked chicken breast into bite-sized pieces. Chop the romaine lettuce and grate your Parmesan cheese. If you’re using lemon juice, squeeze it fresh now. This prep makes assembly quick.
Step 2: Toss Chicken and Dressing (3 minutes)
In a large bowl, combine the chicken with about half of the Caesar dressing. Toss gently until the chicken is evenly coated. This step flavors the chicken and keeps it moist inside the wrap.
Step 3: Add Lettuce and Cheese (2 minutes)
Add the chopped romaine, grated Parmesan, and a light sprinkle of black pepper. Toss gently again, adding the lemon juice here to brighten everything up without wilting the lettuce.
Step 4: Prepare the Tortillas (1 minute)
Lay out your tortillas on a clean surface. If you want, warm them up slightly in the microwave or on a skillet for 10 seconds—makes rolling easier.
Step 5: Assemble the Wraps (3 minutes)
Divide the chicken and lettuce mixture evenly between the tortillas, placing it in the center. Sprinkle the crushed croutons over the top for crunch. Fold in the sides and roll tightly from the bottom up, like a burrito. Wrap each in plastic wrap or parchment for easy transport.
Step 6: Store or Serve
If you’re making these ahead, pop them in the fridge. They keep well for up to 24 hours without getting soggy because of the controlled dressing amount and crouton crunch.
Expert Tips & Tricks
- Don’t overdress the filling: Too much dressing means soggy wraps. Toss chicken and lettuce with just enough to coat.
- Crush croutons last minute: If prepping ahead, keep croutons separate and add right before wrapping, or crush them on top at lunchtime for maximum crunch.
- Warm tortillas briefly: It helps prevent cracking when rolling, especially with whole wheat or thicker wraps.
- Use rotisserie chicken: It saves so much time and adds juiciness. I buy one every weekend just for this recipe.
- Keep lettuce crisp: Tossing it with lemon juice acts as a natural preservative and keeps the greens fresh longer.
- Wrap tightly and chill: This helps the flavors meld and keeps the wrap from falling apart when you eat it.
Variations & Substitutions
Once you’ve nailed the basic Back to School Chicken Caesar Wrap, here’s how to mix it up without stress:
- Vegetarian version: Swap chicken for roasted chickpeas or crispy tofu cubes. The dressing and croutons still bring all the flavor.
- Gluten-free: Use gluten-free tortillas or large lettuce leaves as wraps instead.
- Spicy kick: Add a drizzle of Sriracha or a pinch of red pepper flakes to the chicken mixture for heat.
- Extra protein: Toss in some hard-boiled egg slices or crispy bacon bits for a heartier wrap.
- Make it dairy-free: Use a dairy-free Caesar dressing and skip the Parmesan, or swap with nutritional yeast for a cheesy flavor.
Serving & Storage
This wrap is great served cold or at room temperature, making it perfect for school lunches or even picnic baskets. I usually pack mine with a side of fresh fruit and a small treat.
Storage Tips: Wrap tightly in plastic or parchment and keep refrigerated up to 24 hours. Avoid making these more than a day in advance because the tortillas can get soggy beyond that.
Reheating: This wrap is best cold, but if you want it warm, unwrap and heat in a skillet over low heat for a couple of minutes, flipping to warm evenly. Add a little extra dressing afterward since heating can dry it out.
Nutrition Information
| Nutrient | Per Serving (1 wrap) |
|---|---|
| Calories | 380 |
| Protein | 28g |
| Carbohydrates | 30g |
| Fiber | 3g |
| Fat | 15g |
| Saturated Fat | 5g |
| Sodium | 650mg |
This wrap packs a solid protein punch and has enough carbs to keep energy steady through the afternoon. The fat mostly comes from the dressing and cheese, so if you want to lighten it up, try a lighter dressing or less cheese. Adding more veggies can boost fiber and nutrients without changing the taste too much.
Final Thoughts
So that’s my Back to School Chicken Caesar Wrap—a simple, make-ahead lunch that’s saved mornings and made lunchtime something my son actually looks forward to. I’ve shared my best tips and tricks to keep the wraps fresh, flavorful, and fuss-free.
The beauty of this recipe is how easy it is to personalize and how well it travels in a lunchbox. Whether you’re juggling work and school or just need a reliable lunch idea, this wrap has your back.
Give it a shot, and let me know how your family likes it. If you add bacon, avocado, or even a spicy twist, I want to hear about it. Cooking should be fun—and this wrap makes it that way during the busiest time of year.
Happy packing and happy eating!
Frequently Asked Questions
Q: Can I use rotisserie chicken straight from the store?
A: Absolutely! Rotisserie chicken is my go-to for this recipe because it’s juicy, flavorful, and saves so much time. Just shred or dice it and you’re ready to go.
Q: How do I prevent the wrap from getting soggy if I pack it the night before?
A: Great question. The trick is to toss the chicken and lettuce with just enough dressing to coat—no drowning. Also, adding crushed croutons right before wrapping or at lunchtime keeps the crunch intact. Wrapping tightly in plastic wrap helps keep everything fresh.
Q: Can I make this dairy-free?
A: Yes! Use a dairy-free Caesar dressing (there are several good store-bought options) and skip the Parmesan or replace it with nutritional yeast for a cheesy flavor. It won’t be exactly the same but still delicious.
Q: What if my kid doesn’t like romaine lettuce?
A: You can swap romaine for baby spinach or even kale, but be mindful kale is tougher and might need massaging with a bit of dressing to soften. Another option is thinly sliced cabbage for extra crunch.
Q: Can I freeze these wraps?
A: Freezing isn’t ideal because the lettuce and dressing don’t freeze well and will turn mushy. It’s best to prep fresh or make the filling ahead and assemble the wraps the day of.
Q: How long will the wraps keep in the fridge?
A: Up to 24 hours is best. Beyond that, the tortillas start to get soggy and the lettuce wilts. For meal prep, I recommend making the filling and keeping it separate from the wraps until lunch.
Q: Can I use whole wheat or gluten-free tortillas?
A: Yes, both work well. Just warm them slightly before rolling to prevent cracking. I’ve used gluten-free tortillas with great results for a gluten-free lunch option.
Pin This Recipe!


Back to School Chicken Caesar Wrap
- Total Time: 10 minutes
- Yield: 4 servings 1x
Description
A quick, tasty, and protein-packed chicken Caesar wrap perfect for make-ahead school lunches. Easy to customize and kid-approved, this wrap keeps mornings stress-free and lunches delicious.
Ingredients
- 2 cups cooked chicken breast (about 300g), shredded or diced
- 2 cups romaine lettuce, chopped
- ½ cup Caesar dressing (120ml)
- ¼ cup Parmesan cheese, grated (25g)
- 4 large flour tortillas (10-inch / 25cm)
- 1 cup croutons, crushed (30g)
- 1 tablespoon lemon juice (15ml)
- Black pepper, to taste
- Optional add-ins: diced avocado, cherry tomatoes, crispy bacon bits
Instructions
- Shred or dice the cooked chicken breast into bite-sized pieces. Chop the romaine lettuce and grate the Parmesan cheese. Squeeze fresh lemon juice if using.
- In a large bowl, combine the chicken with about half of the Caesar dressing. Toss gently until the chicken is evenly coated.
- Add the chopped romaine, grated Parmesan, and a light sprinkle of black pepper. Toss gently again, adding the lemon juice to brighten flavors without wilting the lettuce.
- Lay out the tortillas on a clean surface. Warm them slightly in the microwave or on a skillet for 10 seconds if desired to make rolling easier.
- Divide the chicken and lettuce mixture evenly between the tortillas, placing it in the center. Sprinkle crushed croutons over the top for crunch. Fold in the sides and roll tightly from the bottom up like a burrito.
- Wrap each assembled wrap tightly in plastic wrap or parchment paper for easy transport or storage.
- Store in the refrigerator for up to 24 hours. For best texture, add croutons just before eating if prepping ahead.
Notes
[‘Do not overdress the filling to avoid soggy wraps.’, ‘Crush croutons last minute or add just before eating for maximum crunch.’, ‘Warm tortillas briefly to prevent cracking when rolling.’, ‘Use rotisserie chicken to save time and add juiciness.’, ‘Toss lettuce with lemon juice to keep it fresh longer.’, ‘Wrap tightly and chill to help flavors meld and keep the wrap intact.’, ‘For gluten-free, use gluten-free tortillas or large lettuce leaves as wraps.’, ‘For dairy-free, use dairy-free Caesar dressing and skip Parmesan or substitute with nutritional yeast.’]
- Prep Time: 10 minutes
- Cook Time: 0 minutes
- Category: Lunch
- Cuisine: American
Nutrition
- Serving Size: 1 wrap
- Calories: 380
- Sodium: 650
- Fat: 15
- Saturated Fat: 5
- Carbohydrates: 30
- Fiber: 3
- Protein: 28
Keywords: chicken wrap, Caesar wrap, school lunch, make-ahead lunch, easy lunch, kid-friendly, portable lunch, chicken Caesar


