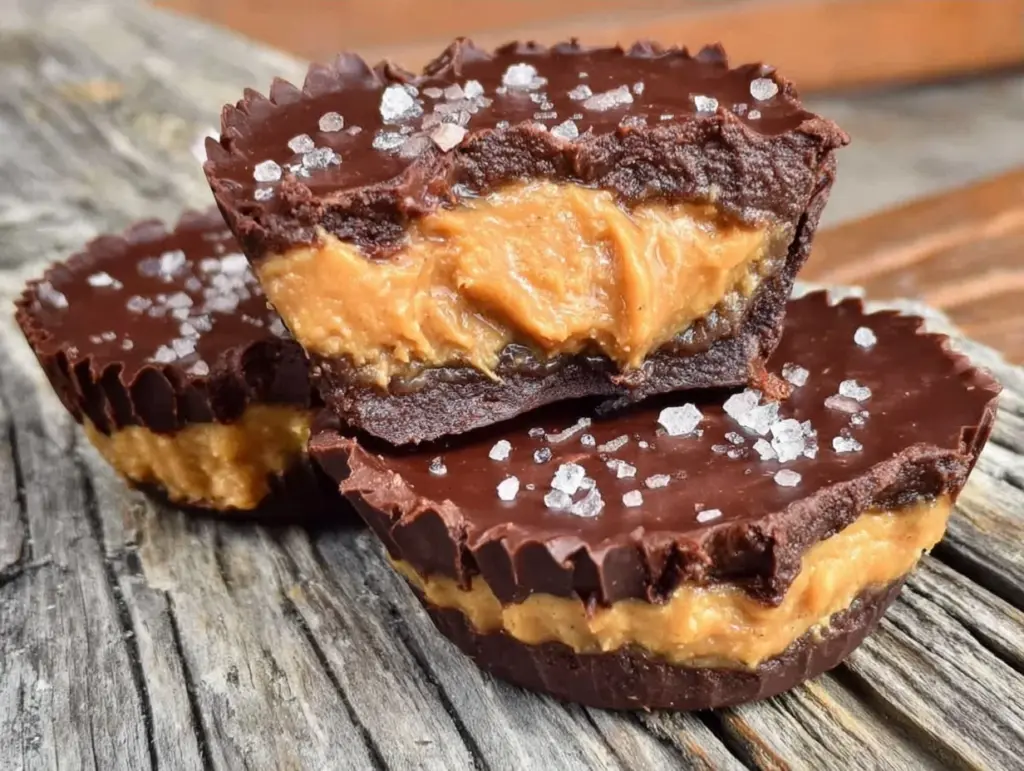
Let’s be real for a second. I have a love-hate relationship with the candy aisle. Specifically, the section with the little foil-wrapped squares. You know the ones. The ones that cost nearly $6 for a bag of six tiny cups. I used to buy them on impulse, mostly because my kids would stare at them with that specific look that says, “Please, Mom, just one.” But after doing the math one Tuesday night (I was bored, don’t judge me), I realized I was spending more on those little cups than I was on the actual dinner ingredients.
So, I tried making sugar-free dark chocolate peanut butter cups. I expected them to be dry, chalky, or taste like artificial chemicals. What I got was something actually better than the store-bought version. Rich, salty, sweet, and totally guilt-free. My kids didn’t even notice the difference until I told them there was no refined sugar. Now, this is my go-to pantry hack when I need a quick treat that doesn’t break the bank or spike everyone’s blood sugar.
Here’s the thing about these 3-ingredient budget treats: they are stupidly simple. You don’t need a tempering torch, a candy thermometer, or a degree in confectionery science. You just need two bowls, a microwave, and about 20 minutes. I’ve made this batch for my after-school snack rotation, and it’s saved me from the drive-thru window more times than I can count. If you’re tired of overpriced snacks and want something you can control, you’re going to love this.
Why You’ll Love This Sugar-Free Dark Chocolate Peanut Butter Cups Recipe
I’ve made a lot of snacks in my day, from no-bake chocolate peanut butter bars to fancy holiday desserts. But this recipe? It’s different. It’s efficient. It’s the kind of recipe that makes you feel like a genius because it takes five minutes of active effort and delivers a result that looks and tastes like you spent hours in the kitchen.
- Three Ingredients, Seriously — I’m not exaggerating. Dark chocolate (sugar-free), natural peanut butter, and a little bit of fat for smoothness. That’s it. If you can melt chocolate in the microwave, you can make this. I’ve walked my teenager through it over FaceTime while I was folding laundry.
- Under $5 Total — Let’s talk budget. A bar of sugar-free dark chocolate is usually $3–$5. A jar of peanut butter is $3–$4 (but you’ll only use half). Compared to buying a box of name-brand cups for $6, this is a no-brainer. Plus, you get way more cups out of it.
- Kid-Approved (Even the Picky Ones) — My oldest is a self-proclaimed “snack snob.” He usually turns his nose up at anything “healthy” or “homemade.” But these? He devoured three in one sitting. The saltiness of the peanut butter hits the sweet spot perfectly.
- Meal Prep Friendly — I make a double batch on Sunday while I’m prepping the rest of the week’s meals. They store in the fridge for weeks, so I always have a healthy option ready to grab when the 3 PM slump hits.
- Actually Low Sugar — This isn’t just a marketing claim. By using high-quality sugar-free chocolate and natural peanut butter, you’re cutting out the processed sugar that usually comes in these treats. It’s great for anyone watching their carb intake or just trying to avoid the afternoon crash.
This is my answer to “what’s for dessert?” when I want something sweet but don’t want to turn on the oven or spend an hour cleaning up. It’s practical, it’s cheap, and it actually tastes good.
Ingredients You’ll Need
Before we get into the mixing, let’s talk about what’s in the basket. I’m particular about three things here, mostly because bad ingredients ruin the texture. But don’t worry, you probably have most of this already.
For the Peanut Butter Center
Natural Peanut Butter (½ cup / 120g) — This is the star. I use creamy, all-natural peanut butter (the kind where the oil separates). Pro tip: You must stir that oil back in until it’s completely smooth and uniform before you measure. If you use chunky, it’ll be too hard to pipe or press into the molds. If you can’t find natural, regular creamy peanut butter works, but add a tiny splash of oil if it’s too thick.
Butter or Coconut Oil (1 tablespoon) — Why add fat? Because natural peanut butter can be dry. Adding a tablespoon of melted butter (or coconut oil for dairy-free) makes the center creamy and helps it set with a nice snap. I prefer butter for flavor, but coconut oil works if you’re avoiding dairy.
Vanilla Extract (½ teaspoon) — Just a splash. It rounds out the peanut flavor. Don’t skip it, but don’t overdo it either.
Pinch of Sea Salt — Essential. Salt makes peanut butter taste like peanut butter. Without it, it just tastes like nuts. Use a flaky sea salt if you have it, but table salt is fine.
For the Chocolate Coating
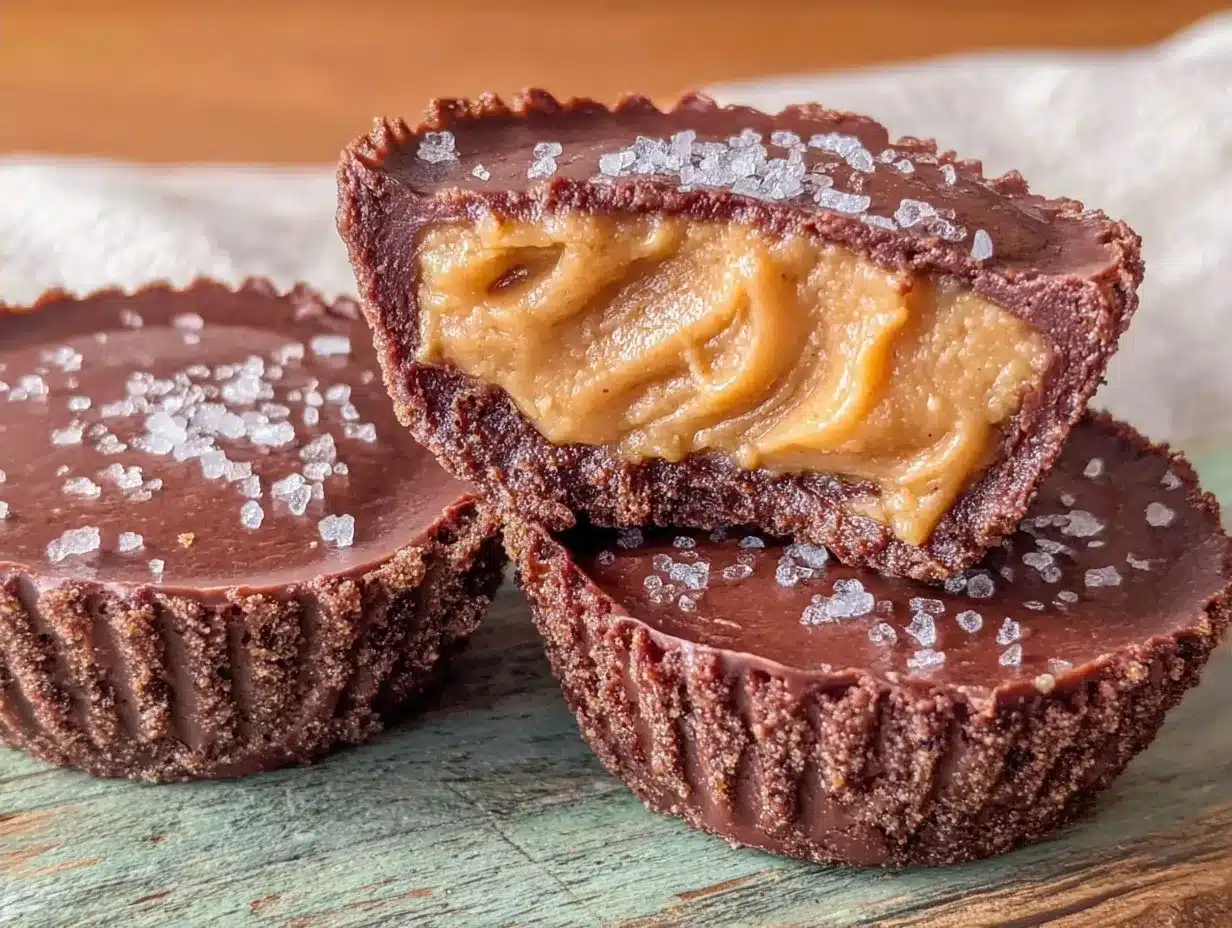
Sugar-Free Dark Chocolate Chips (8 oz / 225g) — This is where you spend your money. I recommend brands like Lily’s Sweets or Ghirardelli Sugar-Free Semi-Sweet. Warning: Do not use chocolate labeled “sugar-free” that contains sugar alcohols like maltitol if you have a sensitive stomach. Some people get tummy trouble from those. The ones I use are sweetened with stevia or erythritol and work great.
Coconut Oil (1 teaspoon, optional) — I add this to the chocolate to make it thinner and easier to dip. It also helps the chocolate shine and snap when it sets. If your chocolate chips are already high quality, you might not need this, but it’s a good insurance policy.
Equipment Needed
You don’t need fancy gadgets. Here’s what I actually use:
- Microwave-Safe Bowls — Two medium bowls. One for the peanut butter, one for the chocolate. Glass works best so you can see what’s happening.
- Microwave — Obviously. If you don’t have one, you can use a double boiler on the stove, but who has time for that on a weeknight?
- Muffin Tin — A standard 12-cup muffin tin works perfectly. I don’t use the silicone cup molds because they’re hard to get the chocolate into evenly. The tin is easier to clean and works just as well.
- Spoon or Small Piping Bag — For the peanut butter. A small spoon works, but if you want them pretty, a piping bag with a round tip is nice. Honestly? I just use a teaspoon and flatten it with my finger.
- Toothpicks — For transferring the peanut butter into the chocolate. It’s a messy process, but toothpicks make it cleaner.
How to Make It: Step-by-Step
Alright, let’s make these sugar-free dark chocolate peanut butter cups. It’s faster than you think. Grab a coffee, put on some music, and let’s go.
Step 1: Prep Your Molds (2 minutes)
Grease your muffin tin lightly with cooking spray or a little butter. This isn’t strictly necessary if you’re using high-quality chocolate, but it guarantees they pop out easily later. Line the cups with paper liners if you want them to look extra fancy, but honestly, they stick fine to the tin if you let them set properly.
Step 2: Make the Peanut Butter Center (3 minutes)
In your medium bowl, mix the stirred natural peanut butter, melted butter (or coconut oil), vanilla, and salt. Stir until it’s completely smooth. It should look like a thick paste. If it’s too dry to hold together, add another half-teaspoon of oil. If it’s too runny, add a spoonful more peanut butter. You want a consistency that holds its shape when you scoop it.
Step 3: Form the Peanut Butter Discs (5 minutes)
Using a teaspoon or small cookie scoop, drop a portion of the peanut butter into each muffin cup. You want about 1 tablespoon per cup. Use your thumb or the back of a spoon to flatten it into a disc. Make sure it’s not too thick, or you’ll run out of chocolate to cover it. Place the tin in the freezer for 10 minutes. This firms up the peanut butter so it doesn’t melt when you pour the chocolate.
Step 4: Melt the Chocolate (2 minutes)
Put your sugar-free chocolate chips in a microwave-safe bowl. Add the optional teaspoon of coconut oil if you’re using it. Microwave in 30-second intervals, stirring thoroughly between each. Crucial: Sugar-free chocolate burns easily and separates if you overheat it. Stop microwaving when there are still a few small unmelted chunks. Stir it vigorously—the residual heat will melt the rest. If you see the chocolate looking grainy or separated, it’s too hot. Let it cool for a minute before proceeding.
Step 5: Coat the Cups (5 minutes)
Remove the muffin tin from the freezer. Take a peanut butter disc out with a toothpick. Dip it into the melted chocolate, coating it completely. Lift it out, let the excess drip off for a second, and drop it back into the muffin cup. Use a toothpick to gently push it down so it’s submerged. Repeat for all cups.
Alternative method: If dipping is too messy (it can be!), just spoon a little chocolate into the bottom of the cup first, freeze for 2 minutes, add the peanut butter, then cover with more chocolate. This “layering” method is often easier for beginners.
Step 6: Set and Serve (30+ minutes)
Once all cups are coated, put the entire muffin tin back in the freezer. Let them set for at least 30 minutes, or until the chocolate is hard to the touch. If you’re in a rush, the fridge works, but the freezer gives you that nice, crisp snap. Pop them out of the tin and enjoy immediately, or store them in an airtight container.
Expert Tips & Tricks
Here’s everything I’ve learned from making these dozens of times. These tips will save you from my mistakes.
- Stir That Peanut Butter — I can’t stress this enough. Natural peanut butter separates. If you scoop from the jar without stirring, your centers will be oily and grainy. Stir it until it’s one uniform color and texture.
- Don’t Burn the Chocolate — Sugar-free chocolate chips often contain bulking agents that melt differently than regular chocolate. They burn faster. Low and slow is the rule. If it smells like burnt nuts, start over.
- Keep It Cold — If your kitchen is hot, your chocolate might take longer to set. Keep the tin in the freezer until the very last second before serving. These are best eaten cold.
- Double the Batch — Seriously, just double it. They disappear fast. I usually make two tins worth when I’m at the grocery store, so I have a month’s supply of snacks ready.
- Customize It — Once you have the base down, get creative. Sprinkle a little flaky sea salt on top before the chocolate sets. Add a crushed peanut on top for crunch. Or dip half the cup in white chocolate for a “white chocolate peanut butter cup” vibe.
Variations & Substitutions
Once you’ve nailed the basic version, here’s how you can mix it up. I’ve tried all of these.
Almond Butter Version
Swap the peanut butter for almond butter. It’s slightly more expensive but tastes incredible. I do this when I want to feel fancy, or if my kids are tired of peanuts.
Halva Style
Add a teaspoon of tahini to the peanut butter mixture. It gives it a nutty, sesame flavor that reminds me of halva. Surprisingly good.
Crunchy Texture
Mix 2 tablespoons of crushed peanuts or pretzels into the peanut butter center before forming the discs. Adds a nice crunch that contrasts with the smooth chocolate.
Coconut Oil Swap
If you’re dairy-free, use coconut oil instead of butter in the center and in the chocolate. The coconut flavor is subtle but nice. Just make sure your chocolate chips are also dairy-free.
Protein Boost
Stir a scoop of unflavored or vanilla protein powder into the peanut butter mixture. It will make it drier, so you might need a little extra oil. Great for post-workout snacks. (I actually use a similar protein shake concept from my creamy chocolate peanut butter protein shake recipe as inspiration here!)
Serving & Storage
How to Serve: These are best served cold. I keep them in the fridge or freezer and grab them straight from the tin. They go perfectly with a cup of black coffee or tea. They also pair well with a light salad if you’re looking for a low-carb lunch add-on.
Refrigerator: Store in an airtight container for up to 2 weeks. They hold their shape well in the fridge.
Freezer: These freeze beautifully! Stack them in a freezer bag with parchment paper between layers. They’ll last for 3 months. Thaw for 5 minutes before eating.
Pro Tip: If you’re meal prepping for the week, make a big batch and portion them out into small bags for lunchboxes or desk snacks. They’re much healthier than the granola bars most people buy.
Nutrition Information
I’m not a nutritionist, but here’s the breakdown if you’re tracking. Note that this varies based on the specific brand of chocolate and peanut butter you use.
Per Cup (Makes 12):
- Calories: ~150
- Protein: 5g
- Net Carbs: 3-4g (varies by chocolate brand)
- Fat: 12g
- Sugar: 0-1g (natural sugars only)
My Take: Look, this is still a treat. It has fat and calories. But it’s clean fat, protein, and no refined sugar. It satisfies the sweet tooth without the guilt. When I want to make it lighter, I use a smaller amount of chocolate and more peanut butter. But usually? I just eat one or two and enjoy it.
Final Thoughts
So that’s my go-to sugar-free dark chocolate peanut butter cups recipe! I’ve probably talked your ear off at this point, but when you make a recipe this often, you have a lot to say about it.
This has saved me from impulse buys at the store more times than I can count. It’s my answer to “what’s for dessert?” when I want something sweet but don’t want to turn on the oven or spend an hour cleaning up. It’s practical, it’s cheap, and it actually tastes good.
Make it yours! Try different add-ins, swap in your favorite nut butter, or adjust the salt. The best recipes are the ones you adapt to your family’s tastes.
If you make this, drop a comment and let me know what you think! I love hearing how recipes turn out in your kitchen. And if something doesn’t work, tell me that too—I’m here to help troubleshoot.
Happy cooking! And I hope your kitchen smells half as good as mine does right now.
Frequently Asked Questions
Q: Can I use regular chocolate chips instead of sugar-free?
A: Yes! If you don’t care about the sugar-free aspect, regular semi-sweet or dark chocolate chips work perfectly. You might need to adjust the sweetness of the peanut butter center if you prefer less sweet, but the ratio stays the same.
Q: Why is my chocolate grainy or separated?
A: This usually happens if the chocolate is overheated. Sugar-free chocolate is sensitive. Always microwave in 30-second bursts and stir well. If it looks separated, let it cool for a minute and stir in a teaspoon of warm water or oil—it might come back together. If not, it’s still edible, just not pretty.
Q: Can I make these ahead of time?
A: Absolutely. In fact, they taste better after a day or two in the fridge as the flavors meld. Make them up to 2 weeks in advance and store in the fridge. For longer storage, freeze them.
Q: What if I don’t have a muffin tin?
A: You can use silicone cup molds, but they can be tricky to fill. Another option is to line a baking sheet with parchment paper, form the peanut butter discs on the sheet, freeze them, then drizzle the chocolate over them. It’s less “cup-shaped” but tastes the same.
Q: Why did my peanut butter center melt?
A: Natural peanut butter has no stabilizers. If your room is warm, it can soften. That’s why keeping the tin in the freezer while you work is important. If they melt, just pop them back in the freezer for 10 minutes to reset.
Q: Can I use almond butter instead of peanut butter?
A: Yes, almond butter works great. It’s thicker than peanut butter, so you might need to add a little more oil or butter to get the right consistency for forming the discs.
Q: How do I reheat leftovers without it getting dry?
A: You don’t need to reheat these! They are best eaten cold. If they’ve been in the fridge and the chocolate is too hard, let them sit at room temperature for 5-10 minutes before eating. They’ll soften up nicely.
Pin This Recipe!
Sugar-Free Dark Chocolate Peanut Butter Cups: 3-Ingredient Budget Treat
- Total Time: 20 minutes
- Yield: 12 servings 1x
Description
A simple, budget-friendly, and sugar-free dessert made with just a few ingredients. These rich, salty, and sweet peanut butter cups are kid-approved, low in sugar, and perfect for meal prep.
Ingredients
- 1/2 cup (120g) natural creamy peanut butter (stirred until smooth)
- 1 tablespoon butter or coconut oil (melted)
- 1/2 teaspoon vanilla extract
- Pinch of sea salt
- 8 oz (225g) sugar-free dark chocolate chips
- 1 teaspoon coconut oil (optional, for smoother chocolate)
Instructions
- Lightly grease a standard 12-cup muffin tin with cooking spray or butter.
- In a medium bowl, mix the stirred natural peanut butter, melted butter (or coconut oil), vanilla extract, and sea salt until smooth and uniform.
- Drop about 1 tablespoon of the peanut butter mixture into each muffin cup. Flatten into a disc using your thumb or the back of a spoon.
- Place the muffin tin in the freezer for 10 minutes to firm up the peanut butter discs.
- In a microwave-safe bowl, combine the sugar-free chocolate chips and optional coconut oil. Microwave in 30-second intervals, stirring thoroughly between each, until mostly melted. Stir vigorously to melt remaining chunks using residual heat.
- Remove the tin from the freezer. Use a toothpick to lift a peanut butter disc and dip it completely into the melted chocolate. Let excess drip off and return it to the muffin cup. Alternatively, layer chocolate, peanut butter, and more chocolate.
- Place the entire muffin tin back in the freezer for at least 30 minutes, or until the chocolate is hard.
- Pop the cups out of the tin and enjoy immediately or store in an airtight container.
Notes
Ensure natural peanut butter is stirred thoroughly to incorporate separated oil. Sugar-free chocolate burns easily, so microwave in short bursts and stir well. For best texture, serve cold. These can be stored in the fridge for up to 2 weeks or frozen for 3 months.
- Prep Time: 15 minutes
- Cook Time: 5 minutes
- Category: Dessert
- Cuisine: American
Nutrition
- Serving Size: 1 cup
- Calories: 150
- Sugar: 1
- Sodium: 50
- Fat: 12
- Saturated Fat: 4
- Carbohydrates: 4
- Fiber: 1
- Protein: 5
Keywords: sugar-free, dark chocolate, peanut butter cups, budget treat, low carb, keto friendly, kid approved, meal prep, no bake, healthy snack


