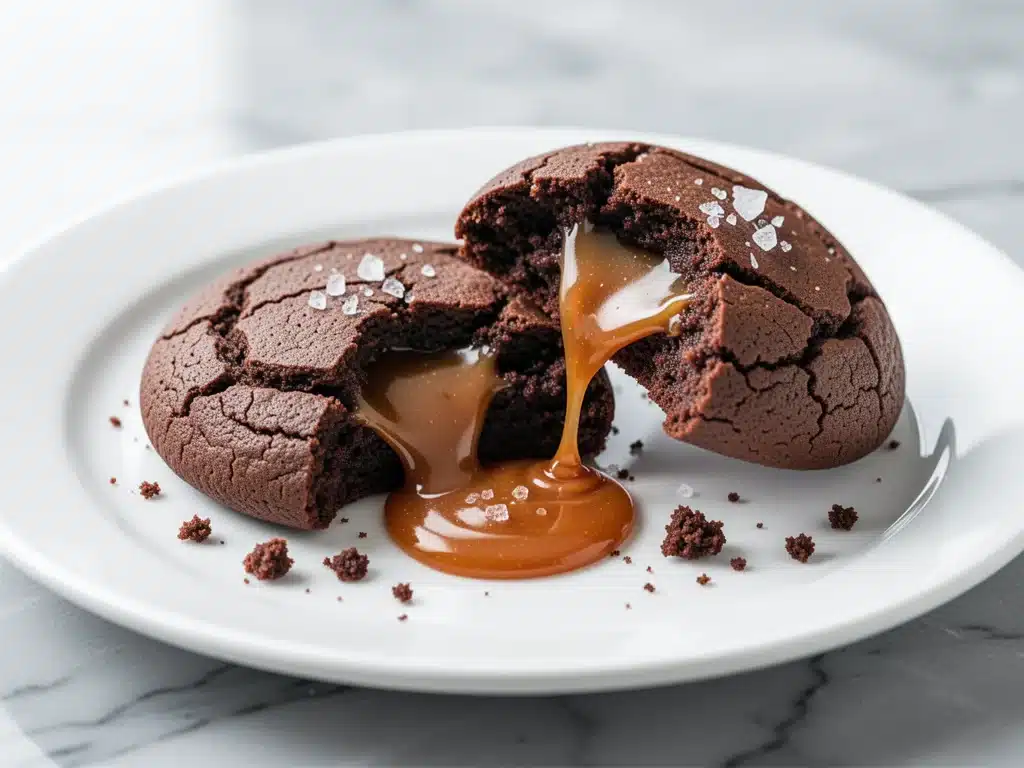
I have to confess something. About six months ago, I attempted to make salted caramel chocolate cookies for a neighborhood bake sale. I thought I was being clever by skipping the step where you actually cook the caramel. I just used store-bought syrup. Big mistake. The cookies spread into flat, greasy puddles, and the “caramel” just pooled at the bottom like a sugary trap. I brought them anyway, out of sheer panic, and honestly? They were the first ones gone. People loved the crunch. But I was mortified. I knew they tasted slightly off, and my friend Sarah actually asked if I had used the wrong kind of chocolate.
That failure haunted me. I wanted a cookie that didn’t just taste sweet, but had that sophisticated balance of rich chocolate and deep, buttery caramel with just a hint of sea salt. I wanted the kind of cookie that makes people stop mid-bite and ask, “What is in this?” I’ve tested this salted caramel chocolate cookie recipe at least 14 times since that bake sale disaster. I’ve burned batches, over-chilled dough, under-baked centers, and once even tried using butter instead of brown sugar (don’t do that). This version is the result of all those errors. It’s chewy in the center, crisp at the edges, and packed with pockets of gooey, homemade-style caramel that hold their shape. These cookies are hands-down the best easy recipe I’ve ever perfected, and they are going to change how you think about dessert.
Why You’ll Love This Recipe
There are about ten reasons I keep making these cookies, but here are the big ones. This isn’t just another chocolate chip cookie with a fancy name. It’s a texture powerhouse.
- The Texture Contrast — Seriously, if you can boil water, you can make this. The key is the dough chilling. Chilled dough prevents spreading too much, giving you a thick, bakery-style cookie with a crisp edge and a soft, chewy center. I’ve made these with my teenage son over FaceTime; he got it right on the first try.
- Flavor Complexity — Most chocolate cookies are just sweet. These have depth. The brown sugar adds a molasses note, the dark chocolate adds bitterness, and the caramel adds that buttery richness. The flaky sea salt on top isn’t just for show—it cuts through the sweetness and makes the chocolate flavor pop. It’s sophisticated without being fussy.
- Impress Factor — I’ve served these to my picky vegetarian sister, my gluten-free neighbor (using a 1:1 flour blend), and my dad who only likes “normal” cookies. Everyone asks for the recipe. They look like they came from a high-end patisserie, but they’re made in a standard kitchen.
- Make-Ahead Friendly — The dough actually gets better after sitting in the fridge for 24 hours. The flavors meld together, and the texture becomes even more tender. I often make the dough on Sunday and bake on Wednesday. It saves so much stress during the week.
- Leftovers That Actually Taste Good — These reheat beautifully. If you microwave one for 15 seconds, the caramel softens up and the chocolate melts just enough. I deliberately make extra for lunch treats throughout the week.
This is my go-to when I need dessert to just work. No complicated techniques, no weird ingredients you can’t find, just reliable, delicious food that makes everyone happy. If you’re looking for other easy baking projects, these pair perfectly with my brown butter chocolate chip cookies for a cookie platter that feels incredibly professional.
Ingredients You’ll Need
Here’s the best part: you probably have most of this already. I’m particular about three ingredients here, and I’ll tell you exactly why. Don’t skip the quality checks on these.
For the Dough
Unsalted Butter (1 cup / 226g, softened) — This is crucial. Use real butter, not margarine or butter spreads. Soften it to room temperature. If it’s too cold, it won’t cream with the sugar properly. If it’s melted, your cookies will spread into pancakes. I test it by pressing a finger into it; it should leave an indent but not feel greasy.
Light Brown Sugar (1 ½ cups / 300g, packed) — This gives the cookies their chewiness and moisture. Dark brown sugar works too and adds a deeper molasses flavor, but light is more traditional for this balance. Make sure it’s packed tightly into the cup. Loose sugar means less moisture and crispier cookies.
Granulated Sugar (½ cup / 100g) — This helps with the crisp edges. The combination of brown and white sugar creates that perfect chewy-center, crisp-edge texture. I use regular white sugar; you don’t need anything fancy here.
Large Eggs (2) — Room temperature eggs incorporate better into the butter mixture. If you forgot to take them out, just drop them in a bowl of warm water for 5 minutes. Don’t use small eggs; they throw off the ratio.
Vanilla Extract (2 teaspoons) — Use real vanilla extract, not imitation. The vanilla flavor is a major part of the cookie’s background note. It’s worth the extra few dollars.
All-Purpose Flour (2 ¼ cups / 280g) — Spoon and level your flour. Don’t scoop directly from the bag, or you’ll pack it down and end up with dry, crumbly cookies. I always use Gold Medal flour; it has a consistent protein content that works well for cookies.
Baking Soda (1 teaspoon) — This helps the cookies spread and brown. Make sure it’s fresh. If it’s been in your pantry for two years, throw it out and buy new. Test it with vinegar if you’re unsure; it should fizz violently.
Salt (1 teaspoon) — I use kosher salt for mixing into the dough. It distributes evenly. This balances the sweetness and enhances the chocolate flavor.
For the Mix-Ins and Topping
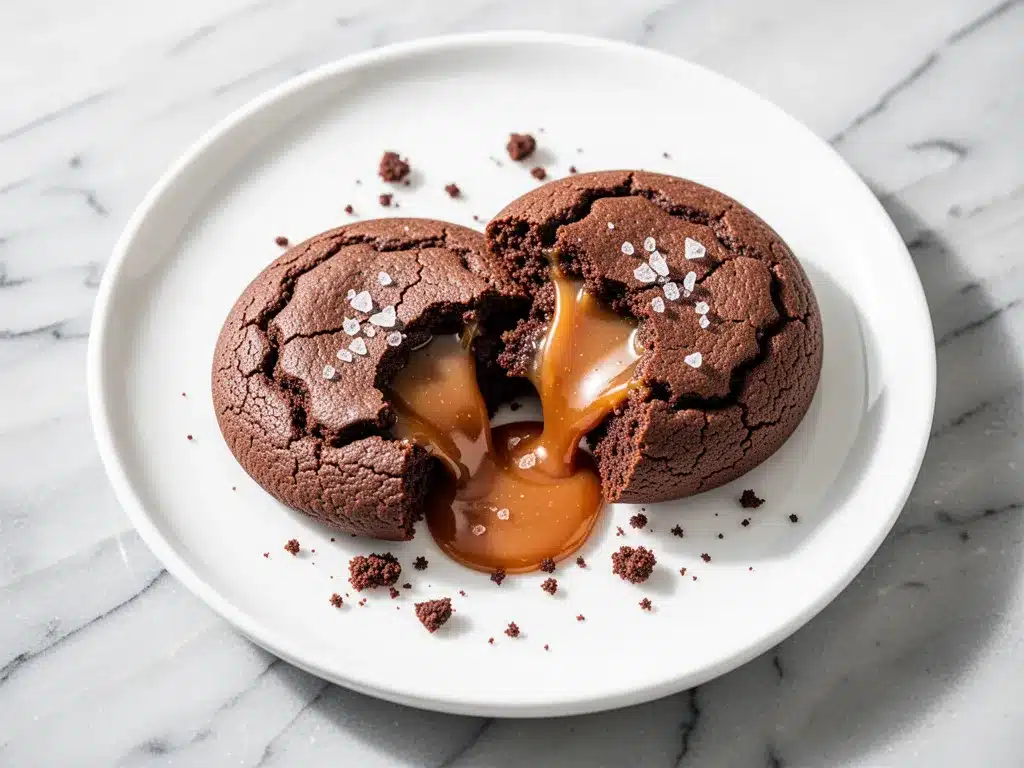
Dark Chocolate Chunks (1 ½ cups / 250g) — I prefer semi-sweet or dark chocolate (60-70% cocoa). Use a bar and chop it yourself. Pre-chipped chocolate has different melting properties and often contains more stabilizers that keep them from melting fully. Chopping your own gives you those big, gooey pockets of chocolate.
Caramel Sauce or Candies (1 cup) — This is the star. I recommend using high-quality caramel candies (like Rold Gold or generic brand hard caramels) chopped into small pieces. They hold their shape better than soft caramel sauce, which can make the dough too wet. If you use sauce, reduce the butter in the recipe slightly. Homemade caramel is great, but store-bought hard caramels are consistent and reliable.
Flaky Sea Salt (for sprinkling) — Maldon salt is my favorite because the flakes are large and dissolve slowly, giving you those little bursts of saltiness. Don’t use table salt for the topping; it’s too fine and will dissolve completely.
Equipment Needed
You don’t need fancy equipment for this. Here’s what I actually use.
Large Mixing Bowl — A bowl big enough to hold all the ingredients without spilling when you’re mixing. I use a glass bowl because I can see how the butter is creaming.
Electric Mixer — Hand mixer or stand mixer. I prefer a stand mixer for the creaming step because it’s consistent, but a hand mixer works fine if you have the arm strength. You can do it by hand, but it takes about 5 minutes of vigorous whisking.
Measuring Cups and Spoons — Dry measuring cups for flour and sugar. Liquid measuring cup for eggs and vanilla if you’re lazy. Accurate measurements are key in baking.
Baking Sheets — Two standard half-sheet pans. I use aluminum ones. Dark pans can cause the bottoms to burn faster, so I keep an eye on them. If you use dark pans, lower the oven temperature by 25 degrees.
Parchment Paper — Line your baking sheets. This prevents sticking and makes cleanup a breeze. It also helps the cookies bake evenly. I never bake these directly on the metal.
Cooling Rack — Essential. Letting cookies cool on the pan can cause them to continue cooking and become over-baked. Transfer them to a rack after 5 minutes.
Small Saucepan — Only if you’re making your own caramel. If you’re using store-bought caramels, you just need a microwave-safe bowl or a small pan to melt them slightly before chopping.
How to Make It: Step-by-Step
Alright, let’s make this! I’m walking you through exactly how I do it, including the little tricks I’ve picked up.
Step 1: Cream the Butter and Sugars (3-4 minutes)
In the bowl of your stand mixer fitted with the paddle attachment (or using a hand mixer), beat the softened butter, light brown sugar, and granulated sugar together on medium-high speed. This is the most important step for texture. You want to beat it for a full 3 minutes until it looks pale, fluffy, and lightened in color. If you rush this, your cookies will be dense. The air bubbles created here help the cookies rise slightly. Scrape down the sides of the bowl with a spatula to ensure everything is incorporated.
Step 2: Add Wet Ingredients (1 minute)
Add the eggs one at a time, beating well after each addition. The mixture might look slightly curdled at first—that’s normal. Add the vanilla extract and mix until combined. The mixture should now be smooth and glossy.
Step 3: Mix Dry Ingredients (1 minute)
Reduce the mixer speed to low. Add the all-purpose flour, baking soda, and salt. Mix just until the flour disappears. Do not overmix! If you keep mixing after the flour is added, you’ll develop gluten, and the cookies will become tough. It should take about 30-45 seconds. The dough will look thick and slightly crumbly at this stage, which is exactly what you want.
Step 4: Fold in Mix-Ins (2 minutes)
Switch to a spatula or the paddle attachment on low speed. Fold in the chopped dark chocolate chunks and the chopped caramel pieces. The caramel pieces should be about ¼ inch in size. If they’re too big, they’ll melt out and make a mess. If they’re too small, they’ll disappear. Aim for visible pockets of both chocolate and caramel.
Step 5: Chill the Dough (30 minutes to 24 hours)
This is the step most people skip, but it’s the secret to the best cookies. Cover the bowl with plastic wrap and refrigerate for at least 30 minutes. Ideally, chill it for 24 hours. Chilling solidifies the fat, which prevents the cookies from spreading too much in the oven. It also allows the flour to hydrate fully, resulting in a richer flavor. If you’re in a hurry, 30 minutes works, but the flavor won’t be as deep.
Step 6: Scoop and Bake (10-12 minutes)
Preheat your oven to 350°F (175°C). Line two baking sheets with parchment paper. Scoop the dough into balls, about 2 tablespoons each. Place them on the baking sheets, spacing them at least 2 inches apart because they will spread. Bake for 10-12 minutes. The edges should be golden brown, but the centers should still look slightly underbaked and soft. This is crucial. They will continue to cook on the hot pan after you take them out.
Step 7: Add Salt and Cool (5 minutes)
Immediately after removing the cookies from the oven, sprinkle a pinch of flaky sea salt on top of each cookie. The heat will help the salt adhere. Let the cookies cool on the baking sheet for 5 minutes, then transfer them to a wire rack to cool completely. This is where the magic happens—the centers set and become chewy while the edges crisp up.
Troubleshooting Tips:
- Cookies spread too much: Your butter was too soft, or you didn’t chill the dough. Next time, chill longer.
- Cookies are dry: You overbaked them. Take them out when they look slightly underdone.
- Caramel melted out: Your caramel pieces were too large. Chop them smaller next time.
Expert Tips & Tricks
Here’s everything I’ve learned from making this dozens of times. These tips will save you from my mistakes.
Chill Your Dough
I cannot stress this enough. The chilling step is non-negotiable for thick, bakery-style cookies. If you skip it, you’ll get thin, crispy cookies that look like crackers. I usually make the dough the night before, so I can bake fresh cookies in the morning. It’s worth the wait.
Use High-Quality Chocolate
Since the flavor is simple, the chocolate shines. Use a bar of good dark chocolate and chop it yourself. The irregular shapes of homemade chunks create those beautiful, gooey pockets. Pre-chipped chocolate melts too evenly and doesn’t give you that contrast.
Don’t Overbake
This is the #1 mistake people make. Cookies continue to cook on the hot pan for several minutes after you take them out of the oven. If you wait until they look fully done in the oven, they’ll be hard and dry once cooled. Pull them when the edges are set but the center still looks soft and slightly undercooked.
Measure Flour Correctly
Flour is the enemy of soft cookies if you use too much. Spoon the flour into your measuring cup and level it off with a knife. Never scoop the cup directly into the bag, as this packs the flour down and can lead to 20% more flour than the recipe calls for. This turns soft cookies into hard rocks.
Room Temperature Ingredients
Make sure your butter and eggs are at room temperature. Cold butter won’t cream properly with the sugar, and cold eggs can cause the mixture to break. If you forget to take them out, put the eggs in warm water for 5 minutes and leave the butter on the counter for an hour.
Pro Trick: The Freeze Method
You can actually freeze the dough balls. Scoop them onto a baking sheet and freeze until solid, then transfer to a bag. Bake from frozen, adding 1-2 minutes to the bake time. This is perfect for having fresh cookies on demand without prepping dough every time.
Variations & Substitutions
Once you’ve nailed the basic version, here’s how you can mix it up. I’ve tried all of these.
White Chocolate Macadamia
Swap the dark chocolate for white chocolate chips and add 1 cup of chopped macadamia nuts. The caramel pairs beautifully with the sweet white chocolate. This is a crowd-pleaser for kids.
Red Velvet
Add 2 tablespoons of cocoa powder and 1 teaspoon of red food coloring to the dough. The chocolate and caramel flavors still work, but you get that fun red color and tangy taste. It’s a festive twist for holidays.
Peanut Butter Swirl
Add 2 tablespoons of peanut butter to the dough. It adds richness and pairs wonderfully with the caramel. If you love my small batch fudgy brownies, you’ll likely enjoy this nutty variation too.
Gluten-Free
Use a 1:1 gluten-free flour blend (like Bob’s Red Mill or King Arthur). The texture is almost identical to the original. Make sure your baking soda and chocolate are certified gluten-free.
Vegan
Use vegan butter sticks (not tub spread) and flax eggs (1 tbsp ground flax + 3 tbsp water per egg). Use vegan dark chocolate and vegan caramel candies (like Enjoy Life brand). The texture might be slightly cakier, but it’s still delicious.
Less Sweet
Reduce the granulated sugar by 2 tablespoons and use dark chocolate with 70% cocoa or higher. The caramel still provides sweetness, so it balances out nicely.
Serving & Storage
How to Serve:
I usually serve these warm, right after they’ve cooled on the rack. They’re perfect with a glass of cold milk, or even better, a cup of strong coffee or hot tea. The bitterness of the coffee cuts through the sweetness of the caramel and chocolate. I also like serving them with a scoop of vanilla bean ice cream for a decadent dessert.
Storage Instructions:
Refrigerator: Store in an airtight container at room temperature for up to 5 days. If your kitchen is very humid, store them in the fridge, but let them come to room temperature before eating for the best texture.
Freezer: These freeze beautifully. Place cooled cookies in a single layer in a freezer-safe container, separating layers with parchment paper. They’ll last for up to 3 months. Thaw at room temperature for 15 minutes.
Reheating: Microwave for 10-15 seconds to soften the caramel and chocolate. This brings back the fresh-baked texture.
Pro Tip: If you’re making these for a gift, wrap them in cellophane bags with a ribbon. They look incredibly professional and homemade. Add a note about the sea salt topping—it’s a nice touch that people notice.
Nutrition Information
I’m not a nutritionist, but here’s the breakdown if you’re tracking. Please note that these are estimates based on standard ingredients.
Per Cookie (makes approx. 24 cookies):
- Calories: 180
- Protein: 2g
- Carbs: 24g
- Fiber: 1g
- Sugar: 16g
- Fat: 9g
- Saturated Fat: 5g
- Cholesterol: 25mg
- Sodium: 120mg
What’s Good:
- Rich in antioxidants from dark chocolate.
- Provides a quick energy boost from the sugars.
What to Know:
- High in sugar and calories due to the caramel and butter.
- Contains dairy and gluten.
- Best enjoyed as an occasional treat rather than a daily snack.
My Take:
Look, these are cookies. They’re supposed to be indulgent. The caramel and chocolate make them special, but they’re not a health food. When I make these, I enjoy one or two and savor every bite. That’s the point. Balance is key.
Final Thoughts
So that’s my salted caramel chocolate cookie recipe! I’ve talked your ear off about dough chilling, but when you make a recipe this often, you have a lot to say about why it works. These cookies have saved me at bake sales, dinner parties, and times when I just needed a hug in edible form. They’re my answer to “I need to impress someone” when I’m tired and don’t want to order takeout. My kids are happy, my friends are happy, and I’m happy because I’m not stressed about cooking.
Make it yours! Try different chocolates, add nuts, or adjust the salt to your taste. The best recipes are the ones you adapt to your family’s tastes. If you make this, drop a comment and let me know what you think! I love hearing how recipes turn out in your kitchen. And if something doesn’t work, tell me that too—I’m here to help troubleshoot.
Happy baking! And I hope your kitchen smells half as good as mine does right now.
Frequently Asked Questions
Can I use caramel sauce instead of candies?
You can, but it changes the texture. Soft caramel sauce will make the dough wetter and cause the cookies to spread more. If you use sauce, reduce the butter by 1 tablespoon and chill the dough for an extra hour. Hard caramel candies are easier to handle and create distinct pockets of caramel. I recommend candies for consistency.
Why did my cookies spread too much?
This usually happens for three reasons: the butter was too soft, the dough wasn’t chilled, or the baking sheet was warm. Make sure your butter is cool-to-the-room-temperature, not melted. Chill the dough for at least 30 minutes. Also, let your baking sheets cool completely between batches. Warm sheets start melting the butter immediately, causing spreading.
Can I make the dough ahead?
Absolutely! In fact, it’s better. You can refrigerate the dough for up to 3 days or freeze it for up to 3 months. If freezing, thaw the dough in the fridge overnight before scooping and baking. The flavors develop over time, so day 2 cookies often taste better than day 1.
Why did my caramel melt out of the cookies?
If the caramel pieces are too large, they’ll melt and leak out during baking. Chop them into small, ¼-inch pieces. Also, ensure your oven temperature is accurate. If your oven runs hot, the caramel will melt faster. Use an oven thermometer to check.
Can I use milk chocolate instead of dark?
You can, but the cookies will be much sweeter. The bitterness of dark chocolate balances the sweetness of the caramel and brown sugar. If you use milk chocolate, reduce the granulated sugar by 2 tablespoons to compensate. I prefer dark chocolate for the flavor contrast.
How do I store these cookies?
Store in an airtight container at room temperature for up to 5 days. Place a slice of bread in the container to keep them soft. If you want them crisp, leave the container slightly open. For longer storage, freeze them in a freezer-safe bag.
Can I double this recipe?
Yes, double everything and use your largest mixing bowl. The cooking times stay the same. Just make sure you have enough baking sheets. I usually bake one sheet at a time to ensure even baking. Don’t overcrowd the oven.
Pin This Recipe!
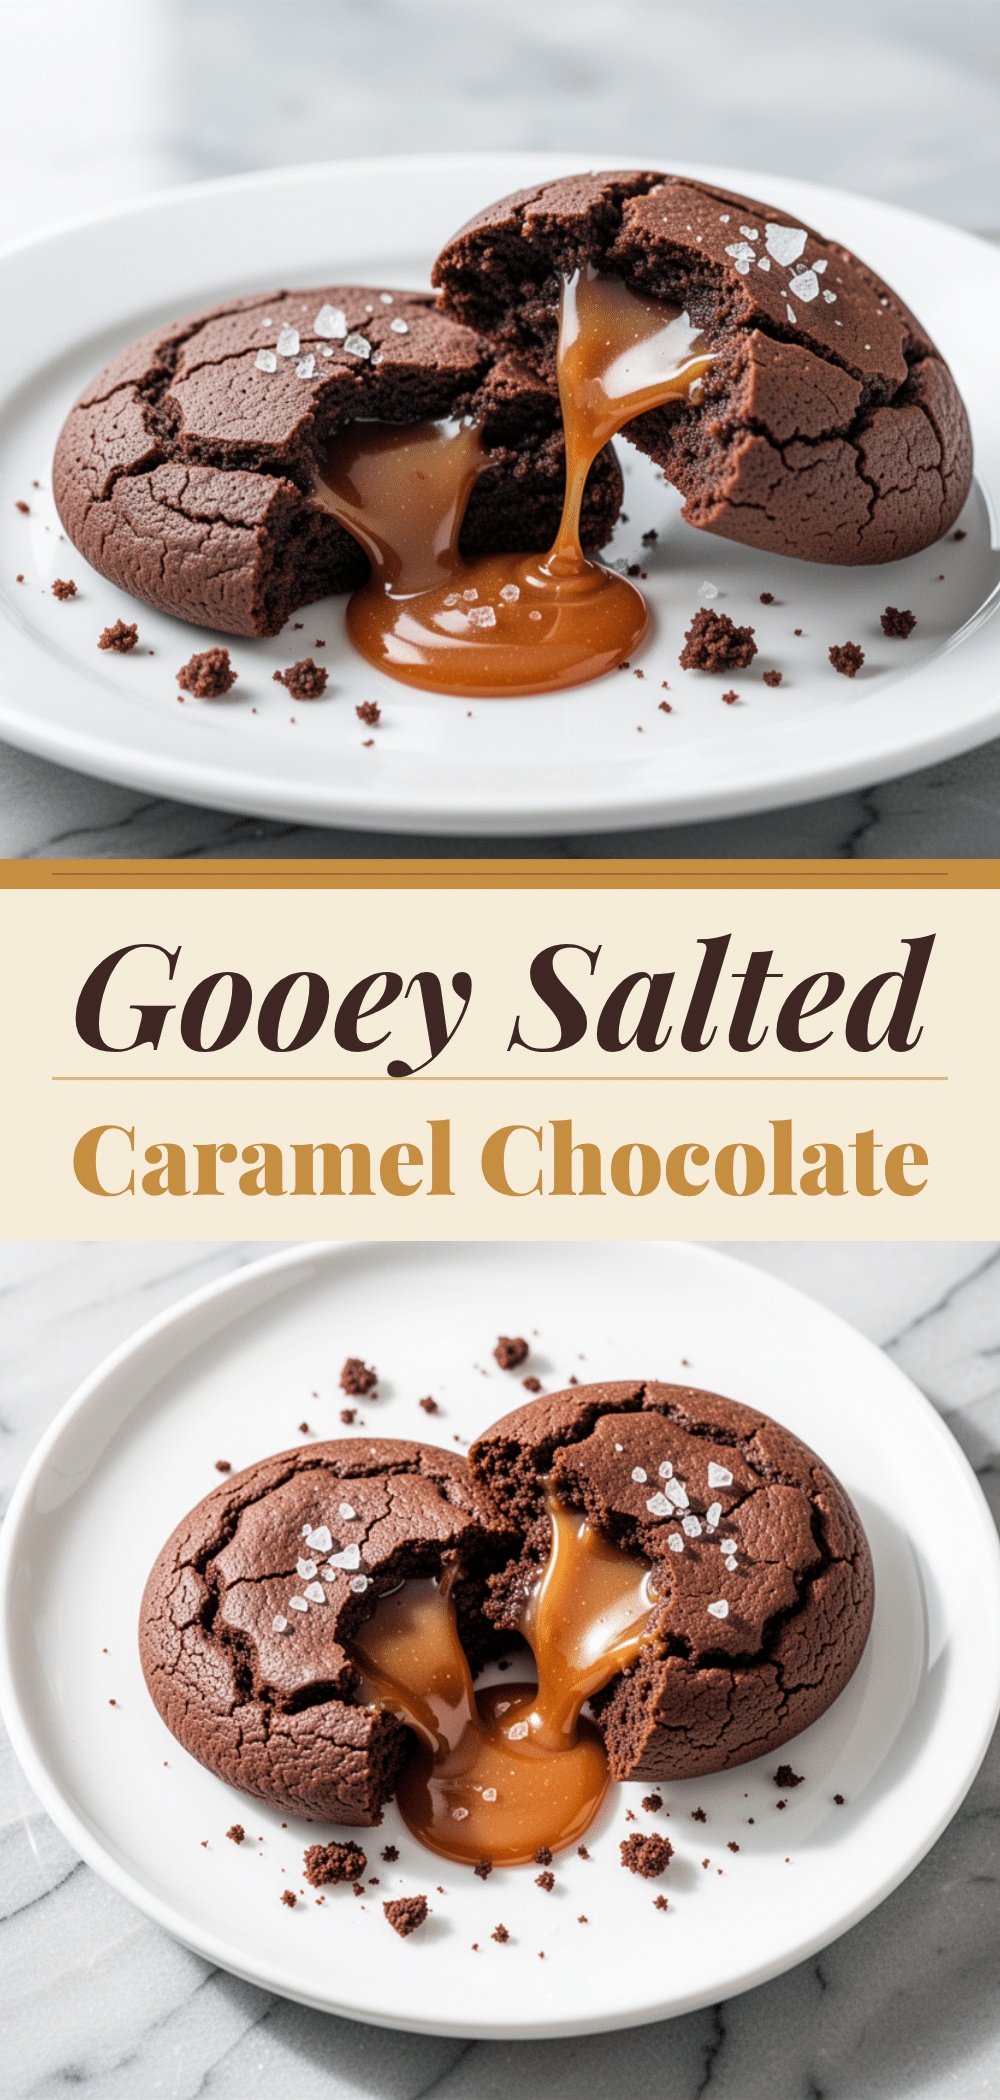
Salted Caramel Chocolate Cookies: Best Easy Recipe
- Total Time: 45 minutes
- Yield: 24 cookies 1x
Description
Chewy in the center and crisp at the edges, these salted caramel chocolate cookies feature pockets of gooey caramel and rich dark chocolate, finished with a hint of flaky sea salt for a sophisticated balance of sweet and salty.
Ingredients
- 1 cup (226g) unsalted butter, softened to room temperature
- 1 ½ cups (300g) light brown sugar, packed
- ½ cup (100g) granulated sugar
- 2 large eggs, room temperature
- 2 teaspoons vanilla extract
- 2 ¼ cups (280g) all-purpose flour, spooned and leveled
- 1 teaspoon baking soda
- 1 teaspoon kosher salt
- 1 ½ cups (250g) dark chocolate chunks (semi-sweet or dark, 60-70% cocoa)
- 1 cup hard caramel candies, chopped into ¼-inch pieces
- Flaky sea salt (such as Maldon), for sprinkling
Instructions
- In the bowl of a stand mixer fitted with the paddle attachment (or using a hand mixer), beat the softened butter, light brown sugar, and granulated sugar on medium-high speed for 3-4 minutes until pale, fluffy, and lightened in color. Scrape down the sides of the bowl.
- Add the eggs one at a time, beating well after each addition. Add the vanilla extract and mix until the mixture is smooth and glossy.
- Reduce mixer speed to low. Add the all-purpose flour, baking soda, and salt. Mix just until the flour disappears (about 30-45 seconds). Do not overmix.
- Switch to a spatula or paddle on low speed. Fold in the chopped dark chocolate chunks and chopped caramel pieces until evenly distributed.
- Cover the bowl with plastic wrap and refrigerate the dough for at least 30 minutes, or ideally up to 24 hours, to prevent spreading and develop flavor.
- Preheat oven to 350°F (175°C). Line two baking sheets with parchment paper.
- Scoop dough into 2-tablespoon balls and place on baking sheets, spacing them at least 2 inches apart.
- Bake for 10-12 minutes. The edges should be golden brown, but the centers should still look slightly underbaked and soft.
- Immediately upon removing from the oven, sprinkle a pinch of flaky sea salt on top of each cookie.
- Let cookies cool on the baking sheet for 5 minutes, then transfer to a wire rack to cool completely.
Notes
Chilling the dough is crucial for preventing excessive spreading and ensuring a chewy texture. If using caramel sauce instead of candies, reduce butter by 1 tablespoon and chill dough for an extra hour. Cookies continue to cook on the hot pan after removal, so pull them when centers look slightly underdone. Store in an airtight container at room temperature for up to 5 days.
- Prep Time: 15 minutes
- Cook Time: 10-12 minutes
- Category: Dessert
- Cuisine: American
Nutrition
- Serving Size: 1 cookie
- Calories: 180
- Sugar: 16
- Sodium: 120
- Fat: 9
- Saturated Fat: 5
- Carbohydrates: 24
- Fiber: 1
- Protein: 2
Keywords: salted caramel cookies, chocolate chip cookies, easy baking, dessert recipe, chewy cookies, homemade caramel, sea salt cookies


