I have a confession to make. For years, I was terrified of flourless chocolate cake. Not because I can’t bake, but because I’ve been burned. Literally. And metaphorically. I remember one Thanksgiving, years ago, when I decided to show off with a flourless chocolate torte. I followed a fancy magazine recipe to the letter. I melted the chocolate. I whipped the eggs. I poured it into a springform pan with the confidence of a woman who had just won a cooking show.
What came out of the oven? A dense, sad brick that cracked down the middle like a dried riverbed. My family ate it politely, but I knew. I knew I had failed. I swore off flourless desserts for a decade, sticking to safe bets like small batch fudgy brownies or store-bought ice cream.
But last month, my daughter had her birthday, and she specifically asked for “that chocolate cake that doesn’t have flour.” I was desperate. I needed something elegant enough for a party but simple enough that I wouldn’t stress myself out. So, I tried again. This time, I changed one thing: I stopped trying to make it light and airy. I decided to lean into the fudge.
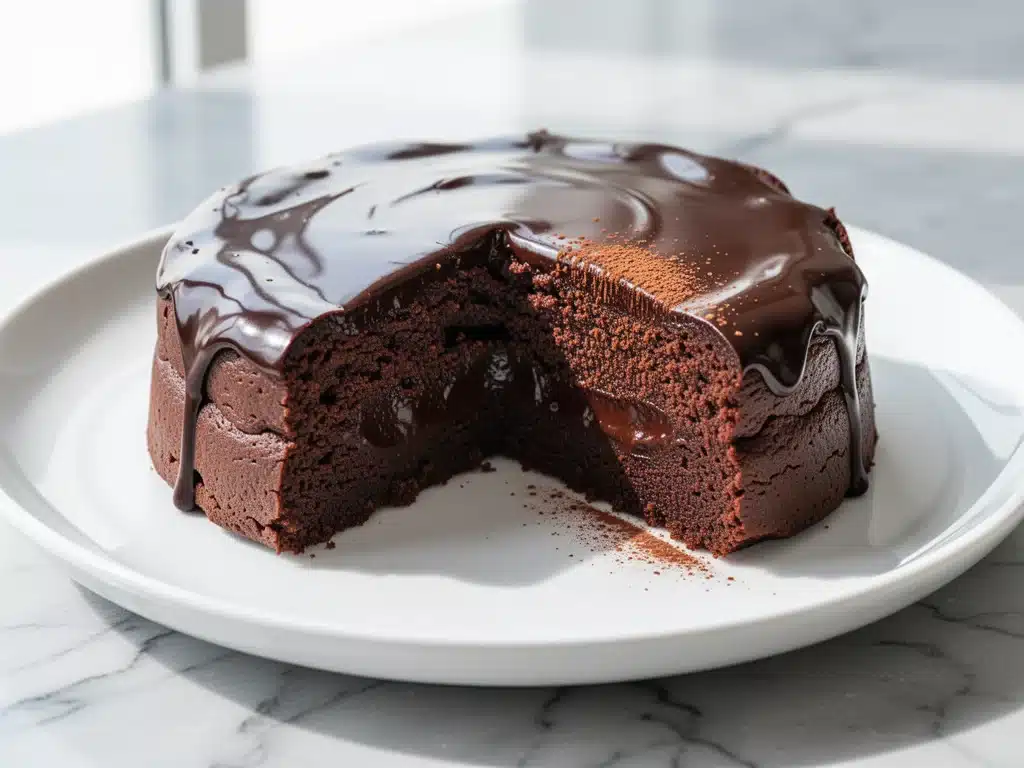
That decision changed everything. This fudgy flourless chocolate torte is dense, rich, and impossibly chocolatey. It doesn’t rise much, and that’s exactly the point. It’s the kind of dessert that makes people close their eyes when they take the first bite. I’ve made it four times in the last six weeks. My husband thinks I’m trying to get him fat. I’m just trying to get it right. And honestly? It’s the best dessert recipe I’ve ever tested.
Why You’ll Love This Fudgy Flourless Chocolate Torte
There are a million chocolate recipes out there. So why this one? Why spend the time melting chocolate and separating eggs when you could just grab a box mix? Here’s the real talk: this torte is the ultimate cheat code for impressing guests without actually doing the hard work.
- It’s Naturally Gluten-Free — No flour means no gluten. This is huge for anyone with celiac disease or gluten sensitivity. But here’s the kicker: even people who aren’t gluten-free love it. It tastes indulgent, not “diet.” I’ve served this to my gluten-eating friends, and they prefer it over regular cake because it’s so intensely chocolatey.
- Only 5 Ingredients (Yes, Five) — I’m serious. Butter, chocolate, sugar, eggs, and a pinch of salt. That’s it. You don’t need vanilla extract, you don’t need cocoa powder, you don’t need flour. If you can melt butter and chop chocolate, you can make this. It’s stupid simple, which is exactly why I make it on repeat.
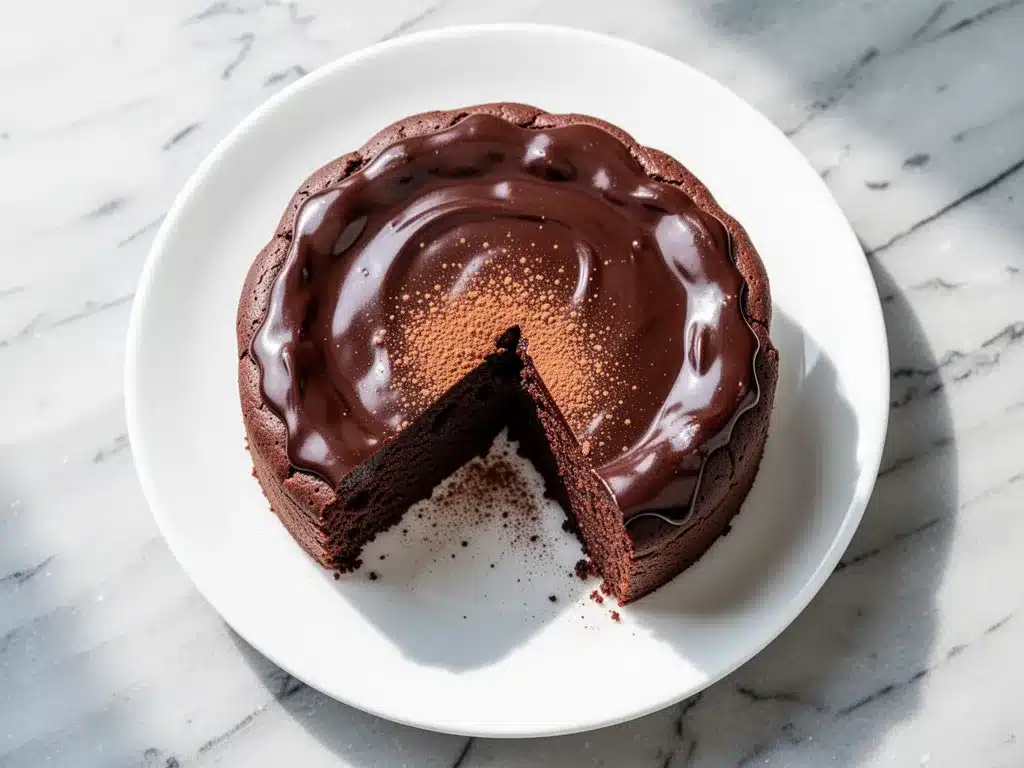
- It Tastes Like a Bakery Dessert — The texture is somewhere between a brownie and a mousse. It’s fudgy, creamy, and has that slight crackly top that screams “professional baker.” My kids think I’m some kind of wizard when I pull this out of the oven. It’s restaurant-quality at home, for a fraction of the price.
- Make-Ahead Friendly — This torte actually gets better the next day. The flavors meld together overnight, making it even richer. I often make it the night before a party, which takes all the stress out of hosting. You can serve it cold, room temperature, or slightly warmed. It’s forgiving in a way most cakes aren’t.
- Low-Carb Friendly — Because there’s no flour, this is naturally lower in carbs than traditional cakes. It’s not keto (there’s still sugar), but it’s much lighter on the carbs. If you’re watching your sugar intake but still want chocolate, this is your best friend. Just swap the sugar for a keto-friendly alternative if needed.
This isn’t just a dessert; it’s a stress-reliever. It’s my go-to when I need to apologize for something, when I need to celebrate something, or when I just need a hug in food form. It’s reliable, delicious, and absolutely foolproof if you follow the steps.
Ingredients You’ll Need
Here’s the best part: you probably have most of these in your pantry or fridge right now. This recipe relies on high-quality ingredients because there’s nowhere to hide. If your chocolate tastes like wax, the torte will taste like wax. So, let’s talk about what makes this work.
The Core Ingredients
High-Quality Dark Chocolate (8 ounces / 225g) — This is the star. Do not use chocolate chips. They have stabilizers that prevent them from melting smoothly. Use a good baking bar. I like Ghirardelli 60% or 70% dark chocolate. If you want it super fudgy, go for 60%. If you want it more intense and less sweet, go for 70%. Avoid anything above 85% unless you really love bitter chocolate—it can make the torte too dry.
Unsalted Butter (½ cup / 113g) — I use salted butter sometimes, but unsalted gives you more control over the final taste. Cut it into cubes before melting so it melts evenly. Don’t skip the butter; it provides the fat that makes the torte moist. If you’re dairy-free, you can use high-quality coconut oil, but the texture will be slightly different.
Granulated Sugar (1 cup / 200g) — Yes, a whole cup. It sounds like a lot, but the bitterness of the dark chocolate balances it out perfectly. If you prefer less sweet, you can reduce it to ¾ cup, but I recommend sticking to the full amount for the right texture. The sugar helps create that crackly top.
Eggs (4 large) — Room temperature eggs are crucial. Cold eggs can seize the chocolate when you add them. Take them out of the fridge 30 minutes before you start. I separate the eggs. Yes, it’s extra work, but separating allows you to whip the whites to stiff peaks, which gives the torte its lift and airy texture. Don’t use egg whites from a carton; use real eggs.
Salt (½ teaspoon) — This is non-negotiable. Salt enhances the chocolate flavor. It makes the chocolate taste more like chocolate. I use fine sea salt. If you only have kosher salt, use a heaping ½ teaspoon.
Optional Add-Ins
Espresso Powder (1 teaspoon) — I know, there’s no coffee in the name. But a teaspoon of espresso powder deepens the chocolate flavor without making it taste like coffee. It’s a secret weapon. If you don’t have espresso powder, instant coffee granules work too.
Vanilla Extract (1 teaspoon) — I usually skip it because the chocolate is so strong, but if you like a hint of vanilla, add it to the egg yolks.
Sea Salt Flakes — For sprinkling on top after baking. This adds a nice crunch and visual appeal. It looks fancy, and it tastes amazing.
Equipment Needed
You don’t need a fancy kitchen for this. Here’s what I actually use, and what you can substitute.
Double Boiler or Heatproof Bowl — You need a way to melt the chocolate and butter gently. I use a glass bowl over a pot of simmering water. Make sure the bottom of the bowl doesn’t touch the water. If you don’t have a double boiler, you can melt it in the microwave in 30-second intervals, stirring in between. But be careful—chocolate burns easily.
Mixer — An electric hand mixer or stand mixer is helpful for whipping the egg whites. You can do it by hand with a whisk, but it will take about 5-7 minutes of arm workout. I’ll take the electric mixer any day.
8-Inch Springform Pan — This is the classic pan for tortes. It allows you to remove the sides easily. Grease it well with butter or non-stick spray. If you don’t have a springform pan, you can use a round cake pan, but you’ll need to line it with parchment paper and be careful when removing it.
Whisk and Spatula — A silicone spatula is essential for folding the egg whites into the chocolate. You want to be gentle so you don’t deflate the air you worked so hard to get in.
Knife — For checking if the torte is done. You need a sharp knife to do the toothpick test.
How to Make It: Step-by-Step
Alright, let’s make this! It’s easier than you think, but there are a few tricks to get that perfect fudgy texture. I’m walking you through exactly how I do it.
Step 1: Prep Your Pan and Oven (5 minutes)
Preheat your oven to 350°F (175°C). Grease an 8-inch springform pan with butter or non-stick spray. I like to line the bottom with a circle of parchment paper for easy removal. This step is crucial because the torte is sticky. If you skip this, you’ll be scraping chocolate off your pan for days.
Step 2: Melt the Chocolate and Butter (5 minutes)
Set up your double boiler. Place the chopped chocolate and butter in a heatproof bowl over a pot of simmering water (make sure the water isn’t boiling vigorously, just simmering). Stir occasionally until completely smooth. This should take about 3-5 minutes. Remove from heat and let it cool slightly. It should be warm to the touch, not hot. If it’s too hot, it will cook the eggs when you add them.
Step 3: Separate the Eggs (5 minutes)
Separate your 4 eggs. Place the yolks in one bowl and the whites in another. Make sure there’s no yolk in the whites, or they won’t whip properly. I usually do this one egg at a time, passing the yolk back and forth between the halves of the shell. It’s tedious, but it works.
Step 4: Mix the Yolks and Sugar (2 minutes)
Add the sugar to the egg yolks. Whisk them together vigorously until the mixture is pale and slightly thickened. This takes about 1-2 minutes. The sugar dissolves into the yolks, which helps create the structure of the torte. Pour this yolk mixture into the cooled chocolate and stir until combined. The mixture will look glossy and rich.
Step 5: Whip the Egg Whites (3-4 minutes)
This is the magic step. Using your mixer, whip the egg whites on medium-high speed until stiff peaks form. This means when you lift the beaters, the peaks stand up straight and don’t droop. It usually takes 2-3 minutes with an electric mixer. Be careful not to over-whip them into a dry, clumpy mess. You want them glossy and firm.
Step 6: Fold the Whites In (3 minutes)
Add about one-third of the whipped egg whites to the chocolate mixture. Stir gently to lighten the chocolate. Then, add the remaining whites. Use a spatula to fold them in. Fold from the bottom up, turning the bowl as you go. Stop as soon as no white streaks remain. Do not overmix! You want to keep as much air in the mixture as possible. This is what gives the torte its lift.
Step 7: Bake (30-35 minutes)
Pour the batter into the prepared springform pan. Smooth the top with a spatula. Bake for 30-35 minutes. The torte is done when the top is cracked and shiny, and the edges are set but the center still jiggles slightly. If you insert a toothpick, it should come out with moist crumbs, not liquid batter. If it’s liquid, bake for another 5 minutes. If it’s clean, it’s overbaked.
Step 8: Cool and Serve (1 hour)
Remove from the oven and let it cool in the pan for 10 minutes. Then, run a knife around the edge and release the springform ring. Let it cool completely on a wire rack. It will sink slightly in the middle, which is normal. This is your “crack.” Serve it plain, or with whipped cream, berries, or a dusting of powdered sugar.
Expert Tips & Tricks
Here’s everything I’ve learned from making this dozens of times. These tips will save you from my mistakes.
Don’t Overbake It — This is the most common mistake. The torte should look underdone in the center when you take it out. It continues to cook as it cools. If you bake it until the center is firm, it will be dry and cakey instead of fudgy. Trust the jiggle.
Room Temperature Eggs — I can’t stress this enough. Cold eggs don’t whip as well, and they can seize the chocolate. Take them out of the fridge early. If you forget, you can warm them in a bowl of warm water for 5 minutes.
Quality Chocolate Matters — I’ve made this with cheap chocolate, and it tastes flat. Good chocolate has a complex flavor that makes the torte sing. Spend the extra money on a good bar. It’s worth it.
Let It Rest — I know it’s hard, but let the torte cool completely. It’s easier to slice when it’s cool, and the flavors develop. If you cut into it hot, it will be a mess. I usually make it the night before.
Storage — Store leftovers in an airtight container at room temperature for up to 3 days. It keeps well because of the high fat content. You can also refrigerate it, but let it come to room temperature before serving for the best texture.
Variations & Substitutions
Once you’ve nailed the basic version, here’s how you can mix it up. I’ve tried all of these.
Chocolate Chip Version — Fold ½ cup of chocolate chips into the batter before baking. It adds little pockets of melted chocolate. My kids love this version.
Sea Salt Torte — Sprinkle flaky sea salt on top immediately after baking. The salt contrasts beautifully with the sweet chocolate. It looks fancy and tastes amazing.
Espresso Torte — Add 1 teaspoon of espresso powder to the melted chocolate. It deepens the chocolate flavor without adding coffee taste. This is my personal favorite variation.
Gluten-Free — This recipe is naturally gluten-free, so no substitutions needed. Just make sure your chocolate is certified gluten-free if you have celiac disease.
Keto Version — Swap the granulated sugar for a keto-friendly sweetener like erythritol or monk fruit. Use 1:1 baking sweetener for best results. The texture will be slightly different, but it’s still delicious.
Dairy-Free — Use coconut oil instead of butter. The torte will be slightly denser, but still fudgy. Use dairy-free chocolate chips or bars.
Serving & Storage
How to Serve: — I usually serve this straight from the pan, sliced into wedges. It’s rustic and elegant at the same time. Top with fresh raspberries or strawberries for a pop of color and acidity. A dollop of whipped cream is classic, but not necessary. The torte is rich enough on its own.
Side Dishes: — This goes well with almost anything. A simple green salad balances the richness. Or serve it with a cup of hot coffee or tea. I also like it with a glass of red wine. It’s a dessert that stands on its own.
Storage Instructions: — Store in an airtight container at room temperature for up to 3 days. It can also be refrigerated for up to 5 days. Let it come to room temperature before serving. Do not freeze the whole torte, as the texture can become grainy. You can freeze individual slices, though.
Nutrition Information
I’m not a nutritionist, but here’s the breakdown if you’re tracking. This is a rich dessert, so portion control is key.
Per Serving (based on 8 servings):
– Calories: 320
– Protein: 6g
– Carbs: 32g
– Fiber: 3g
– Sugar: 28g
– Fat: 20g
– Saturated Fat: 12g
– Cholesterol: 110mg
– Sodium: 40mg
What’s Good: — It’s gluten-free and relatively low in carbs compared to regular cake. It provides some iron from the dark chocolate. It’s also satisfying, so you don’t need a huge slice.
What to Know: — It’s high in sugar and fat. It’s a treat, not a health food. Enjoy it in moderation. If you’re watching your sugar, use a keto sweetener.
Final Thoughts
So that’s my fudgy flourless chocolate torte! I’ve probably talked your ear off at this point, but when you make a recipe this often, you have a lot to say about it. This torte has saved me more times than I can count. It’s my answer to “what’s for dessert” when I want something special but don’t want to spend hours in the kitchen. It’s reliable, delicious, and absolutely foolproof.
Make it yours! Try different toppings, swap in your favorite chocolate, or add a pinch of chili powder for a kick. The best recipes are the ones you adapt to your tastes. If you make this, drop a comment and let me know what you think! I love hearing how recipes turn out in your kitchen. And if something doesn’t work, tell me that too—I’m here to help troubleshoot.
Happy baking! And I hope your kitchen smells half as good as mine does right now.
Frequently Asked Questions
Can I use milk chocolate instead of dark chocolate?
You can, but the torte will be much sweeter and less fudgy. Milk chocolate has more sugar and milk solids, which can make the texture softer. If you use milk chocolate, reduce the sugar by half. But I really recommend dark chocolate for the best flavor and texture.
Why did my torte turn out cakey instead of fudgy?
This usually means you overbaked it. The torte should still jiggle slightly in the center when you take it out. It continues to cook as it cools. If you bake it until it’s firm, it will be cakey. Also, make sure you’re using high-quality chocolate. Cheap chocolate can affect the texture.
Can I make this ahead of time?
Yes! This torte actually gets better the next day. Make it 24 hours before you need it. Store it in an airtight container at room temperature. It will be easier to slice and the flavors will be more developed. You can also make it 2 days ahead.
Can I freeze this torte?
I don’t recommend freezing the whole torte, as the texture can become grainy. However, you can freeze individual slices. Wrap them tightly in plastic wrap and foil. Thaw them in the fridge overnight. The texture won’t be quite as good as fresh, but it’s still tasty.
Do I need a springform pan?
It’s the easiest pan to use, but you can use a regular round cake pan. Just line it with parchment paper and grease it well. When you remove it, you’ll need to invert it onto a plate. It’s a bit trickier, but it works.
Can I use egg whites from a carton?
I don’t recommend it. Fresh eggs whip better and give a better texture. If you must use carton egg whites, make sure they’re at room temperature. But fresh eggs are worth the effort.
What if I don’t have a mixer?
You can whip the egg whites by hand with a whisk, but it will take about 5-7 minutes of arm workout. It’s doable, but tiring. Make sure you have a large bowl and a sturdy whisk.
Pin This Recipe!
Fudgy Flourless Chocolate Torte
- Total Time: 45-50 minutes
- Yield: 8 servings 1x
Description
A dense, rich, and impossibly chocolatey flourless chocolate torte that is naturally gluten-free, low-carb friendly, and incredibly easy to make with just five core ingredients.
Ingredients
- 8 ounces (225g) high-quality dark chocolate (60-70%), chopped
- ½ cup (113g) unsalted butter, cubed
- 1 cup (200g) granulated sugar
- 4 large eggs, separated and room temperature
- ½ teaspoon fine sea salt
- 1 teaspoon espresso powder (optional)
- 1 teaspoon vanilla extract (optional)
- Sea salt flakes for topping (optional)
Instructions
- Preheat oven to 350°F (175°C). Grease an 8-inch springform pan with butter or non-stick spray and line the bottom with parchment paper.
- Set up a double boiler. Place chopped chocolate and butter in a heatproof bowl over simmering water (ensure bowl doesn’t touch water). Stir occasionally until smooth (3-5 minutes). Remove from heat and let cool slightly until warm to the touch.
- Separate 4 eggs, placing yolks in one bowl and whites in another. Ensure no yolk gets into the whites.
- Whisk egg yolks and sugar vigorously until pale and slightly thickened (1-2 minutes). Pour this mixture into the cooled chocolate and stir until combined.
- Using an electric mixer, whip egg whites on medium-high speed until stiff peaks form (2-3 minutes).
- Add one-third of the whipped egg whites to the chocolate mixture and stir gently to lighten. Fold in the remaining whites using a spatula, folding from the bottom up until no white streaks remain. Do not overmix.
- Pour batter into the prepared pan and smooth the top. Bake for 30-35 minutes until the top is cracked and shiny, edges are set, and the center jiggles slightly.
- Remove from oven and let cool in the pan for 10 minutes. Run a knife around the edge and release the springform ring. Cool completely on a wire rack before serving.
Notes
Do not overbake; the center should jiggle slightly as it continues to cook while cooling. Use high-quality dark chocolate for best flavor. Room temperature eggs are crucial for proper whipping and texture. This torte tastes better the next day as flavors meld. Store in an airtight container at room temperature for up to 3 days or refrigerate for up to 5 days.
- Prep Time: 15 minutes
- Cook Time: 30-35 minutes
- Category: Dessert
- Cuisine: American
Nutrition
- Serving Size: 1 slice
- Calories: 320
- Sugar: 28
- Sodium: 40
- Fat: 20
- Saturated Fat: 12
- Carbohydrates: 32
- Fiber: 3
- Protein: 6
Keywords: flourless chocolate cake, gluten-free dessert, fudgy torte, easy chocolate recipe, low-carb dessert, dairy-free option


