Last Tuesday, I was staring at the clock. It was 6:15 PM. My husband had just walked through the door, looking like he’d run a marathon. My two kids were in the backyard, currently engaged in what I can only describe as “aggressive soccer,” and I realized with a sinking feeling that I had absolutely nothing ready for dinner. The freezer was full of random ice cubes and a bag of frozen peas that had been there since February. The pantry held nothing but a box of stale crackers and a jar of pickles.
But then I remembered the four pounds of potatoes sitting on the counter from last Sunday’s roast. They were raw, unpeeled, and looking at me like, “Well? What are you going to do with us?”
I didn’t have time to peel them. I didn’t have time to boil them for forty minutes and mash them by hand until my arm fell off. I needed something fast, something creamy, something that smelled like comfort the second I opened the oven door. So, I threw together what I call the “Cheesy Loaded Smashed Potato Casserole.” It’s not fancy. It doesn’t require a food processor. It doesn’t even require peeling.
It’s just potatoes, cheese, and a little bit of cheating (in the best way possible). And you know what? It was the best dinner we had all week. My husband took three helpings. My kids didn’t complain about the skin. And I got to sit down for five minutes while it was still hot. That’s the kind of weeknight win I’m talking about.
I’ve made this cheesy loaded smashed potato casserole at least a dozen times since that Tuesday panic. It’s become my secret weapon for those evenings when I’m tired, hungry, and running on fumes. It’s stupid simple, it uses ingredients I always have on hand, and it tastes like something you’d get at a fancy potato bar—but without the forty-five minutes of prep time.
Here’s the thing about this recipe: it’s forgiving. If you use sharp cheddar instead of mild, it’s still amazing. If you skip the bacon because you forgot to buy it, the casserole still works. It’s reliable. It’s hearty. And it’s going to save your weeknight dinner routine, I promise.
Why You’ll Love This Recipe
There are about ten reasons I keep making this cheesy loaded smashed potato casserole, but here are the big ones. This isn’t just another side dish; it’s a complete comfort-food hug in a baking dish.
Stupid Simple Prep — Seriously, if you can boil water and chop an onion, you can make this. I don’t even peel the potatoes. I just wash them, slice them thin, and smash them down. No fancy tools required. I’ve walked my teenage son through this recipe over FaceTime while he was at college, and he nailed it.
Lightning Fast — 5-ingredient weeknight dinner status is real. From start to finish, this takes about 30-35 minutes. I make this on weeknights when I get home at 7 PM and my brain is already offline. It’s mostly hands-off time in the oven, so I can actually sit down for a glass of wine.
Pantry-Friendly — You probably have 80% of these ingredients already. I keep potatoes, cheese, and bacon bits stocked just so I can make this on a whim. The rest is basic dairy and seasonings. It’s the ultimate “I don’t want to go to the store” dinner.
Crowd-Pleaser — I’ve served this to my vegetarian sister (just skip the bacon), my picky-eater nephew, and my dad who thinks “potatoes are boring.” Everyone asks for the recipe. The texture is crispy on top, creamy in the middle, and cheesy everywhere. It’s hard to hate.
Makes Amazing Leftovers — Actually tastes better the next day. The flavors meld together overnight, and the cheese gets even more gooey. I deliberately make extra for lunch throughout the week. It reheats beautifully in the microwave, which is a huge win for busy mornings.
This is my go-to when I need dinner to just work. No complicated techniques, no weird ingredients, just reliable, delicious food that makes everyone happy. It’s the kind of meal that reminds you why you cook in the first place.
Ingredients You’ll Need
Here’s the best part: you probably have most of this already. This looks like a short list, but each ingredient plays a specific role in creating that perfect texture and flavor profile. I’m particular about a few things here, and I’ll tell you exactly why.
For the Base
Yellow potatoes (4 pounds / 1.8 kg) — I use Yukon Gold or yellow potatoes because they have a naturally buttery flavor and hold their shape well. Russets are too starchy and get fluffy; I want creamy chunks, not mash. Red potatoes work too, but yellow is my favorite. Don’t peel them! The skin adds texture and nutrients. Just scrub them well.
Butter (4 tablespoons / 60g) — Unsalted is best so you can control the salt. I use real butter, not margarine. It adds richness and helps the potatoes stick together. If you’re out of butter, olive oil works, but you lose that classic comfort-food taste.
Salt and Pepper (1 teaspoon kosher salt, ½ teaspoon black pepper) — Season the potatoes well. I know it’s easy to skip, but unseasoned potatoes taste bland. Use coarse kosher salt for better distribution.
For the “Loaded” Part

Sharp Cheddar Cheese (2 cups / 200g, shredded) — Buy the block and grate it yourself. Pre-shredded cheese has anti-caking agents that prevent it from melting smoothly. You want gooey, stringy cheese, not grainy clumps. Sharp cheddar gives the best flavor punch. If you want a milder taste, use mild cheddar, but sharp is my preference.
Bacon Bits (1 cup / 100g, crumbled) — This is the “loaded” part. I use real cooked bacon, crumbled into small pieces. If you’re in a huge rush, you can use store-bought bacon bits, but real bacon tastes so much better. It adds that salty, smoky crunch that contrasts with the creamy potatoes.
Green Onions (4 stalks, sliced) — Adds a fresh, sharp bite to cut through the richness. I use both the white and green parts. If you don’t like onions, you can skip them, but I think they’re essential for balance.
For the Creamy Sauce
Sour Cream (½ cup / 120g) — This is the secret to the creamy texture. It adds tang and thickness. Full-fat sour cream works best. If you’re watching calories, you can use Greek yogurt, but the flavor will be slightly different.
Milk (¼ cup / 60ml) — Just a splash to loosen up the sour cream and cheese mixture. Whole milk is best, but anything works. Don’t skip this, or the casserole might be too thick.
Garlic Powder (1 teaspoon) — Fresh garlic is great, but for this recipe, garlic powder distributes more evenly and doesn’t burn in the oven. It gives a subtle, all-over garlic flavor. If you only have fresh garlic, use 2 cloves minced, but powder is easier.
Optional Add-ins:
Chives (2 tablespoons, chopped) — For garnish and extra flavor.
Hot Sauce (1 tablespoon) — If you like a little kick. I drizzle this on top before baking sometimes.
Equipment Needed
You don’t need fancy equipment for this. Here’s what I actually use.
Large Pot — I use a 6-quart pot. Needs to fit 4 pounds of potatoes comfortably. My ancient pot from college still works fine. Any large pot with a lid will do.
Colander — For draining the potatoes. Or just use the lid to drain—I do this when I’m lazy. Just be careful, it’s hot.
9×13 Baking Dish — A standard glass or ceramic dish works best. I prefer Pyrex because I can see the bottom browning. Metal works too, but glass gives more even heating.
Large Spoon or Potato Masher — For smashing the potatoes. I use a sturdy wooden spoon because it’s easier to press down. A masher works if you want a smoother texture, but I like chunks.
Sharp Knife and Cutting Board — For slicing the potatoes and chopping green onions. A serrated knife works well for potatoes if they’re waxy.
Grater — Box grater for the cheese. Or food processor if you’re grating lots of cheese, but hand-grating is faster for this amount.
Mixing Bowls — One large bowl for mixing the sour cream, cheese, and milk. A medium bowl for tossing the potatoes with butter and seasoning.
How to Make It: Step-by-Step
Alright, let’s make this! I’m walking you through exactly how I do it, including the little tricks I’ve picked up. This is the cheesy loaded smashed potato casserole, and it’s easier than you think.
Step 1: Prep the Potatoes (5 minutes)
Start by washing the potatoes thoroughly under cold water. Use a vegetable brush to scrub off any dirt. Don’t peel them! The skin adds texture and holds the shape. Slice the potatoes into ½-inch thick rounds. Uniform slices cook evenly. If they’re too thick, they’ll be hard in the middle. If they’re too thin, they’ll turn to mush. ½-inch is the sweet spot.
Step 2: Boil the Potatoes (10-12 minutes)
Bring a large pot of salted water to a boil. The water should taste like the ocean. Add the potato slices and cook for 10-12 minutes, or until they are fork-tender. You should be able to pierce a slice with a fork with no resistance. Don’t overcook them, or they’ll fall apart too much when you smash them. Drain them in a colander and let them sit for 2 minutes to steam off excess water. This step is crucial—if they’re too wet, the casserole will be soupy.
Step 3: Smash and Season (3 minutes)
Transfer the drained potatoes to a large mixing bowl. Add the melted butter, salt, and pepper. Gently toss to coat. Now, the smashing part. Use a large spoon or potato masher to press down on the potatoes. You don’t want a smooth mash; you want chunks and flat surfaces. Think “rustic mashed potatoes” not “potato soup.” Leave some larger chunks for texture. This creates more surface area for the cheese to stick to.
Step 4: Mix the Topping (2 minutes)
In a separate bowl, combine the sour cream, milk, garlic powder, half of the shredded cheese, and half of the bacon bits. Stir until smooth. This mixture will become the creamy binding agent for your casserole.
Step 5: Assemble the Casserole (2 minutes)
Preheat your oven to 375°F (190°C). Grease your 9×13 baking dish with a little butter or cooking spray. Spread the smashed potatoes evenly into the dish. Pour the sour cream mixture over the top and spread it out gently. Sprinkle the remaining cheese and bacon bits evenly over the top. Don’t be shy with the cheese; this is a loaded casserole, after all.
Step 6: Bake Until Golden (15-18 minutes)
Place the dish in the preheated oven and bake for 15-18 minutes. You’re looking for the cheese to be melted, bubbly, and slightly golden on top. The edges should be crispy. If you want it browner, you can broil for the last 1-2 minutes, but watch it closely—cheese burns fast.
Step 7: Garnish and Serve
Remove from the oven and let it rest for 5 minutes. This helps it set slightly so it’s easier to scoop. Sprinkle with sliced green onions. Serve warm. It’s that simple.
Total Time: About 30-35 minutes (10 minutes active, 25 minutes baking)
Expert Tips & Tricks
Here’s everything I’ve learned from making this dozens of times. These tips will save you from my mistakes.
Don’t Over-Boil
The biggest mistake people make is boiling the potatoes until they’re falling apart. You want them tender but intact. If they’re too soft, they’ll turn into a soup when you add the sour cream. Test them with a fork 2 minutes before the timer goes off.
Drain Well
After draining, let the potatoes sit in the colander for 2-3 minutes. Steam off excess water. Wet potatoes = watery casserole. I’ve made this mistake twice, and it was a disaster. Now I always wait.
Use Real Bacon
I know it’s more work, but real bacon tastes so much better than the dried bits. Cook it crispy, let it cool, then crumble it. The fat from the bacon adds flavor to the whole dish. If you’re short on time, use high-quality bacon bits, but real bacon is worth the 5 minutes.
Grate Your Own Cheese
Pre-shredded cheese contains cellulose, which prevents clumping but also prevents smooth melting. You’ll end up with a greasy, grainy topping. Grate a block of cheddar—it takes 2 minutes and makes a huge difference.
Room Temperature Sour Cream
If your sour cream is cold, it might seize up when mixed with the warm potatoes. Let it sit out for 10 minutes before using. Or, mix it with the warm milk first to temper it.
For Extra Crunch
If you like a crispy top, sprinkle a little panko breadcrumbs mixed with melted butter over the cheese before baking. It adds a nice texture contrast. I do this sometimes when I want it to feel fancier.
Variations & Substitutions
Once you’ve nailed the basic version, here’s how you can mix it up. I’ve tried all of these.
Broccoli Cheddar Version
Add 2 cups of steamed broccoli florets to the potatoes before assembling. It’s a great way to sneak in veggies. My kids don’t even notice the broccoli under the cheese.
Buffalo Chicken Version
Shred 2 cups of cooked chicken and toss it with ½ cup of buffalo sauce. Layer it with the potatoes. Top with ranch dressing instead of sour cream. This is perfect for game day.
Vegetarian Option
Skip the bacon and add sautéed mushrooms or caramelized onions. Mushrooms add a savory, meaty texture that works well. Caramelized onions add sweetness and depth.
Spicy Version
Add 1 teaspoon of cayenne pepper or jalapeños to the sour cream mixture. Top with sliced jalapeños before baking. For those who like heat, this is a must.
Gluten-Free
This recipe is naturally gluten-free, as long as you use gluten-free bacon and verify your cheese doesn’t have additives. Most cheeses are safe, but always check labels.
Dairy-Free
Use dairy-free butter, sour cream (like Kite Hill), and dairy-free cheddar shreds. It’s not quite the same, but it’s edible. I’ve made this for my lactose-intolerant friend, and she liked it.
Lower-Carb
Swap potatoes for cauliflower. Steam cauliflower florets, smash them, and proceed with the recipe. It’s lighter and lower in carbs. I won’t lie—it’s not as hearty, but it works.
Serving & Storage
How to Serve:
I usually serve this straight from the baking dish at the dinner table—it looks rustic and stays warm. But here are other ways I’ve enjoyed it:
Side Dishes:
This pairs perfectly with grilled chicken, roast beef, or even just a simple green salad. It’s rich enough to stand on its own as a side, but hearty enough to be a main if you add protein.
Wine Pairing:
Not a wine expert, but my wine-snob friend says a crisp Sauvignon Blanc or a light Pinot Noir works great with this. The acidity cuts through the richness.
Storage Instructions:
Refrigerator:
Store in an airtight container for up to 3 days. The casserole will thicken in the fridge—totally normal.
Reheating:
Best method: Add a splash of milk or cream to a skillet, add your leftover casserole, and heat gently over low heat, stirring frequently. The extra liquid brings back the creamy texture.
Microwave method: Heat in 30-second intervals, stirring between. Add a splash of milk if it’s too thick.
Oven method: Cover with foil and bake at 350°F for 15-20 minutes.
Freezing:
Honestly, this doesn’t freeze well because of the dairy. The sour cream separates when thawed, and the potatoes can become grainy. Make it fresh or store in the fridge for up to 3 days.
Meal Prep:
You can prep the potatoes and smash them ahead of time, store them in the fridge, and assemble/bake when ready. This saves 10 minutes on weeknights.
Pro tip: If leftovers are drying out, stir in a tablespoon of butter and a splash of milk when reheating. Brings back that creamy texture.
Nutrition Information
I’m not a nutritionist, but here’s the breakdown if you’re tracking.
Per Serving (based on 8 servings):
– Calories: 320
– Protein: 12g
– Carbs: 35g
– Fiber: 3g
– Sugar: 2g
– Fat: 16g
– Saturated Fat: 9g
– Cholesterol: 45mg
– Sodium: 480mg
– Calcium: 200mg
What’s Good:
– Decent protein from cheese and bacon
– Calcium from the cheese
– Potassium from the potatoes (great for heart health)
– More filling than it looks
What to Know:
– Higher in calories from cheese and sour cream
– Contains dairy and gluten (if using regular bacon)
– Moderate sodium (use low-sodium bacon to reduce)
My Take:
“Look, this is comfort food with cheese and sour cream. It’s not a diet recipe. But it’s way better than takeout, costs less, and I know exactly what’s in it. When I want to make it lighter, I use less cheese and add more broccoli. But usually? I just eat a reasonable portion and enjoy it.”
Final Thoughts
So that’s my go-to cheesy loaded smashed potato casserole! I’ve probably talked your ear off at this point, but when you make a recipe this often, you have a lot to say about it.
This has saved weeknight dinners more times than I can count. It’s my answer to “what’s for dinner” when I’m tired, don’t want takeout, and still want something that tastes really good. My kids are happy, my husband’s happy, and I’m happy because I’m not stressed about cooking.
Make it yours! Try different add-ins, swap in your favorite cheeses, adjust the spice level. The best recipes are the ones you adapt to your family’s tastes. If you need more easy weeknight ideas, check out my soft baked ham and cheese pretzel bites for a fun appetizer, or my no-bake strawberry pretzel salad for a sweet treat.
If you make this, drop a comment and let me know what you think! I love hearing how recipes turn out in your kitchen. And if something doesn’t work, tell me that too—I’m here to help troubleshoot.
Happy cooking! And I hope your kitchen smells half as good as mine does right now.
Frequently Asked Questions
Can I use russet potatoes instead of yellow potatoes?
You can, but the texture will be different. Russets are starchy and will become fluffier and softer when smashed. Yellow potatoes hold their shape better and give a creamier, chunkier result. If you use russets, don’t over-boil them, or they’ll turn to mush. I prefer yellow, but russets work in a pinch.
Why did my casserole turn out watery?
Usually means you didn’t drain the potatoes well enough after boiling, or you boiled them too long. Make sure you let the potatoes sit in the colander for 2-3 minutes to steam off excess water. Also, don’t add too much milk. The sour cream and cheese should bind everything together. If it’s already watery, bake it uncovered for an extra 5-10 minutes to evaporate the liquid.
Can I make this ahead for a dinner party?
Sort of. You can prep the potatoes and smash them up to 4 hours ahead and store them in the fridge. Assemble the casserole right before baking. If you bake it ahead and reheat it, the texture might suffer slightly. I recommend assembling and baking it fresh for the best results. It only takes 30 minutes, so it’s not too late to prep.
Can I use pre-shredded cheese?
You can, but I don’t recommend it. Pre-shredded cheese has anti-caking agents that prevent it from melting smoothly. You’ll end up with a grainy, less gooey topping. Grating a block of cheese takes 2 minutes and makes a huge difference in texture and flavor. It’s worth the extra effort.
How do I reheat leftovers without it getting dry?
Add a splash of milk or cream to a skillet, add your leftover casserole, and heat gently over low heat, stirring frequently. The extra liquid brings back the creamy texture. Microwave sort of works but tends to dry it out. If you do microwave, definitely add a splash of milk first and heat in short bursts, stirring between.
Can I double this recipe?
Absolutely! Double everything and use a 9×13 dish if you’re doubling, or use a larger baking dish if you’re quadrupling. The cooking time might increase by 5-10 minutes. Check for doneness by looking for bubbly, golden cheese. I do this when I’m meal-prepping or feeding a crowd.
Is this recipe gluten-free?
Yes, this recipe is naturally gluten-free, as long as you use gluten-free bacon and verify your cheese doesn’t have additives. Most cheeses are safe, but some pre-shredded cheeses have wheat starch. Always check labels if you’re celiac or highly sensitive.
Pin This Recipe!
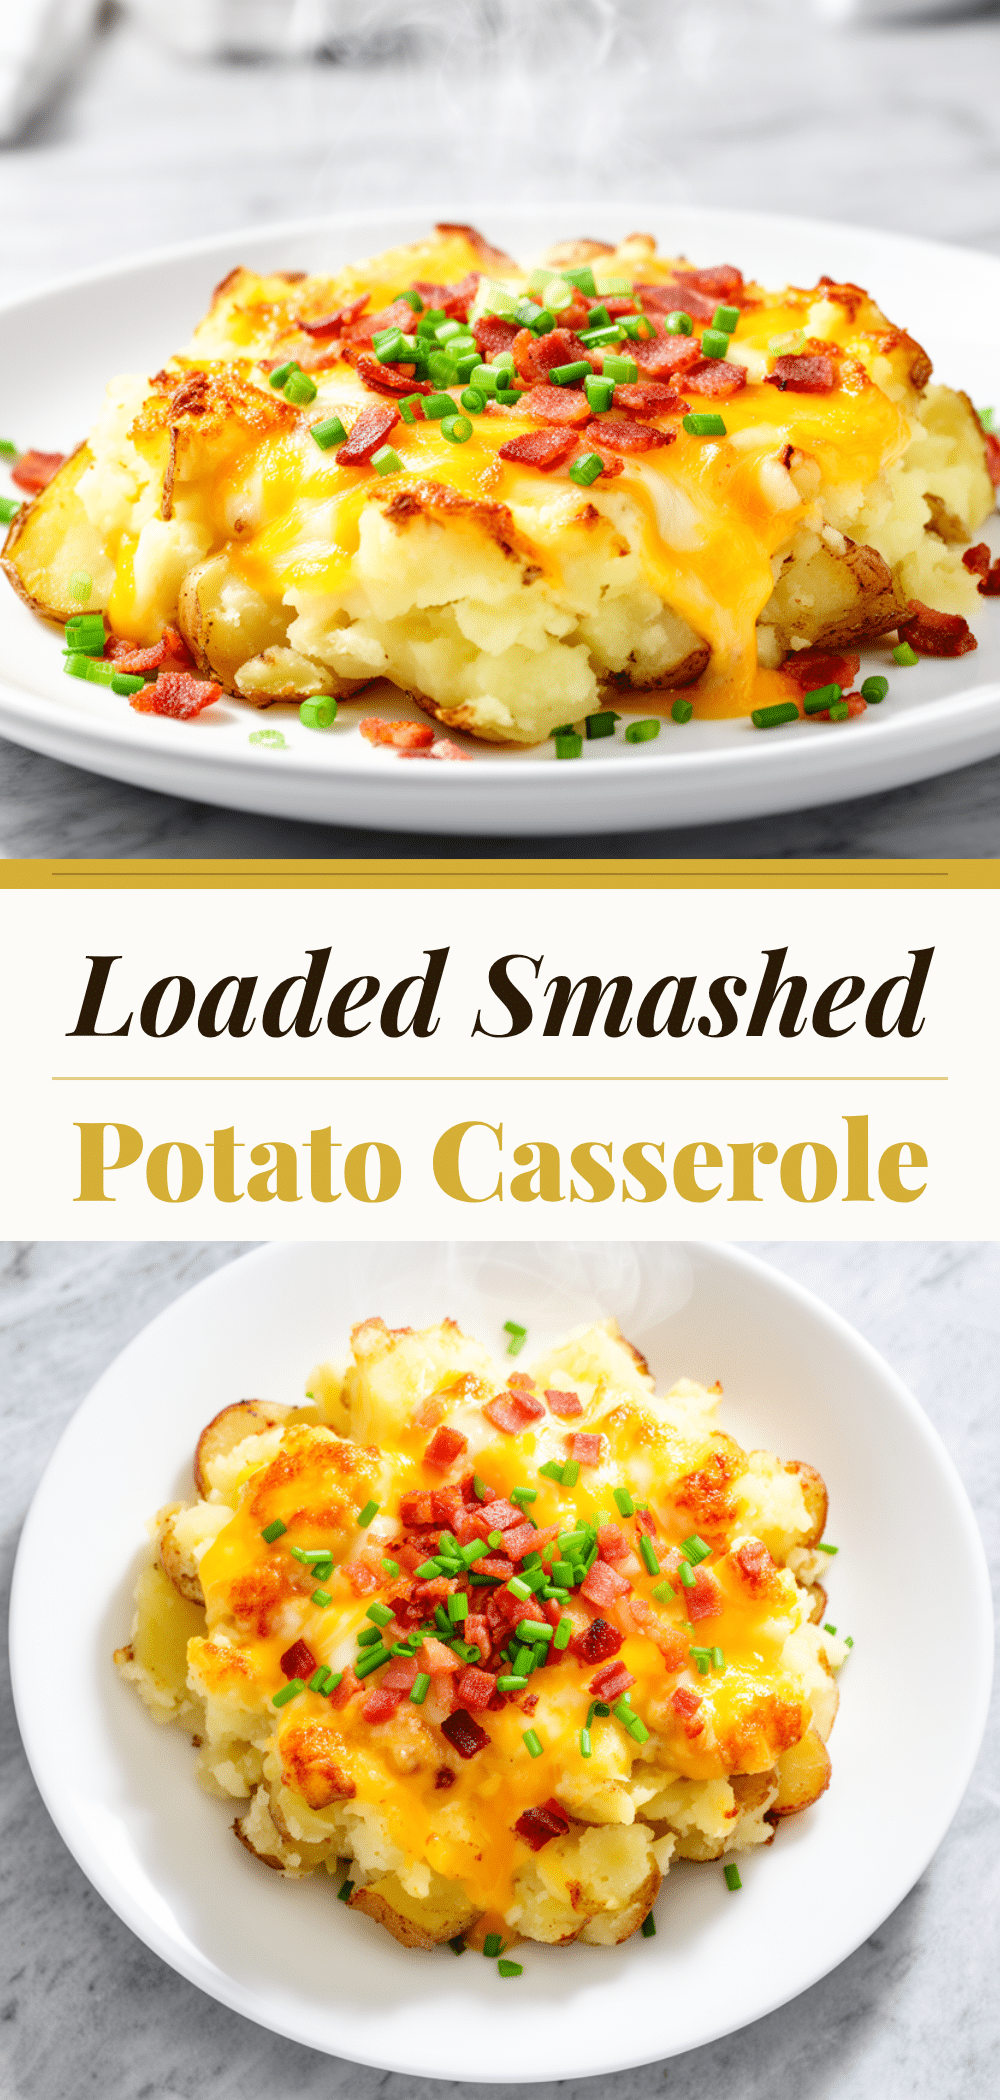

Cheesy Loaded Smashed Potato Casserole
- Total Time: 35 minutes
- Yield: 8 servings 1x
Description
A quick, 5-ingredient weeknight dinner featuring Yukon Gold potatoes, sharp cheddar cheese, and bacon bits. This comforting casserole is creamy inside, crispy on top, and requires no peeling or fancy tools.
Ingredients
- 4 pounds yellow potatoes (Yukon Gold or similar), scrubbed and sliced into ½-inch rounds
- 4 tablespoons unsalted butter, melted
- 1 teaspoon kosher salt
- ½ teaspoon black pepper
- 2 cups sharp cheddar cheese, shredded
- 1 cup bacon bits, crumbled (cooked real bacon preferred)
- 4 stalks green onions, sliced
- ½ cup sour cream
- ¼ cup milk
- 1 teaspoon garlic powder
Instructions
- Preheat oven to 375°F (190°C) and grease a 9×13 baking dish.
- Wash and slice potatoes into ½-inch rounds. Bring a large pot of salted water to a boil and cook potatoes for 10-12 minutes until fork-tender.
- Drain potatoes well and let them sit for 2 minutes to steam off excess water.
- Transfer potatoes to a large bowl, add melted butter, salt, and pepper. Gently smash with a spoon or masher to create chunks and flat surfaces.
- In a separate bowl, mix sour cream, milk, garlic powder, half the cheese, and half the bacon bits until smooth.
- Spread smashed potatoes into the baking dish. Pour the sour cream mixture over the top and spread evenly.
- Sprinkle remaining cheese and bacon bits over the casserole.
- Bake for 15-18 minutes until cheese is melted, bubbly, and slightly golden.
- Let rest for 5 minutes before garnishing with green onions and serving.
Notes
Do not peel the potatoes; the skin adds texture. Ensure potatoes are drained well to prevent a watery casserole. Grate your own cheese for better melting. For extra crunch, sprinkle panko breadcrumbs mixed with butter on top before baking.
- Prep Time: 10 minutes
- Cook Time: 25 minutes
- Category: Side Dish
- Cuisine: American
Nutrition
- Serving Size: 1/8 of the casserole
- Calories: 320
- Sugar: 2
- Sodium: 480
- Fat: 16
- Saturated Fat: 9
- Carbohydrates: 35
- Fiber: 3
- Protein: 12
Keywords: potato casserole, weeknight dinner, cheesy potatoes, smashed potatoes, easy recipe, comfort food, bacon potatoes