Last week, I was standing in my kitchen at 6:45 AM, holding a lunchbox that felt suspiciously light. My son had just looked at me with that specific “I don’t want to eat this” glare that only happens before the first day of school. I had tried the usual suspects—PB&J, apple slices, cheese sticks—but the lunchbox was looking sad. It was just sad.
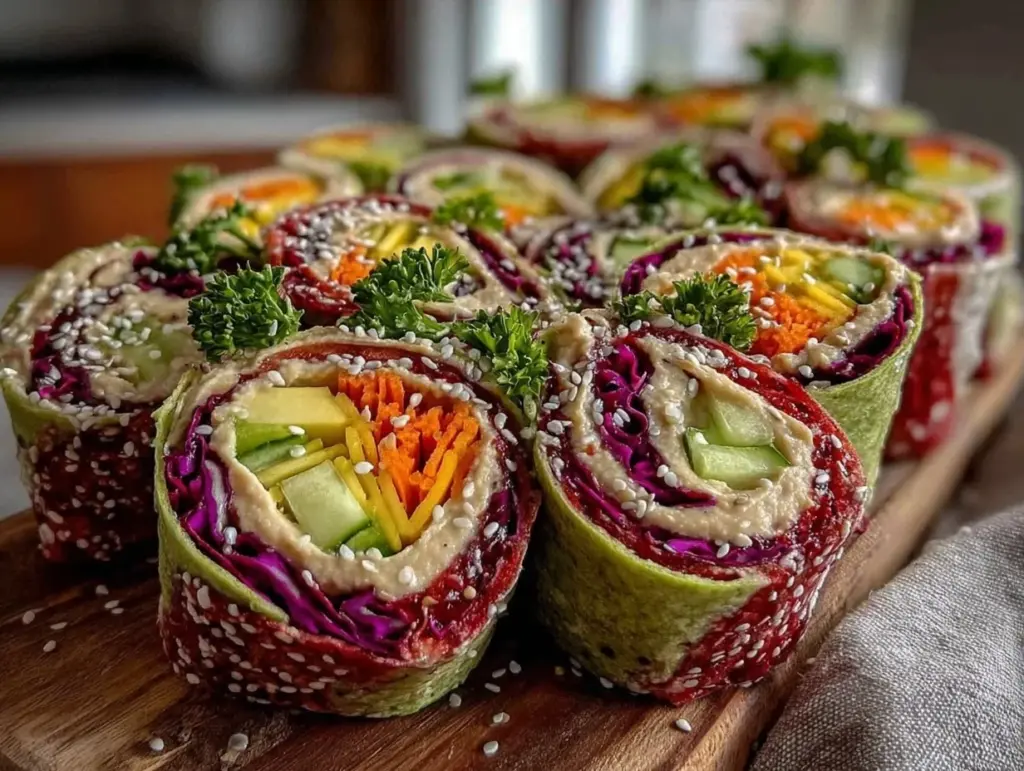
Then I remembered a trick I picked up from a fellow parent at the playground: the “Build-Your-Own” Wrap Strategy. It’s not a recipe you cook; it’s a recipe you assemble. And somehow, turning dinner ingredients into colorful, handheld snacks changed everything. Those Back to School Rainbow Veggie Wraps with Hummus didn’t just fill his stomach; they made him excited to open his lunchbox. He called them “lunch tacos.” I called them a miracle.
Here’s the thing about the back-to-school rush. It’s chaotic. You’re juggling bus schedules, soccer practice, and trying to remember if you bought the right kind of glue sticks. You don’t have time to roast a vegetable medley or make a complex sauce from scratch. What you need is something fast, cheap, and—most importantly—something your kids will actually eat without complaining. These wraps hit every single one of those marks. They’re colorful (kids love colors), they’re handheld (no mess), and they’re built on pantry staples you probably already have. Best part? They cost pennies per serving compared to those overpriced deli sandwiches.
I’ve tested this concept for three weeks straight. Some days it was spinach and cucumber; other days it was shredded carrots and bell peppers. The formula stays the same, but the flavors change. It’s become my go-to strategy for lunchbox prep, and honestly, I’ve started making them for my own lunch, too. They’re light enough that I don’t feel sluggish in the afternoon, but filling enough to last until dinner.
Why You’ll Love This Recipe
There are about a dozen reasons I keep coming back to these rainbow wraps, but let’s be real—you’re probably looking for solutions to three specific problems: the “what’s for lunch?” panic, the grocery bill, and the picky eater. This recipe solves all of them.
- Stupid Simple Assembly — Seriously, if you can spread hummus and lay down a tortilla, you can make this. I’ve assembled these while my kid was doing homework at the table. There’s no cooking involved, which means no cleanup. Just spread, roll, and pack.
- Lightning Fast — From opening the fridge to packing the lunchbox takes about 5 minutes. That’s it. Five minutes. I make these on mornings when I’m running on two hours of sleep and the coffee hasn’t kicked in yet.
- Pantry-Friendly — You probably have 90% of these ingredients already. Tortillas, hummus, and whatever veggies are languishing in your crisper drawer. I don’t need to make a special trip to the store.
- Budget-Smart — Feeds 4-6 kids for under $10. That’s less than what I spend on a single box of pre-packaged school snacks. When you buy a tub of hummus and a bag of carrots in bulk, the cost per wrap drops to almost nothing.
- Crowd-Pleaser — I’ve served these to my vegetarian daughter, my son who usually only eats chicken nuggets (he loves the crunch), and my husband who thinks “healthy” means “bland.” Everyone loved it. The hummus acts as the glue for flavor, making veggies taste like a treat.
- Make-Ahead Friendly — I assemble all six wraps on Sunday night. They keep perfectly in the fridge for up to three days. This is a game-changer for my Sunday evening sanity.
This is my go-to when I need lunch to just work. No complicated techniques, no weird ingredients, just reliable, delicious food that makes everyone happy. It’s the kind of meal prep that actually feels like progress.
Ingredients You’ll Need
Here’s the best part: you probably have most of this already. This recipe is designed around flexibility. You aren’t locked into a specific brand or exotic ingredient. Let’s talk about what goes into the basket.
For the Wraps
Flour Tortillas (6 large, 10-inch) — I use the standard flour tortillas because they’re pliable and don’t tear as easily as whole wheat. If you prefer whole wheat for extra fiber, that works too, but keep in mind they can be a bit stiffer. I always grab the big family-size packs at the store.
Hummus (1 cup / 240g) — This is your flavor base and your “glue.” I stick to classic garlic or plain hummus. If your kids are adventurous, roasted red pepper is a great alternative. Avoid the flavored ones with weird additives. I buy the large tubs because they last longer and cost less per ounce than the single-serve cups.
Soft Cheese (1 block, about 4oz) — Cream cheese or a mild cheddar sliced thin. The cream cheese adds a rich, creamy texture that balances the crunch of the veggies. If you’re dairy-free, skip this or use a dairy-free spread.
For the Rainbow Fillings
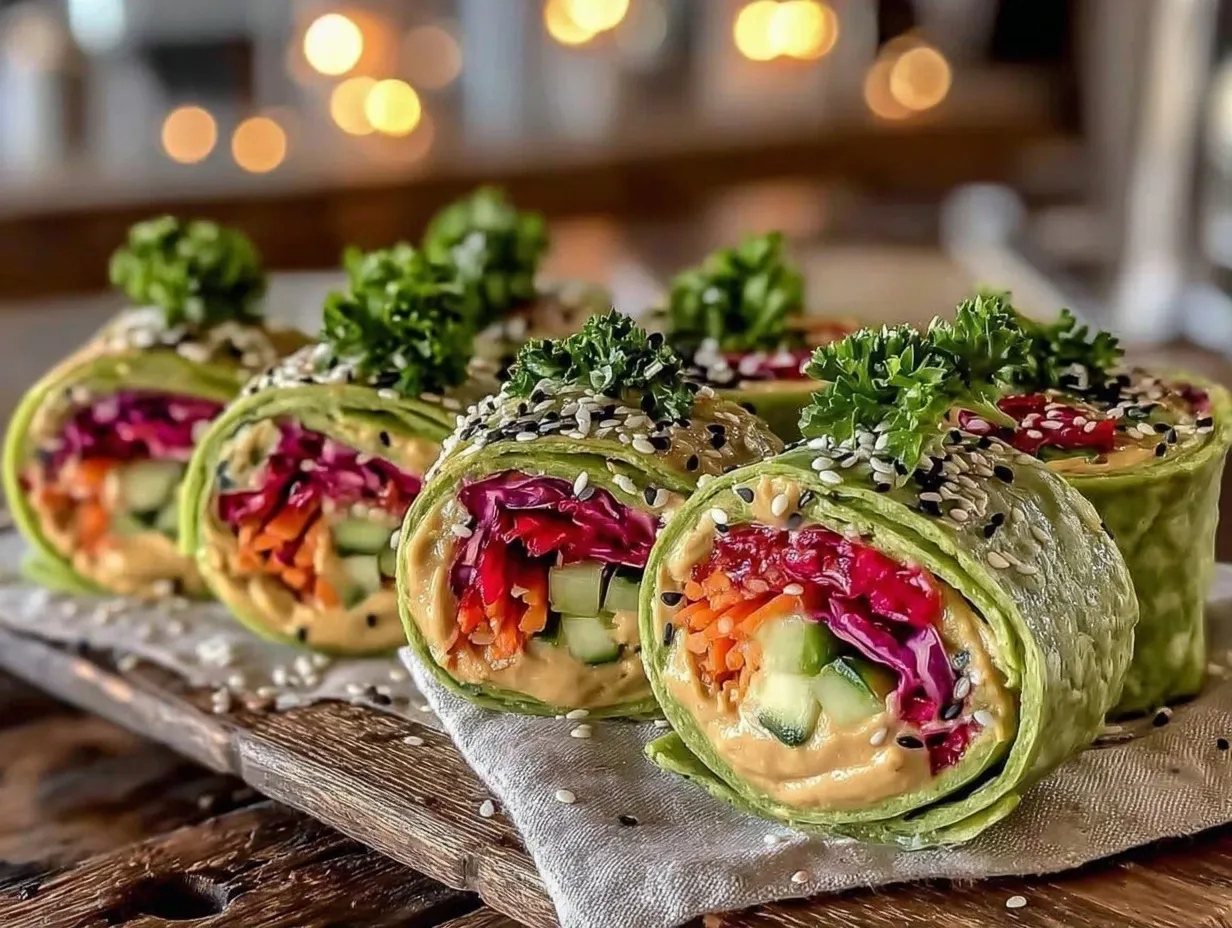
Shredded Carrots (1 cup / 100g) — The orange component. I buy pre-shredded bags because I’m lazy, but if you have time, shredding a fresh carrot gives a nicer texture. It’s sweet and crunchy.
Shredded Red Cabbage (1 cup / 80g) — The purple component. This is non-negotiable for me because it adds that vibrant color and a slight peppery crunch. It keeps the wrap interesting so it doesn’t taste like just “salad.”
Sliced Cucumber (1 medium, sliced thin) — The green component. I peel the cucumber if the skin is thick, then slice it into half-moons. It adds that fresh, cool crunch that makes the wrap feel light.
Red Bell Pepper (1 medium, diced) — The red component. Sweet bell peppers are key here. Don’t use green peppers unless you love bitterness. Diced small so it’s easy to bite through.
Optional Add-ins:
Avocado (1, sliced) — Adds healthy fats and creaminess. Add this right before packing so it doesn’t brown.
Sprouts (½ cup) — Alfalfa or broccoli sprouts add a nice texture, but some kids hate them. Skip if your kids are sensitive to textures.
Cooked Chicken (1 cup, shredded) — If you need more protein, leftover crispy honey garlic chicken works great here. Just shred it up and layer it in.
Personal Tip: I always wash and chop my veggies on Sunday. I store them in airtight containers with a paper towel at the bottom to absorb moisture. This keeps them crisp all week long. Wet veggies make soggy wraps, and nobody wants a soggy wrap.
Equipment Needed
You don’t need fancy equipment for this. Here’s what I actually use.
Large Plate or Platter — I use this as my assembly station. It gives me plenty of room to spread the hummus and layer the veggies without things falling off.
Sharp Knife — For slicing cucumbers and peppers. Dull knives make you cry more—learned this the hard way with a stubborn cucumber.
Box Grater — For shredding carrots and cheese. If you don’t want to grate, just buy pre-shredded. It’s fine.
Spreading Knife — A butter knife or small offset spatula works. I use the knife that comes with the hummus tub.
Airtight Containers — For storing the prepped veggies. I use glass containers because they don’t stain from the turmeric in some hummus brands.
Wax Paper or Parchment Paper — To wrap the finished wraps. This keeps them from sticking together in the lunchbox.
Optional but nice:
Food Processor — If you’re prepping a huge batch of veggies, the pulse function saves your arm.
Ziploc Bags — For storing the tortillas if you don’t use them all at once.
Tool Tip: Don’t have a grater? Just buy the pre-shredded carrots and coleslaw mix. It’s a huge time saver and tastes the same.
How to Make It: Step-by-Step
Alright, let’s make this! I’m walking you through exactly how I do it, including the little tricks I’ve picked up. This is assembly-only, so don’t worry about heat or timing.
Step 1: Prep Your Veggies (5-10 minutes)
Wash and dry all your vegetables. Moisture is the enemy of a good wrap. If the veggies are wet, the tortilla will get soggy. Pat them dry with a paper towel. Slice the cucumber into thin half-moons. Dice the bell pepper into small cubes. If you’re using fresh carrots, shred them. If you’re using cabbage, shred it finely. I usually do this in a big bowl so I can mix them all together for easy scooping.
Step 2: Lay Out Your Station (2 minutes)
Take your large plate and lay out your tortillas. If you’re making more than two, use a baking sheet or two plates. Keep the tortillas covered with a damp paper towel or a clean kitchen towel. Tortillas dry out fast, and dry tortillas crack when you roll them. We don’t want cracks.
Step 3: Spread the Hummus (1 minute per wrap)
Take a tortilla and spread a generous layer of hummus over the surface, leaving about an inch of space at the top edge. This is your glue. If you don’t spread it all the way to the edge, the wrap might fall apart. I use about 2 tablespoons per wrap. Don’t skimp on the hummus—it’s the flavor star.
Step 4: Add the Cheese (30 seconds)
Place your cheese on top of the hummus. If using cream cheese, spread a thin layer. If using cheddar, lay the slices flat. The cheese helps seal the veggies in and adds richness. It’s like the mortar between the bricks.
Step 5: Load Up the Rainbow (2 minutes)
Now for the fun part. Layer your veggies on top of the cheese. I like to layer them in sections rather than mixing them all in a pile—it looks prettier and gives you a bite of each color. Start with the carrots, then cabbage, then cucumber, then pepper. Don’t overstuff! If you put too much in, it won’t roll. Aim for a thin, even layer. Think of it like a sandwich, but fluffier.
Step 6: Roll It Up (1 minute)
This is the trickiest part. Start at the bottom edge (the edge closest to you). Fold it over the filling, tuck it in tight, and then roll it away from you. Use your fingers to tuck the sides in slightly as you roll to keep it compact. It should feel firm but not tight enough to burst. If it’s too loose, it’ll unravel. If it’s too tight, it’ll break. Practice makes perfect.
Step 7: Wrap and Pack (2 minutes)
Once rolled, wrap each wrap tightly in wax paper or parchment paper. This keeps the moisture in and the tortilla soft. Place them in an airtight container or a lunchbox. If you’re packing them for school, add an ice pack. The hummus and veggies need to stay cool.
Total Time: About 15 minutes for a batch of 6 wraps. That’s 2.5 minutes per wrap. You can’t beat that.
Built-in Troubleshooting:
Wrap fell apart? You didn’t spread enough hummus or you overfilled it. Next time, use less filling and more hummus.
Tortilla cracked? It dried out. Next time, cover them with a damp towel while you work.
Veggies leaking water? They weren’t dry enough. Always pat them dry before assembling.
Expert Tips & Tricks
Here’s everything I’ve learned from making these dozens of times. These tips will save you from my mistakes.
Keep It Dry
This is the #1 tip. Wet veggies = soggy wraps. I always use a salad spinner or paper towels to dry the cucumbers and peppers. If you’re using pre-shredded coleslaw mix, give it a quick squeeze in a towel to remove excess moisture.
Use the Right Tortilla
Don’t use the tiny taco shells. You need large, pliable flour tortillas. If you’re using whole wheat, microwave the tortilla for 10 seconds to make it more pliable. Cold tortillas crack. Warm tortillas roll.
Prep Ahead on Sunday
I chop all my veggies on Sunday night. I store them in containers with paper towels. This way, weekday mornings are just assembly. It takes the stress out of the morning routine. I’ve also been known to make these while watching TV on a lazy Saturday afternoon.
Don’t Skimp on Hummus
The hummus is the flavor. If you use too little, the wrap tastes like plain bread and veggies. I use a full tablespoon per inch of width. It’s worth the extra calories for the taste.
Add a Crunch Factor
If your kids like extra crunch, add some sunflower seeds or sliced almonds. It adds texture and healthy fats. I sprinkle a little on top before rolling.
Common Mistakes (and how to avoid them):
Mistake: Wrap is too loose
Fix: Tuck the sides in as you roll. Use less filling.
Mistake: Wrap is too tight
Fix: Use a larger tortilla. Don’t pack the veggies as densely.
Mistake: Veggies are watery
Fix: Dry them thoroughly. Use paper towels.
Pro Tricks I’ve Learned:
For Restaurant-Quality Finish
Add a thin layer of cream cheese under the hummus. It creates a barrier that keeps the hummus from soaking into the tortilla.
For Extra Flavor
Sprinkle a little everything bagel seasoning on the hummus before adding veggies. It adds a nice savory kick.
For Better Texture
Use a mix of shredded cabbage and shredded carrots. It’s easier to roll than whole leaves.
Variations & Substitutions
Once you’ve nailed the basic version, here’s how you can mix it up. I’ve tried all of these.
Chicken Lover’s Wrap
Add ½ cup of shredded cooked chicken. I often use leftover creamy tuscan garlic chicken for this. It adds protein and makes it more filling. My husband prefers this version.
Avocado Green Wrap
Swap the red pepper for sliced avocado. Add a squeeze of lime juice to the hummus. It’s richer and creamier. Great for summer.
Spicy Kick
Add a pinch of red pepper flakes to the hummus. Or use a spicy hummus variety. My older kids like it with a little hot sauce drizzled on top.
Gluten-Free
Use gluten-free tortillas. Most brands work fine, but check the packaging for pliability. Some GF tortillas are brittle. I’ve used Alvarado Street tortillas and they work great.
Vegan
Use vegan hummus and skip the cheese, or use a vegan cheese slice. The rest is naturally vegan. My vegetarian friend requests this version.
Different Proteins:
– Hard-boiled eggs (sliced)
– Turkey slices (layered like deli meat)
– Tofu (crumbled firm tofu)
– Beans (mashed black beans for a dip-like layer)
Serving & Storage
How to Serve:
I usually serve these straight from the lunchbox. They’re best at room temperature. If you’re eating them for lunch, take them out of the fridge 10 minutes before eating. They’re not meant to be hot.
Side Dishes:
– Apple slices
– Pretzels
– Cheese sticks
– A small bag of chips (yes, sometimes they want junk food too)
Storage Instructions:
Refrigerator: Store in an airtight container for up to 3 days. The veggies might get slightly softer, but they’ll still be good.
Freezing: No, don’t freeze these. The veggies will get mushy when thawed. Make them fresh or store in the fridge.
Meal Prep: Make the veggies on Sunday. Assemble wraps as needed. Or assemble all at once and store for 3 days.
Pro tip: If you’re packing for school, use a bento box style container. It keeps the wraps from getting squished. I also add a small container of extra hummus for dipping.
Nutrition Information
I’m not a nutritionist, but here’s the breakdown if you’re tracking. This is an estimate per wrap.
- Calories: 250
- Protein: 8g
- Carbs: 35g
- Fiber: 4g
- Sugar: 6g
- Fat: 10g
- Sodium: 350mg
What’s Good:
– High in fiber from the veggies
– Good source of protein from hummus
– Low in saturated fat
– Packed with vitamins from the rainbow colors
What to Know:
– Higher in carbs from the tortilla
– Contains gluten
– Moderate sodium (use low-sodium hummus to reduce)
My Take:
Look, this is a light, healthy lunch. It’s not a heavy meal, so it’s perfect for school. It won’t make you sleepy in the afternoon. When I want to make it heavier, I add chicken or cheese. But usually? I just enjoy the crunch and the freshness.
Final Thoughts
So that’s my go-to Back to School Rainbow Veggie Wraps with Hummus! I’ve probably talked your ear off at this point, but when you make a recipe this often, you have a lot to say about it.
This has saved my mornings more times than I can count. It’s my answer to “what’s for lunch?” when I’m tired, don’t want to cook, and still want something that tastes really good. My kids are happy, my husband’s happy, and I’m happy because I’m not stressed about packing a sad lunchbox.
Make it yours! Try different veggies, swap in your favorite hummus flavor, adjust the cheese. The best recipes are the ones you adapt to your family’s tastes.
If you make this, drop a comment and let me know what you think! I love hearing how recipes turn out in your kitchen. And if something doesn’t work, tell me that too—I’m here to help troubleshoot.
Happy packing! And I hope your kids’ lunchboxes look half as colorful as mine do right now.
Frequently Asked Questions
Q: Can I use whole wheat tortillas?
A: Yes, but they’re stiffer. I recommend microwaving them for 10 seconds to make them pliable. They also have a stronger flavor, which some kids might not like. I usually stick to flour tortillas for the kids.
Q: How long do these wraps last in the fridge?
A: Up to 3 days. After that, the veggies get too soft and the tortilla gets soggy. I usually make enough for 3 days and then make fresh ones on Thursday.
Q: Can I make these ahead for the week?
A: Yes! I assemble all 6 wraps on Sunday night. I store them in an airtight container in the fridge. They’re ready to grab and go. This is my favorite time-saver.
Q: Why did my tortilla crack?
A: It dried out. Tortillas dry out fast. Keep them covered with a damp towel while you work. If they’re already dry, microwave them for 10 seconds.
Q: Can I use pre-shredded coleslaw mix?
A: Yes, it’s a great shortcut. Just make sure to dry it well. Coleslaw mix is often wet from the dressing or moisture. Pat it dry with paper towels.
Q: How do I reheat these?
A: You don’t. These are meant to be eaten cold or at room temperature. Heating them will make the tortilla tough and the veggies soggy.
Q: Can I double this recipe?
A: Absolutely! Double everything and use your biggest plate. The assembly time stays the same. I do this when I’m meal-prepping for the whole week. Just make sure your fridge has space for the containers.
Pin This Recipe!

Back to School Rainbow Veggie Wraps: 5-Ingredient Kid-Friendly Budget Meal
- Total Time: 15 minutes
- Yield: 6 servings 1x
Description
A quick, no-cook assembly recipe for colorful veggie wraps with hummus and cheese, designed to be a fast, budget-friendly, and kid-approved lunch solution.
Ingredients
- 6 large flour tortillas (10-inch)
- 1 cup (240g) hummus (classic garlic or plain)
- 4oz soft cheese (cream cheese or mild cheddar slices)
- 1 cup (100g) shredded carrots
- 1 cup (80g) shredded red cabbage
- 1 medium cucumber, sliced thin
- 1 medium red bell pepper, diced
- Optional: 1 avocado, sliced
- Optional: ½ cup sprouts
- Optional: 1 cup cooked shredded chicken
Instructions
- Wash, dry, and prep all vegetables: slice cucumber into half-moons, dice bell pepper, and shred carrots and cabbage. Ensure veggies are dry to prevent soggy wraps.
- Lay out tortillas on a large plate or platter. Keep them covered with a damp paper towel to prevent drying out.
- Spread a generous layer of hummus (about 2 tablespoons) over each tortilla, leaving a 1-inch border at the top edge.
- Add the cheese on top of the hummus. If using cream cheese, spread a thin layer; if using cheddar, lay slices flat.
- Layer the vegetables on top of the cheese in sections (carrots, cabbage, cucumber, pepper) for visual appeal and even distribution. Avoid overstuffing.
- Starting from the bottom edge, fold the tortilla over the filling, tuck in the sides slightly, and roll tightly away from you.
- Wrap each finished wrap tightly in wax paper or parchment paper and place in an airtight container or lunchbox with an ice pack if packing for school.
Notes
Ensure vegetables are thoroughly dried before assembling to prevent the tortilla from becoming soggy. Tortillas should be kept covered with a damp towel while working to maintain pliability. These wraps are best eaten cold or at room temperature; do not reheat.
- Prep Time: 15 minutes
- Cook Time: 0 minutes
- Category: Lunch
- Cuisine: American
Nutrition
- Serving Size: 1 wrap
- Calories: 250
- Sugar: 6
- Sodium: 350
- Fat: 10
- Saturated Fat: 2
- Carbohydrates: 35
- Fiber: 4
- Protein: 8
Keywords: back to school lunch, kid-friendly meals, budget meals, veggie wraps, hummus wraps, no-cook recipes, meal prep, healthy lunch ideas, gluten-free options


