There is a specific kind of panic that sets in when the summer calendar flips. One minute you’re waking up to the smell of pancakes on a lazy Sunday morning, and the next, you’re staring at a packed lunchbox and a clock that says 7:15 AM. My kitchen usually looks like a tornado hit it during these first few weeks of school. I’m trying to find lost permission slips, locate the left shoe, and simultaneously get three kids fed before the bus comes.
Last year, I tried to be the perfect mom. I made elaborate smoothies every morning. I bought expensive granola bars. I woke up at 5:30 AM to bake muffins. It lasted exactly twelve days before I realized I was exhausted, the kids were rushing, and the muffins were just… okay. Not amazing. Just okay.
Then I remembered my grandmother’s old trick. She used to bake big pans of oatmeal for her three boys who had big appetites and even bigger school days. It wasn’t fancy. It was just warm, comforting, and cheap. I decided to try it again, but with a twist. Instead of a giant pan, I used a muffin tin. And instead of just plain oats, I loaded them with apples and cinnamon.
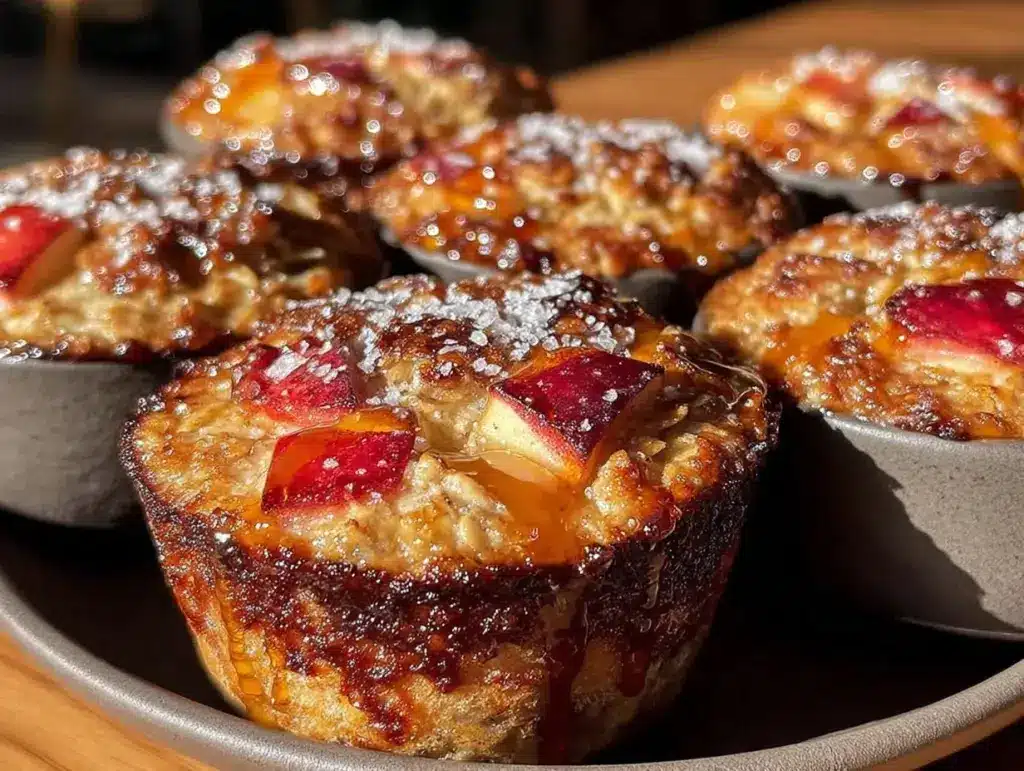
These baked apple cinnamon oatmeal cups changed our morning routine. They are basically edible muffins, but they’re made from pantry staples, cost pennies per serving, and can be made on Sunday for the entire week. My kids think they’re getting a treat because of the cinnamon sugar topping, but I know they’re getting fiber and protein that actually keeps them full until lunch. It’s a win-win.
I’ve tested this recipe about twenty times now—some with too much apple, some with too little cinnamon, some with the wrong oat type. This version? It’s the sweet spot. Soft, chewy, perfectly sweet, and sturdy enough to survive being thrown in a backpack. If you’re drowning in the back-to-school rush, these might just save your sanity.
Why You’ll Love This Recipe
I know what you’re thinking. “Oatmeal? Again?” But hear me out. These aren’t the mushy, sad bowls of porridge that kids complain about. These are baked, portion-controlled, and taste like dessert. Here’s why this is the ultimate budget breakfast hack:
Stupid Simple Prep — Seriously, if you can mix ingredients in a bowl, you can make these. I usually have all the ingredients in my pantry already. There’s no fancy equipment, no stand mixer, no complicated techniques. Just mix, pour, and bake.
Lightning Fast Mornings — The baking takes 25 minutes, but that’s hands-off time. On school mornings, these are ready to eat cold or warmed up for 30 seconds in the microwave. No cooking required while everyone is screaming to get out the door.
Pantry-Friendly — You don’t need to run to the store for this. Rolled oats, apples, eggs, milk, butter, cinnamon. These are staples. If you have them, you have breakfast for the week.
Budget-Friendly — This is the big one. A batch of these costs about $3 to $4 to make, depending on apple prices. That’s less than $0.50 per cup. Compare that to $3.50 for a granola bar or $5 for a breakfast sandwich at the drive-thru, and you’re saving enough for a family movie night by October.
Makes Amazing Leftovers — I deliberately make a double batch. They keep in the fridge for up to 5 days and freeze beautifully for up to 3 months. I keep a stash in the freezer for those days when I overslept and need a backup plan.
Kid-Approved — My pickiest eater, who usually refuses anything with “healthy” in the name, eats these without complaint. The cinnamon makes them smell like cookies, and the texture is chewy, not slimy. It’s a rare win.
This recipe has saved me more mornings than I can count. It’s my answer to “what’s for breakfast?” when I’m tired, broke, and out of ideas. No stress, no mess, just good food.
Ingredients You’ll Need
Here’s the best part: you probably have most of this already. I’m not asking you to buy exotic superfoods or expensive specialty flours. This is real, honest, budget cooking.
Rolled Oats (3 cups / 270g) — Use old-fashioned rolled oats. Quick oats will turn into mush, and steel-cut oats are too hard to bake into a cup. I buy the big store-brand boxes because they’re cheap and work perfectly. Don’t use instant oatmeal packets; they have too much sugar and additives.
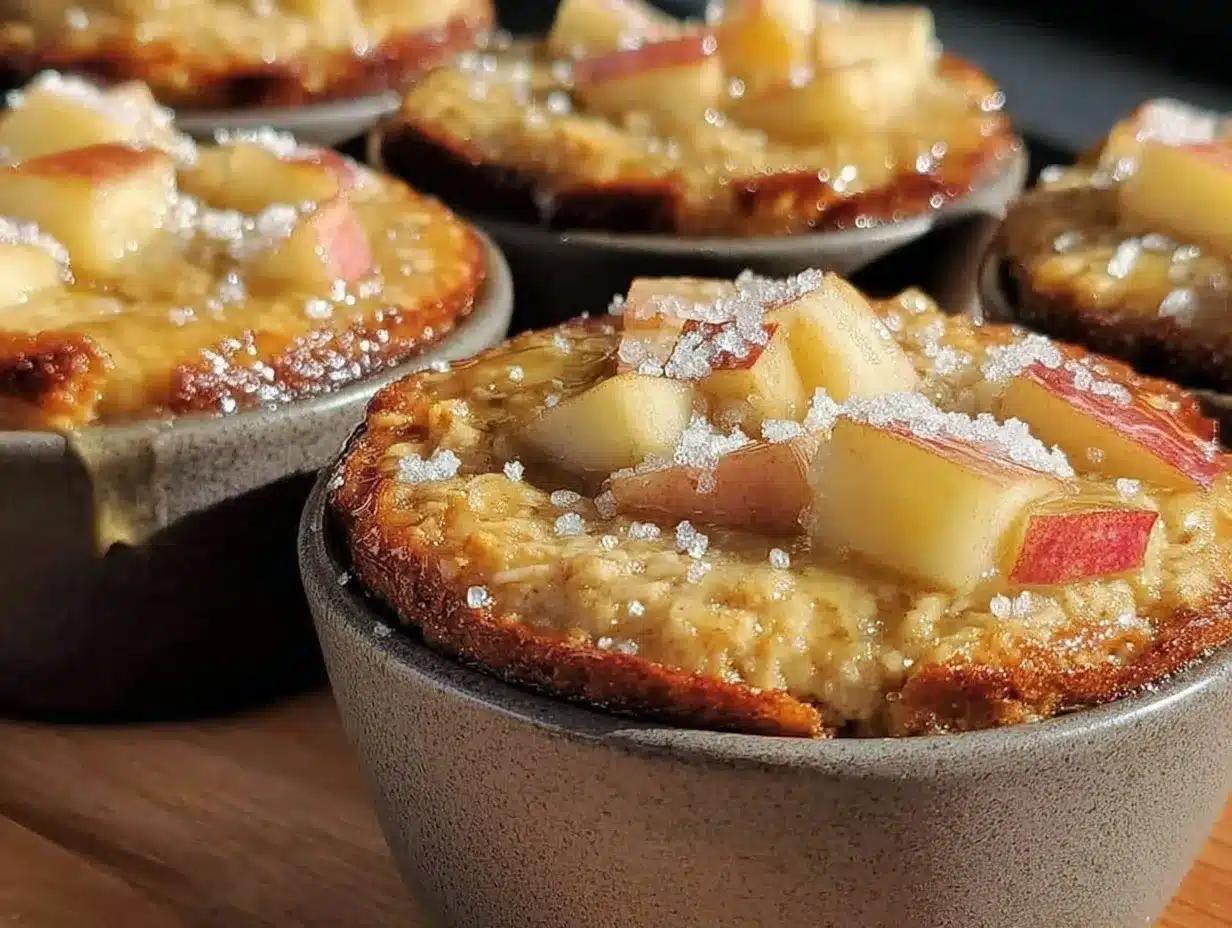
Apples (2 medium / about 300g) — I use Granny Smith apples for a tart contrast, but Honeycrisp or Fuji work great if you prefer sweeter. Peel them? Optional. I leave the peel on for extra fiber and color, but if your kids are picky about texture, peel them first. Dice them into small ½-inch cubes so they bake evenly.
Eggs (2 large) — These act as the binder. Room temperature eggs mix better, but cold eggs work fine too. Just whisk them well.
Milk (1 ½ cups / 360ml) — Whole milk makes them richer, but skim or 2% works fine if you’re watching calories. Dairy-free milk like almond or oat milk works too. I usually just use whatever is left in the carton.
Butter (¼ cup / 57g, melted) — Unsalted butter is best so you can control the salt. If you’re out of butter, coconut oil works, but it changes the flavor slightly. Don’t skip this; it adds richness.
Maple Syrup (¼ cup / 60ml) — I prefer real maple syrup for the depth of flavor, but brown sugar works too if you’re on a tight budget. It’s cheaper and still sweet. I use about half maple syrup and half brown sugar sometimes to stretch the expensive stuff.
Brown Sugar (½ cup / 100g, packed) — Adds moisture and a caramel-like taste. Dark brown sugar is stronger, light brown is milder. Either works.
Cinnamon (2 teaspoons) — The star flavor. Don’t use old, dusty cinnamon. If it doesn’t smell strong, throw it out and buy new. Fresh cinnamon makes all the difference.
Baking Powder (1 teaspoon) — Just a little bit to help them rise slightly. Don’t skip it, or they’ll be dense.
Salt (½ teaspoon) — Enhances the sweetness. Essential.
Vanilla Extract (1 teaspoon) — Adds warmth. Pure vanilla is best, but imitation works in a pinch.
For the Topping (Optional but Recommended)
Butter (2 tablespoons, softened) — Mix with sugar.
Granulated Sugar (2 tablespoons) — For sprinkling on top.
Cinnamon (½ teaspoon) — For the topping.
Pro Tip: I keep a bag of walnuts or pecans in my pantry. Adding ½ cup of chopped nuts is optional, but it adds great crunch and healthy fats. My husband loves them; my kids usually pick them out. I make two batches—one with nuts, one without.
Equipment Needed
You don’t need fancy equipment for this. Here’s what I actually use.
Muffin Tin — Standard 12-cup muffin tin. I use my well-loved non-stick one from the dollar store. It works fine. If you want smaller cups for snack-sized portions, you can use a mini muffin tin (bake time will be shorter).
Muffin Liners — Paper liners make cleanup easier. I use them because I hate washing the tin every morning. Silicone liners work too, but they don’t get the same crispy edges.
Large Mixing Bowl — Just something big enough to hold all the oats and wet ingredients. Any bowl works.
Whisk — For mixing the wet ingredients. Fork works if you don’t have one.
Measuring Cups and Spoons — Standard stuff. Dollar store versions work fine.
Pastry Brush — Optional, for brushing the muffin cups with butter if you aren’t using liners. I rarely use this because I use liners.
Knife and Cutting Board — For dicing the apples.
Freezer-Safe Containers — If you plan to freeze them. I use old plastic takeout containers or ziplock bags. Saves money on buying special freezer bags.
How to Make It: Step-by-Step
Alright, let’s make these! I’m walking you through exactly how I do it, including the little tricks I’ve picked up over the years.
Step 1: Prep the Oven and Pan (2 minutes)
Preheat your oven to 350°F (175°C). Line a 12-cup muffin tin with paper liners. I usually spray the liners with a little non-stick cooking spray just to be safe, though it’s not strictly necessary. This step ensures your cups don’t stick.
Step 2: Mix the Dry Ingredients (3 minutes)
In your large mixing bowl, combine the rolled oats, baking powder, salt, and cinnamon. Stir them together with a spoon. This distributes the cinnamon evenly so you don’t get a mouthful of pure spice in one bite.
Step 3: Mix the Wet Ingredients (2 minutes)
In a separate bowl or large measuring cup, whisk together the eggs, milk, melted butter, maple syrup (or brown sugar), and vanilla extract. Make sure the butter is melted but not hot, so it doesn’t cook the eggs. Whisk until it’s all smooth and combined.
Step 4: Combine Everything (2 minutes)
Pour the wet ingredients into the dry ingredients. Stir gently with a spatula or spoon until everything is moistened. Don’t overmix; just get the dry spots gone. It will look thick and chunky. That’s good.
Step 5: Add the Apples
Stir in the diced apples. If you’re adding nuts, do it now. Make sure the apples are evenly distributed. I usually do one last fold to make sure every cup will get a piece of apple.
Step 6: Fill the Cups (2 minutes)
Scoop the mixture into the muffin liners. Fill each one about ¾ full. Don’t overfill them, or they’ll spill over in the oven. I use an ice cream scoop or a large spoon for this. It makes them all the same size, which helps them bake evenly.
Step 7: Add the Topping (1 minute)
In a small bowl, mix the softened butter, sugar, and cinnamon for the topping. It should look like wet sand. Sprinkle a teaspoon of this mixture on top of each oatmeal cup. This creates that delicious, crispy, cinnamon-sugar crust that makes them taste like treats.
Step 8: Bake (20-25 minutes)
Place the tin in the oven and bake for 20-25 minutes. You’ll know they’re done when the tops are golden brown and a toothpick inserted into the center comes out clean (or with just a few moist crumbs). They might look slightly soft when you take them out, but they’ll firm up as they cool.
Step 9: Cool and Serve
Let them cool in the pan for 5 minutes, then transfer to a wire rack to cool completely. They are safe to eat warm, but they’re much easier to handle once they’re cool. They can be stored at room temperature for 2 days, in the fridge for 5 days, or in the freezer for 3 months.
Total Time: About 35 minutes (10 minutes prep, 25 minutes bake)
Expert Tips & Tricks
Here’s everything I’ve learned from making this dozens of times. These tips will save you from my mistakes.
Don’t Use Quick Oats
I made this mistake once. I used quick oats because I was in a hurry. The result was a soggy, mushy mess that fell apart when I picked it up. Stick to old-fashioned rolled oats. They hold their structure and give you that chewy texture.
Dice Apples Small
If your apple chunks are too big, they won’t cook all the way through and can be hard to chew. Dice them into ½-inch cubes. They should be small enough to eat with a fork but big enough to feel like a real apple bite.
Freeze in Single Layers
If you’re freezing them, place them in a single layer on a baking sheet first and freeze for an hour. Then transfer to a bag. This prevents them from sticking together in a giant clump. You can grab one or two at a time instead of thawing the whole batch.
Reheat with a Splash of Milk
If you’re reheating them in the microwave, they can dry out. Add a few drops of water or milk to the cup before heating. It creates steam and keeps them moist. 30 seconds is usually enough.
Double the Batch
This recipe doubles easily. I make two batches every Sunday. One batch goes in the fridge for the week, and the other goes in the freezer. It’s worth the extra 10 minutes of prep to have breakfast sorted for a month.
Customize the Sweetness
If your kids are sensitive to sugar, reduce the brown sugar to ¼ cup and skip the topping. They still taste sweet from the apples and maple syrup. If you want them sweeter, increase the brown sugar and add a little nutmeg to the topping.
Variations & Substitutions
Once you’ve nailed the basic version, here’s how you can mix it up. I’ve tried all of these.
Banana Nut Version
Swap the apples for 2 mashed ripe bananas. Add ½ cup chopped walnuts or pecans. It tastes like banana bread. My kids love this version, especially in the winter.
Pumpkin Spice Version
Add ½ cup canned pumpkin puree and swap the cinnamon for pumpkin pie spice. It’s perfect for fall. Reduce the milk to 1 cup because the pumpkin adds moisture.
Chocolate Chip Version
Add ½ cup chocolate chips instead of apples. It’s basically oatmeal cookies in cup form. Use semi-sweet or dark chocolate chips for less sugar.
Gluten-Free
Use certified gluten-free rolled oats. Everything else is naturally gluten-free. I’ve used Bob’s Red Mill oats and they work great. Check your baking powder to make sure it’s GF too.
Dairy-Free
Replace the butter with coconut oil or a dairy-free butter alternative. Use oat milk or almond milk instead of dairy milk. The topping butter can also be swapped for coconut oil.
Vegan
Replace the eggs with “flax eggs” (2 tablespoons ground flaxseed mixed with 5 tablespoons water, let sit for 5 minutes). Use maple syrup instead of honey (if using honey). Swap dairy milk for plant milk and butter for coconut oil.
Protein Boost
Add 2 tablespoons of protein powder (vanilla or unflavored works best) to the dry ingredients. You might need to add a splash more milk because protein powder absorbs liquid. Great for growing kids or active teens.
Serving & Storage
How to Serve:
I usually serve these straight out of the muffin tin. They’re sturdy and easy to handle. For breakfast, I pair them with a piece of fruit or a glass of milk. For snacks, they’re perfect with a side of yogurt or cheese sticks. They travel well in lunchboxes too—just make sure they’re completely cool before packing, or they’ll get soggy.
Refrigerator:
Store in an airtight container for up to 5 days. They actually get slightly chewier and more flavorful after a day or two. I keep them in the fridge because I know they’ll last.
Freezer:
Store in a freezer-safe bag or container for up to 3 months. Label the bag with the date so you don’t forget. They thaw quickly at room temperature or can be eaten cold straight from the freezer.
Reheating:
Microwave for 30-60 seconds. If you’re reheating from frozen, add 30 seconds. Don’t overheat them, or they’ll become rubbery. Oven reheating is also an option at 350°F for 10 minutes, but who has time for that in the morning?
Pro Tip: If you’re meal-prepping for a busy week, make a double batch on Sunday. Pack one batch for the fridge and one for the freezer. Rotate them so you always have fresh ones available. It’s the ultimate time-saver.
Nutrition Information
I’m not a nutritionist, but here’s the breakdown if you’re tracking. These are estimates based on standard ingredients.
Per Serving (1 cup, based on 12 servings):
- Calories: 180
- Protein: 5g
- Carbs: 32g
- Fiber: 3g
- Sugar: 14g
- Fat: 5g
- Saturated Fat: 2g
- Cholesterol: 25mg
- Sodium: 120mg
What’s Good:
- Good source of fiber from the oats
- Contains vitamins from the apples
- Lower in sugar than most breakfast pastries
- Whole grain carbs for sustained energy
What to Know:
- Higher in carbs due to oats and fruit
- Contains dairy and eggs (unless modified)
- Sugar content can be adjusted by reducing syrup/brown sugar
My Take:
Look, this is breakfast food. It’s not a diet pill. But it’s way better than a donut or a sugary cereal. It has real ingredients, fiber, and protein. When I want to make it lighter, I reduce the sugar and use skim milk. But usually? I just eat a reasonable portion and enjoy it. It’s fuel for a busy day.
Final Thoughts
So that’s my go-to baked apple cinnamon oatmeal cup recipe! I’ve probably talked your ear off at this point, but when you make a recipe this often, you have a lot to say about it.
This has saved my mornings more times than I can count. It’s my answer to “what’s for breakfast?” when I’m tired, don’t want to cook, and still want something that tastes really good. My kids are happy, my husband’s happy, and I’m happy because I’m not stressed about cooking.
Make it yours! Try different add-ins, swap in your favorite fruits, adjust the spices. The best recipes are the ones you adapt to your family’s tastes. If you make this, drop a comment and let me know what you think! I love hearing how recipes turn out in your kitchen. And if something doesn’t work, tell me that too—I’m here to help troubleshoot.
Happy cooking! And I hope your kitchen smells half as good as mine does right now.
Frequently Asked Questions
Can I use quick oats instead of rolled oats?
I don’t recommend it. Quick oats are processed more and will turn into a mushy, porridge-like texture when baked. Rolled oats hold their shape and give you that chewy, cookie-like texture. If you only have quick oats, you can try it, but expect a softer result.
Can I make these ahead and freeze them?
Yes! This is one of my favorite things about this recipe. Bake them, let them cool completely, and store them in a freezer-safe bag or container. They last up to 3 months in the freezer. Reheat in the microwave for 30-60 seconds. They taste just as good as fresh.
How do I store leftovers?
Store them in an airtight container in the fridge for up to 5 days. They get slightly chewier after a day or two, which I actually prefer. If you want them soft, reheat them in the microwave with a splash of milk.
Can I use different fruits instead of apples?
Absolutely. Bananas, berries, peaches, or even pumpkin puree work great. Just keep the amount similar to the apples (about 1-2 cups). Berries might make the batter wetter, so you may need to add a little more oats.
Why did my oatmeal cups turn out dry?
This usually happens if you overbake them. Check them at 20 minutes. They should still look slightly soft in the center when you take them out. They will firm up as they cool. Also, make sure you’re using rolled oats, not quick oats, which can absorb more liquid.
Can I make these in a mini muffin tin?
Yes! Just reduce the baking time to 12-15 minutes. They make great snacks or breakfast bites for smaller kids. The topping works great on mini cups too.
Is this recipe kid-friendly?
Yes! Most kids love them because they taste sweet and cinnamon-y, like cookies. They’re easy to hold and eat on the go. If your kids are picky, you can reduce the cinnamon or add chocolate chips to make them more appealing.
Pin This Recipe!


Easy Baked Apple Cinnamon Oatmeal Cups
- Total Time: 35 minutes
- Yield: 12 servings 1x
Description
Budget-friendly, kid-approved baked oatmeal cups made with pantry staples. These portable breakfasts are perfect for busy mornings, offering a chewy texture and cinnamon-sugar flavor that keeps children full until lunch.
Ingredients
- 3 cups old-fashioned rolled oats
- 2 medium apples (diced into ½-inch cubes)
- 2 large eggs
- 1 ½ cups milk
- ¼ cup melted unsalted butter
- ¼ cup maple syrup
- ½ cup packed brown sugar
- 2 teaspoons cinnamon
- 1 teaspoon baking powder
- ½ teaspoon salt
- 1 teaspoon vanilla extract
- 2 tablespoons softened butter (for topping)
- 2 tablespoons granulated sugar (for topping)
- ½ teaspoon cinnamon (for topping)
Instructions
- Preheat oven to 350°F (175°C). Line a 12-cup muffin tin with paper liners.
- In a large mixing bowl, combine rolled oats, baking powder, salt, and 2 teaspoons cinnamon. Stir to distribute evenly.
- In a separate bowl or measuring cup, whisk together eggs, milk, melted butter, maple syrup, and vanilla extract until smooth.
- Pour wet ingredients into dry ingredients and stir gently with a spatula until just moistened. Do not overmix.
- Stir in diced apples (and nuts if using) until evenly distributed.
- Scoop mixture into muffin liners, filling each about ¾ full.
- Mix softened butter, granulated sugar, and ½ teaspoon cinnamon for the topping. Sprinkle a teaspoon of this mixture onto each cup.
- Bake for 20-25 minutes until tops are golden brown and a toothpick inserted comes out clean.
- Cool in the pan for 5 minutes, then transfer to a wire rack to cool completely before serving or storing.
Notes
Use old-fashioned rolled oats, not quick oats, to maintain texture. Apples can be peeled if preferred, but leaving the peel on adds fiber. These store in the fridge for 5 days or freeze for up to 3 months. For freezing, place in a single layer on a baking sheet first to prevent sticking. Reheat in microwave with a splash of milk to keep moist.
- Prep Time: 10 minutes
- Cook Time: 25 minutes
- Category: Breakfast
- Cuisine: American
Nutrition
- Serving Size: 1 cup
- Calories: 180
- Sugar: 14
- Sodium: 120
- Fat: 5
- Saturated Fat: 2
- Carbohydrates: 32
- Fiber: 3
- Protein: 5
Keywords: baked oatmeal, breakfast cups, budget breakfast, kid-friendly breakfast, meal prep, apple cinnamon, oatmeal muffins, easy breakfast


