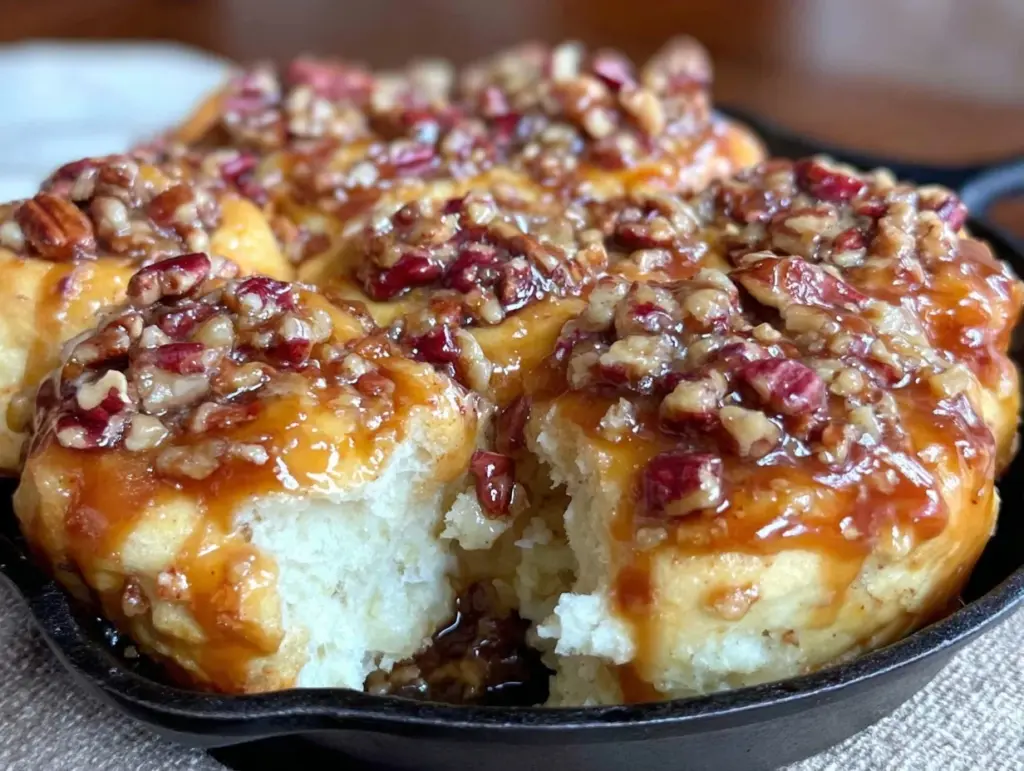
It started with a half-empty jar of maple syrup and a bag of pecans I’d been meaning to use for months. I was staring into my pantry on a crisp Saturday morning, the kind where the air smells like burnt leaves and woodsmoke, wondering what to make for breakfast that wouldn’t leave me stressed by 9 AM. My kids were already arguing over who got the blue bowl, and my husband was scrolling through his phone, pretending he didn’t hear the refrigerator humming. That’s when I decided to stop buying those frozen, cardboard-like sticky buns from the grocery store and actually make them from scratch.
What happened next was not just a breakfast—it was a declaration of war against boring weekend mornings. These fall maple pecan sticky buns are the kind of recipe that turns your house into a bakery and your family into devoted fans. I’ve made them at least ten times in the last two months, sometimes just for us, sometimes for the neighborhood kids who wander in smelling the brown butter. And every single time, they come out gooey, caramelized, and impossibly soft.
Here’s the thing about sticky buns: most people think they’re too hard to make at home. They’re intimidated by yeast, or they worry about the glaze, or they think they need fancy equipment. But this recipe? It’s designed for real life. It’s budget-friendly, uses ingredients you probably already have, and if you mess up the timing (which I have), it still tastes incredible. This is the fall maple pecan sticky buns recipe that saved my weekend mornings. It’s sweet, it’s spiced, and it’s the perfect way to start the day without spending half your afternoon in the kitchen.
Why You’ll Love This Recipe
Look, I’m not going to lie to you. Making bread from scratch takes time. But the payoff here is massive. These buns have completely changed our weekend dynamic. Instead of rushing out to a café where a single pastry costs $6 and is basically dry air, we’re sitting at the table with steaming mugs of coffee and these warm, gooey treats. Here’s why this recipe earns a permanent spot in our rotation:
- Stupid Simple for Beginners — Seriously, if you can mix flour and water, you can make these. I’ve walked my teenage daughter through the kneading process over FaceTime while she was at college. She called me to say she nailed it. No fancy techniques, just good old-fashioned mixing and waiting.
- Lightning Fast Prep (After Rising) — The active work is maybe 20 minutes. The rest is just letting the dough rise. I usually start these the night before, so on Saturday morning, I just mix, roll, and bake. It’s basically zero effort until you pull the pan out of the oven.
- Pantry-Friendly Ingredients — You don’t need exotic spices or expensive cheese. Just flour, sugar, butter, maple syrup, and pecans. I keep a jar of maple syrup and a bag of pecans stocked specifically for these. If you have basic baking supplies, you’re good to go.
- Budget-Smart — This is the big one. A box of frozen buns runs you $5-$8 for just six tiny ones. This recipe makes 12 huge, generous buns for under $4 in ingredients. That’s less than $0.50 per bun. My husband does the math sometimes just to feel smug about our savings.
- Makes Amazing Leftovers — Actually, these are best reheated. I make a double batch because the leftovers taste even better the next day, warmed up in the microwave with a splash of milk in the glaze. They’re perfect for lunch snacks or a quick dinner treat.
This is my go-to when I want to impress guests without spending all day cooking. It’s reliable, delicious, and makes everyone happy. Even my picky eater kid, who usually only eats toast, asks for “the gooey ones” on weekends.
Ingredients You’ll Need
Here’s the best part: you probably have most of this already. This recipe relies on simple, affordable staples that don’t require a trip to a specialty store. I’m particular about a few things, but mostly, it’s about technique over expensive ingredients.
For the Dough
Active Dry Yeast (1 packet / 2.25 tsp) — Standard packet works fine. I use Red Star. Make sure it’s not expired! If your yeast is old, the dough won’t rise, and you’ll end up with brick buns. I’ve learned this the hard way.
Warm Milk (1 cup / 240ml) — Whole milk is best for richness, but 2% works too. It needs to be warm, like bathwater temperature (about 110°F). Too hot, and you kill the yeast. Too cold, and it won’t rise. I test it on my wrist—it should feel warm, not hot.
Granulated Sugar (¼ cup / 50g) — Feeds the yeast and adds sweetness. Don’t skip this. The yeast needs food to activate.
Unsalted Butter (¼ cup / 57g, melted) — Adds tenderness to the dough. I use butter, not oil, because it tastes better. If you’re out of butter, you can use neutral oil, but the flavor won’t be as rich.
Large Egg (1) — Room temperature is best. If you forget, just drop it in warm water for 5 minutes. It helps bind the dough and adds structure.
All-Purpose Flour (3 to 3.5 cups / 375-435g) — This is where it gets tricky. You don’t need bread flour, but all-purpose works well. Add flour slowly. The dough should be soft and slightly sticky, not stiff. If you add too much, the buns will be dense. I usually use 3 cups, but it depends on the humidity.
Salt (1 tsp) — Essential for flavor. Don’t skip it, even though it’s a sweet recipe.
For the Filling
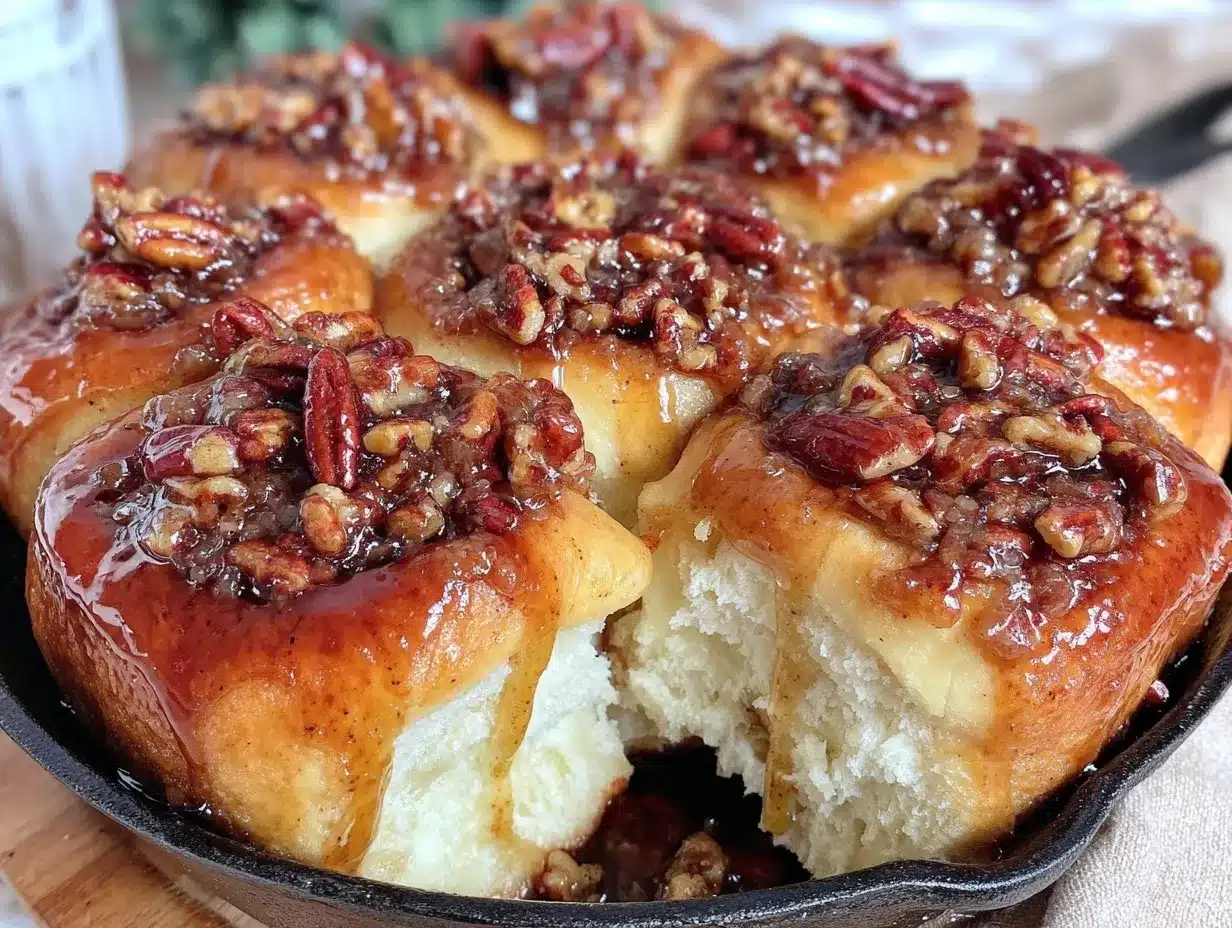
Dark Brown Sugar (1 cup / 200g) — Packed tight. This gives the deep, molasses flavor that makes sticky buns taste like fall. Light brown sugar works, but dark is better.
Ground Cinnamon (2 tsp) — Use fresh cinnamon. Old cinnamon tastes dusty. I buy mine in small quantities to ensure freshness.
Unsalted Butter (¼ cup / 57g, softened) — This goes into the filling to help the sugar stick and add richness.
Pecans (1 cup / 120g, chopped) — I buy these in bulk bags to save money. Chopped pecans add crunch and texture. You can skip them if you’re allergic, but they’re worth it.
For the Brown Butter Glaze
Unsalted Butter (½ cup / 113g) — This is for browning. Yes, you brown the butter for the glaze. It adds a nutty, toasty depth that regular glaze lacks. It sounds fancy, but it’s just cooking butter until it smells like hazelnuts.
Confectioners’ Sugar (2 cups / 240g) — Sifted if it’s clumpy. You want a smooth glaze.
Maple Syrup (3 tablespoons / 45ml) — Use real maple syrup, not pancake syrup. The grade doesn’t matter much, but avoid the stuff that says “pancake syrup” on the bottle. It’s just corn syrup with flavoring.
Heavy Cream (2-3 tablespoons / 30-45ml) — Adjust for consistency. You want it pourable but thick enough to coat the buns.
Salt (¼ tsp) — Just a pinch to balance the sweetness.
Equipment Needed
You don’t need fancy equipment for this. Here’s what I actually use.
Large Mixing Bowl — I use a 5-quart bowl. It needs to be big enough to let the dough expand without making a mess.
Stand Mixer or Hand Mixer — I have a stand mixer and love it, but you can absolutely do this by hand. Kneading by hand takes about 10 minutes of elbow grease. I’ve done it, and it’s fine. Just don’t skip the kneading.
9×13 Inch Baking Pan — I use a metal pan, not glass. Metal conducts heat better for the bottom crust. If you use glass, reduce the oven temperature by 25°F. I’ve ruined buns in glass pans before—they burn on the bottom. Lesson learned.
Small Saucepan — For melting butter and browning it for the glaze. A small one is best so you can watch the butter closely.
Whisk — For mixing the glaze. A fork works too, but a whisk is faster.
Pastry Brush — Optional, but nice for brushing the pan with butter before adding the pecans. I use a silicone brush because it’s easy to clean.
Sharp Knife — For chopping pecans. If you don’t have a knife, you can buy them pre-chopped, but chopping them yourself ensures even pieces.
How to Make It: Step-by-Step
Alright, let’s make this! I’m walking you through exactly how I do it, including the little tricks I’ve picked up.
Step 1: Activate the Yeast (5 minutes)
In the bowl of your stand mixer (or a large bowl), combine the warm milk and sugar. Sprinkle the yeast over the top and stir gently. Let it sit for 5-10 minutes until it gets foamy. If it doesn’t foam, your yeast is dead, and you need to start over. I’ve made that mistake once, and it was a sad, flat breakfast. Don’t be me.
Step 2: Mix the Dough (10 minutes)
Add the melted butter, egg, and salt to the yeast mixture. Beat on medium speed for 2 minutes. Then, add the flour one cup at a time. Switch to the dough hook (or use your hands) and knead for 5-7 minutes. The dough should be soft, smooth, and slightly sticky. If it’s too wet, add a tablespoon of flour. If it’s too dry, add a tablespoon of milk. It should pull away from the sides of the bowl but still feel tacky.
Step 3: First Rise (1-2 hours)
Lightly grease a clean bowl with oil or butter. Place the dough inside and turn it once to coat. Cover with plastic wrap or a damp towel. Let it rise in a warm spot until doubled in size. This takes about 1-2 hours. If your kitchen is cold, put it in the oven with the light on. The light generates a little heat. I usually do this while I’m drinking my coffee.
Step 4: Make the Filling (5 minutes)
While the dough rises, mix the brown sugar and cinnamon in a small bowl. Melt the ¼ cup of butter for the filling and let it cool slightly. Chop your pecans. This is prep work, so you’re ready to go when the dough is done.
Step 5: Roll and Fill (10 minutes)
Punch down the risen dough gently. Roll it out on a floured surface into a 12×16 inch rectangle. Spread the melted butter evenly over the dough, leaving a ½ inch border on one long side. Sprinkle the brown sugar-cinnamon mixture evenly over the butter. Sprinkle the chopped pecans on top. Starting from the long side, roll the dough up tightly into a log. Pinch the seam to seal it. If it unravels, you didn’t roll it tight enough. Try again.
Step 6: Cut and Second Rise (30 minutes)
Brush your 9×13 pan with butter. I also sprinkle a few extra pecans on the bottom for extra crunch. Cut the log into 12 equal slices. I use a sharp knife or dental floss (yes, really! It cuts cleanly without squishing the buns). Place the slices in the pan, cut side up. Cover loosely and let them rise again for 30 minutes. They’ll puff up and touch each other. This is crucial for those gooey, connected buns.
Step 7: Bake (25-30 minutes)
Preheat your oven to 350°F (175°C). Bake the buns for 25-30 minutes until they are golden brown. If they start browning too fast on top, cover them loosely with foil. They should feel springy when you press them gently.
Step 8: Make the Brown Butter Glaze (10 minutes)
While the buns bake, make the glaze. Melt the ½ cup butter in a saucepan over medium heat. Stir constantly. The butter will foam, then crackle. Watch it closely. Once the foam subsides and you see brown specks at the bottom and smell a nutty aroma, remove it from the heat. Let it cool for 2 minutes. Whisk in the confectioners’ sugar, maple syrup, cream, and salt. It will be thick. If it’s too thick, add more cream. If too thin, add more sugar.
Step 9: Invert and Serve
Let the buns cool in the pan for 5-10 minutes. Then, place a large serving platter over the pan. Using oven mitts, quickly and confidently flip the pan over. The buns should release easily. If one sticks, just pull it out with a fork. Drizzle the warm brown butter glaze over the buns while they’re still warm. The glaze will soak in and create that sticky, caramelized bottom. Serve immediately. They get hard if they cool too long.
Expert Tips & Tricks
Here’s everything I’ve learned from making these dozens of times. These tips will save you from my mistakes.
- Don’t Skip the Second Rise — This is the secret to fluffy buns. If you bake them right after cutting, they’ll be dense. Give them that extra 30 minutes to puff up.
- Brown the Butter Carefully — It goes from perfect to burnt in seconds. When you see brown bits, take it off the heat immediately. The residual heat will keep cooking it slightly.
- Use Dental Floss for Cutting — It sounds weird, but it works. Slide the floss under the log, cross it over the top, and pull. It cuts cleanly without compressing the dough. I was skeptical, but now I’m a believer.
- Glaze While Warm — If the buns are cold, the glaze won’t soak in. If they’re too hot, the glaze runs off. 5-10 minutes after flipping is the sweet spot.
- Doubling the Batch — I often double this recipe for holiday gatherings. Just use two pans or a larger pan. The timing stays the same. It’s worth the effort because everyone asks for the recipe.
Variations & Substitutions
Once you’ve nailed the basic version, here’s how you can mix it up. I’ve tried all of these.
Maple Pecan Blondie Twist — If you love the flavor profile of my maple pecan blondies with brown butter, you can add a layer of blondie batter under the buns for a denser, bar-like texture. It’s indulgent and fun.
Walnut Version — Swap pecans for walnuts. Some people prefer the slightly bitter note of walnuts. It’s a classic combination.
Gluten-Free — Use a 1:1 gluten-free flour blend with xanthan gum. The dough will be stickier, so you might need a bit more flour. It works surprisingly well.
Dairy-Free — Use plant-based milk and butter substitutes. The glaze can be made with coconut cream. It’s not as rich, but it’s still tasty.
Add-Ins — Throw in some dried cranberries or chopped apples for extra fall flavor. I did this once for Thanksgiving, and it was a hit.
Serving & Storage
How to Serve: I serve these straight from the pan, platter and all. It looks rustic and stays warm. Pair with strong coffee or hot chocolate. If you’re serving a crowd, these go fast. I usually make a double batch and freeze the extras.
Storage: Store leftovers in an airtight container at room temperature for up to 2 days. If it’s hot outside, refrigerate them. They’ll harden in the fridge, so reheat them in the microwave for 15 seconds to soften.
Reheating: Microwave for 10-15 seconds. Or warm them in a 300°F oven for 5-10 minutes. Never eat these cold—they’re meant to be gooey.
Freezing: You can freeze the baked buns (without glaze) for up to 3 months. Thaw overnight and reheat. Or freeze the unbaked dough after the second rise, then bake from frozen (add 5-10 minutes to bake time). I do this when I want fresh buns on a random Tuesday.
Meal Prep Tip: Make the dough on Sunday, let it rise, then refrigerate it. On Saturday morning, roll, fill, and let them rise again. It spreads out the work and makes Saturday morning stress-free.
Nutrition Information
I’m not a nutritionist, but here’s the breakdown if you’re tracking. This is a treat, so enjoy it guilt-free.
Per Serving (based on 12 buns):
- Calories: 450
- Protein: 6g
- Carbs: 65g
- Fiber: 2g
- Sugar: 40g
- Fat: 18g
It’s sweet, it’s rich, and it’s perfect for a special breakfast. If you want to lighten it up, reduce the sugar in the dough and use less butter in the glaze. But honestly? These are meant to be indulgent. Just share them with someone you love.
Final Thoughts
So that’s my go-to fall maple pecan sticky buns recipe! I’ve talked your ear off, but when you make a recipe this often, you have a lot to say about it. These buns have saved my weekends. They’re my answer to “what’s for breakfast” when I want something special but don’t want to stress. My kids are happy, my husband is happy, and I’m happy because I’m not spending a fortune on pastries.
Make it yours! Try different nuts, add fruit, or change the glaze. The best recipes are the ones you adapt to your family’s tastes. If you make this, drop a comment and let me know what you think! I love hearing how recipes turn out in your kitchen.
Happy baking! And I hope your house smells like heaven.
Frequently Asked Questions
Can I make this ahead for a dinner party?
Yes! Make the dough and let it rise overnight in the fridge. In the morning, roll, fill, and let them do their second rise. Then bake. It’s a great way to prep ahead. I do this for brunches all the time.
Why did my buns turn out dense?
Usually, this means the yeast was dead, or you added too much flour. Make sure your milk is warm (not hot) to activate the yeast. And don’t be afraid of sticky dough. More flour equals denser buns.
Can I use active yeast instead of instant?
Yes. Active yeast just needs to be dissolved in warm liquid first (which this recipe does). Instant yeast can be mixed directly with flour. Both work fine here.
How do I store leftovers?
Keep them in an airtight container at room temperature for 2 days. Reheat in the microwave to restore the gooey texture. They don’t freeze well with the glaze on, so freeze without glaze if possible.
Can I double the recipe?
Absolutely. Use two 9×13 pans or a larger pan. The baking time stays the same. I double it for holidays because they disappear so fast.
What if I don’t have maple syrup?
You can use honey or brown sugar syrup, but maple gives that distinct fall flavor. If you must substitute, use honey, but the taste will be different.
Pin This Recipe!
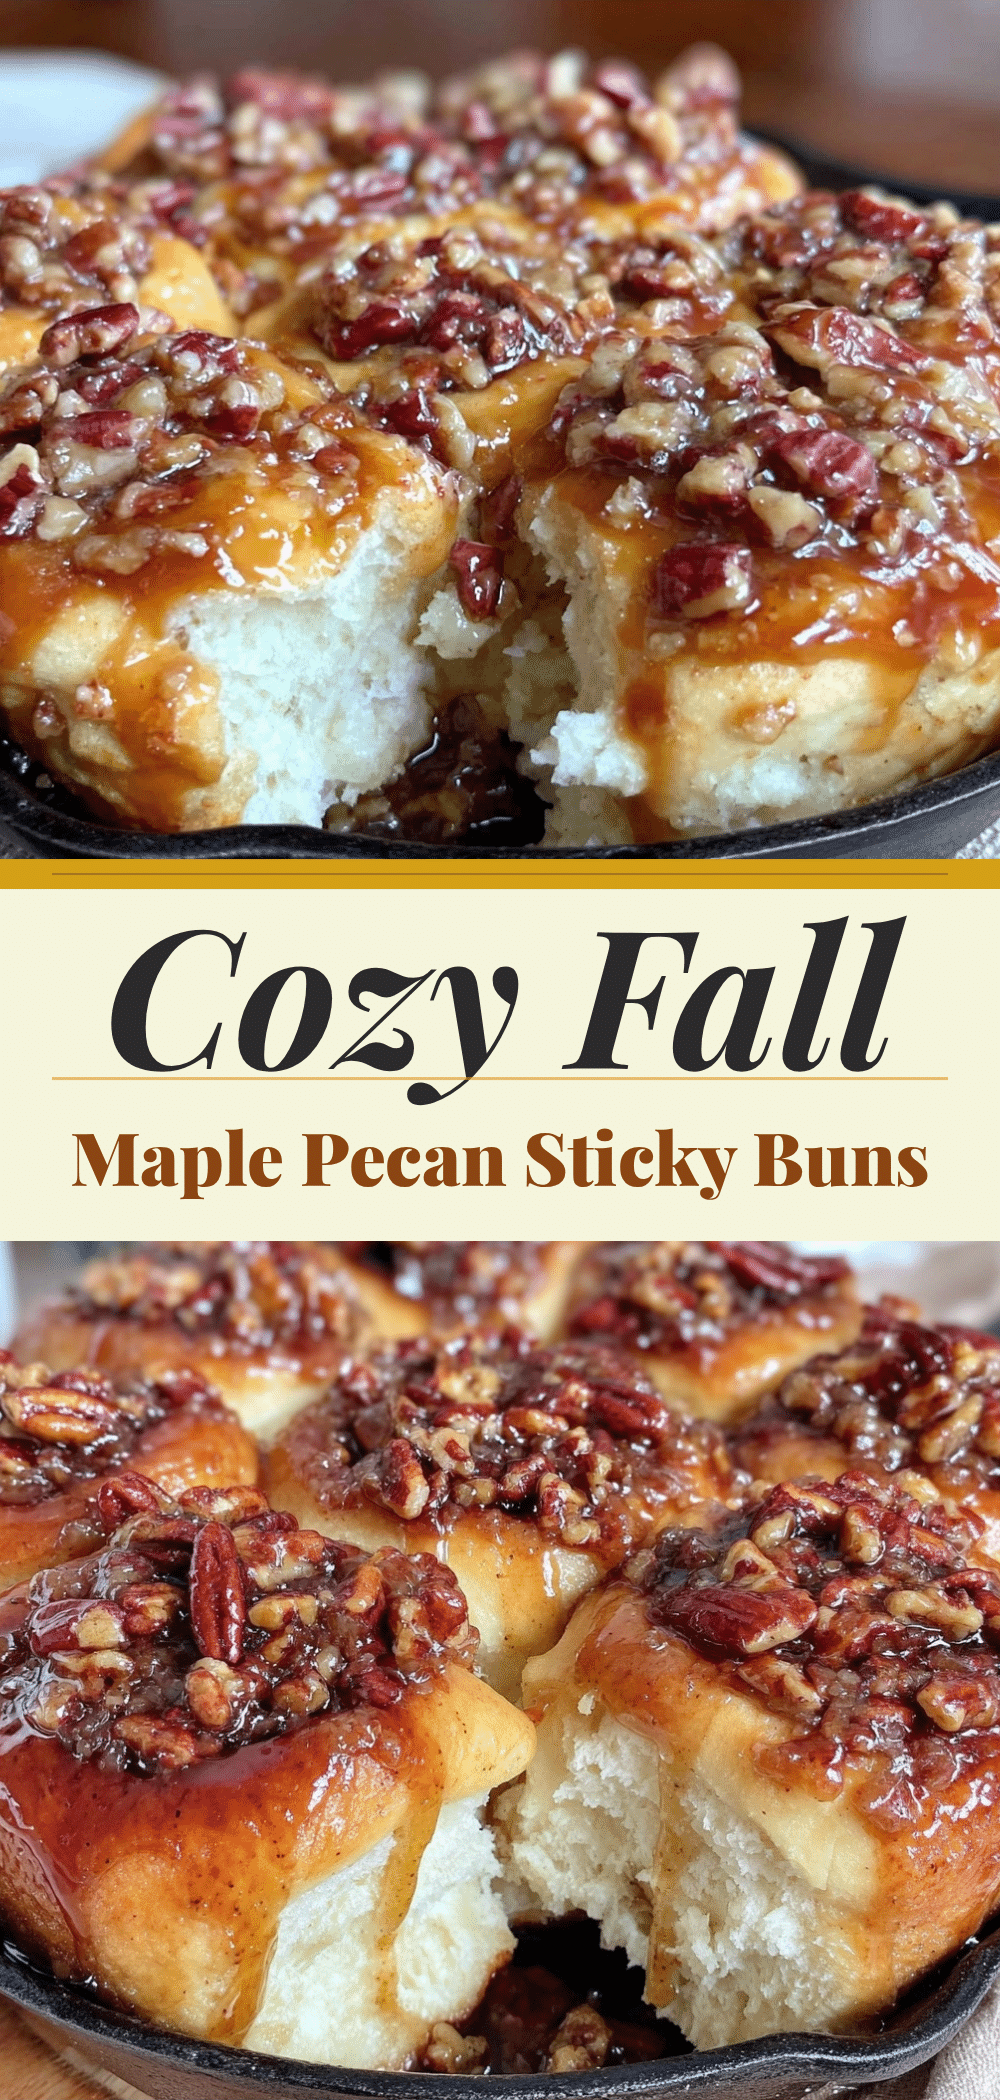
Fall Maple Pecan Sticky Buns
- Total Time: 1 hour 30 minutes
- Yield: 12 servings 1x
Description
Easy, budget-friendly homemade sticky buns with a rich brown butter maple glaze and toasted pecans. Perfect for weekend breakfasts or brunches.
Ingredients
- 1 packet (2.25 tsp) active dry yeast
- 1 cup warm milk (about 110°F)
- ¼ cup granulated sugar
- ¼ cup unsalted butter, melted
- 1 large egg, room temperature
- 3 to 3.5 cups all-purpose flour
- 1 tsp salt
- 1 cup dark brown sugar, packed
- 2 tsp ground cinnamon
- ¼ cup unsalted butter, softened (for filling)
- 1 cup pecans, chopped
- ½ cup unsalted butter (for glaze)
- 2 cups confectioners’ sugar
- 3 tablespoons real maple syrup
- 2–3 tablespoons heavy cream
- ¼ tsp salt (for glaze)
Instructions
- In a large bowl or stand mixer, combine warm milk and sugar. Sprinkle yeast over the top and let sit for 5-10 minutes until foamy.
- Add melted butter, egg, and salt to the yeast mixture. Beat on medium speed for 2 minutes.
- Add flour one cup at a time. Switch to a dough hook or knead by hand for 5-7 minutes until the dough is soft, smooth, and slightly sticky.
- Place dough in a greased bowl, cover, and let rise in a warm spot for 1-2 hours until doubled in size.
- While dough rises, mix brown sugar and cinnamon. Melt ¼ cup butter for the filling and chop pecans.
- Punch down risen dough and roll out on a floured surface into a 12×16 inch rectangle.
- Spread softened butter over the dough, leaving a ½ inch border. Sprinkle with brown sugar-cinnamon mixture and chopped pecans.
- Roll dough tightly into a log and pinch the seam to seal.
- Brush a 9×13 inch baking pan with butter. Cut the log into 12 equal slices and place them in the pan, cut side up.
- Cover loosely and let buns rise again for 30 minutes.
- Preheat oven to 350°F (175°C). Bake buns for 25-30 minutes until golden brown.
- While buns bake, melt ½ cup butter in a saucepan over medium heat until it foams, crackles, and turns brown with a nutty aroma. Remove from heat.
- Whisk confectioners’ sugar, maple syrup, heavy cream, and ¼ tsp salt into the brown butter until smooth.
- Let buns cool in the pan for 5-10 minutes.
- Place a serving platter over the pan and quickly flip to invert the buns.
- Drizzle warm brown butter glaze over the buns and serve immediately.
Notes
Ensure yeast is not expired and milk is warm (not hot) to activate it. Do not skip the second rise for fluffy buns. Brown butter carefully as it burns quickly. Use dental floss to cut buns cleanly if preferred. Best served warm; leftovers can be reheated in the microwave.
- Prep Time: 30 minutes
- Cook Time: 30 minutes
- Category: Breakfast
- Cuisine: American
Nutrition
- Serving Size: 1 bun
- Calories: 450
- Sugar: 40
- Sodium: 350
- Fat: 18
- Saturated Fat: 10
- Carbohydrates: 65
- Fiber: 2
- Protein: 6
Keywords: sticky buns, maple pecan buns, breakfast recipe, weekend brunch, homemade bread, fall recipes, budget baking


