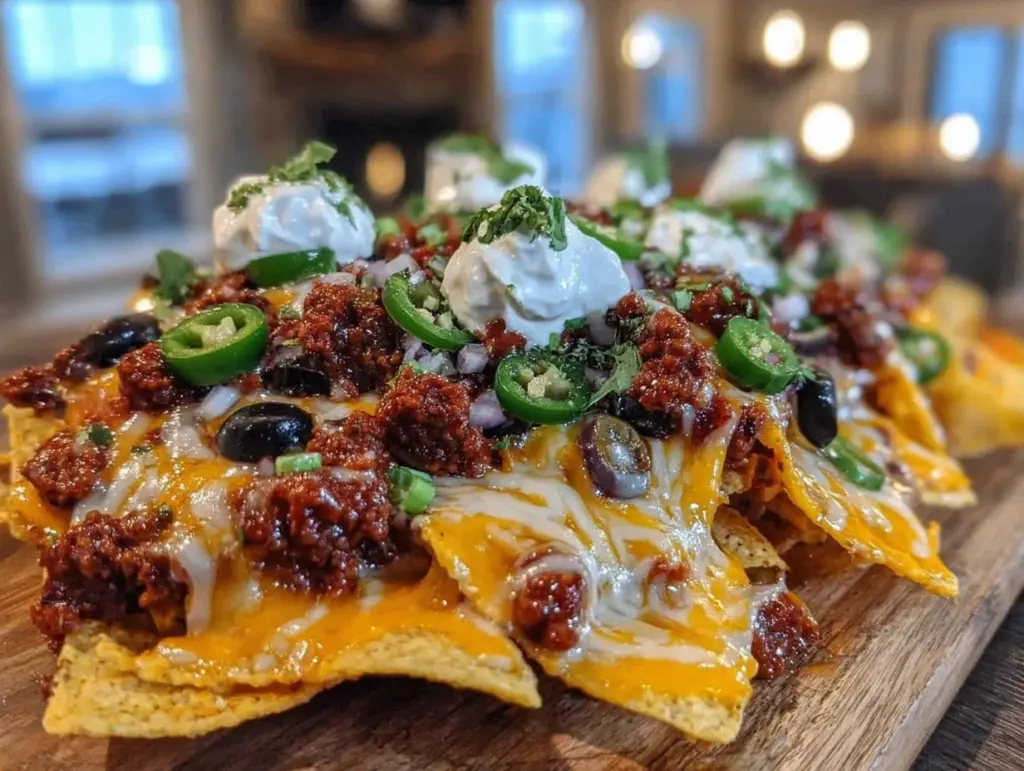
Last Sunday, I was staring at a half-empty fridge and a calendar full of “what’s for dinner?” panic. My husband had texted from work: “Big game tonight. Bringing five friends. Hope you don’t mind if we crash the couch.” Five friends. On a Tuesday. Well, a Sunday. You get the picture.
I had twenty minutes to feed a small army, and I didn’t want to order expensive takeout that would arrive cold and disappointing. So I did what I always do when the budget is tight and the hunger is high: I raided the pantry and the freezer. I pulled out some tortilla chips, a bag of frozen black beans, some cheese that was slightly past its prime but still good, and a handful of veggies hiding in the crisper drawer.
I threw together what I thought would be a mediocre snack. It was going to be a stopgap. But then the smell hit the house. That rich, savory scent of melted cheese, spicy meat, and warm tortillas. When my husband and his friends walked in, they didn’t say a word about the food. They just grabbed a plate and kept going back for seconds. By the time the game started, the platter was empty, and my husband was asking me to add it to our permanent rotation.
That night, I realized I had accidentally created the ultimate crowd-pleaser. It’s cheap, it’s messy in the best way possible, and it tastes like a party. This Loaded Nacho Supreme isn’t just a snack; it’s a meal solution for busy parents who need to stretch a dollar while feeding a hungry house. I’ve tested this recipe at least a dozen times since that Sunday, tweaking the ratios and the toppings until it was perfect. It’s my go-to when I need dinner to just work, and honestly, it’s become the star of our game day spreads.
Why You’ll Love This Loaded Nacho Supreme Recipe
There are about ten reasons I keep making this, but here are the big ones. If you’re looking for a way to feed a crowd without breaking the bank or spending hours in the kitchen, this is it.
Stupid Simple — Seriously, if you can pour a can of beans and sprinkle cheese, you can make this. I’ve walked my teenage son through it over FaceTime while I was at work. There’s no complex technique here, just assembly and heat.
Lightning Fast — From start to finish, this takes about 30 minutes. And only 15 of those are active work. The rest is just waiting for the cheese to melt. I make this on weeknights when I get home exhausted and need dinner on the table before the kids lose their minds.
Pantry-Friendly — You probably have 80% of these ingredients already. I keep tortilla chips, canned beans, and shredded cheese stocked just so I can throw this together on a whim. It’s the ultimate “I have nothing left to eat” solution.
Crowd-Pleaser — I’ve served this to my picky-eater nephew, my gluten-sensitive friend (with a swap), and my husband’s rowdy football buddies. Everyone loves it. It’s the one dish that satisfies both the hungry teenager and the foodie adult.
Budget-Smart — Feeds 6-8 people for under $20. That’s less than what I’d pay for a single appetizer at a sports bar. And unlike the bar, this is fresh, hot, and made with ingredients I trust.
This is my answer to “what’s for dinner?” when I’m tired, don’t want takeout, and still want something that tastes really good. My kids are happy, my husband’s happy, and I’m happy because I’m not stressed about cooking.
Ingredients You’ll Need
Here’s the best part: you probably have most of this already. This looks like a long list, but most of it is pantry basics. I’m particular about three ingredients here, and I’ll tell you exactly why.
For the Base
Tortilla Chips (1 large bag / about 14oz / 400g) — I use sturdy, thick-cut chips. The thin restaurant-style ones break too easily and get soggy. Look for brands like Tostitos Scoops or generic store-brand thick chips. They hold up to the toppings without turning into mush.
Ground Beef (1 pound / 450g) — 80/20 lean-to-fat ratio is key here. You want some fat for flavor. If you’re watching calories, you can use 93/7, but it will be drier. Turkey works too, but beef has that classic nacho taste.
Yellow Onion (1 medium, diced / about 200g) — Sweet onions work too, but yellow gives better depth. White onions are too sharp for this. Dice it small so it distributes evenly.
Garlic (4 cloves, minced / about 2 tablespoons) — Yes, four cloves. Don’t skimp. Fresh only—no jarred garlic in this recipe. It adds that essential aromatic punch.
For the Flavor
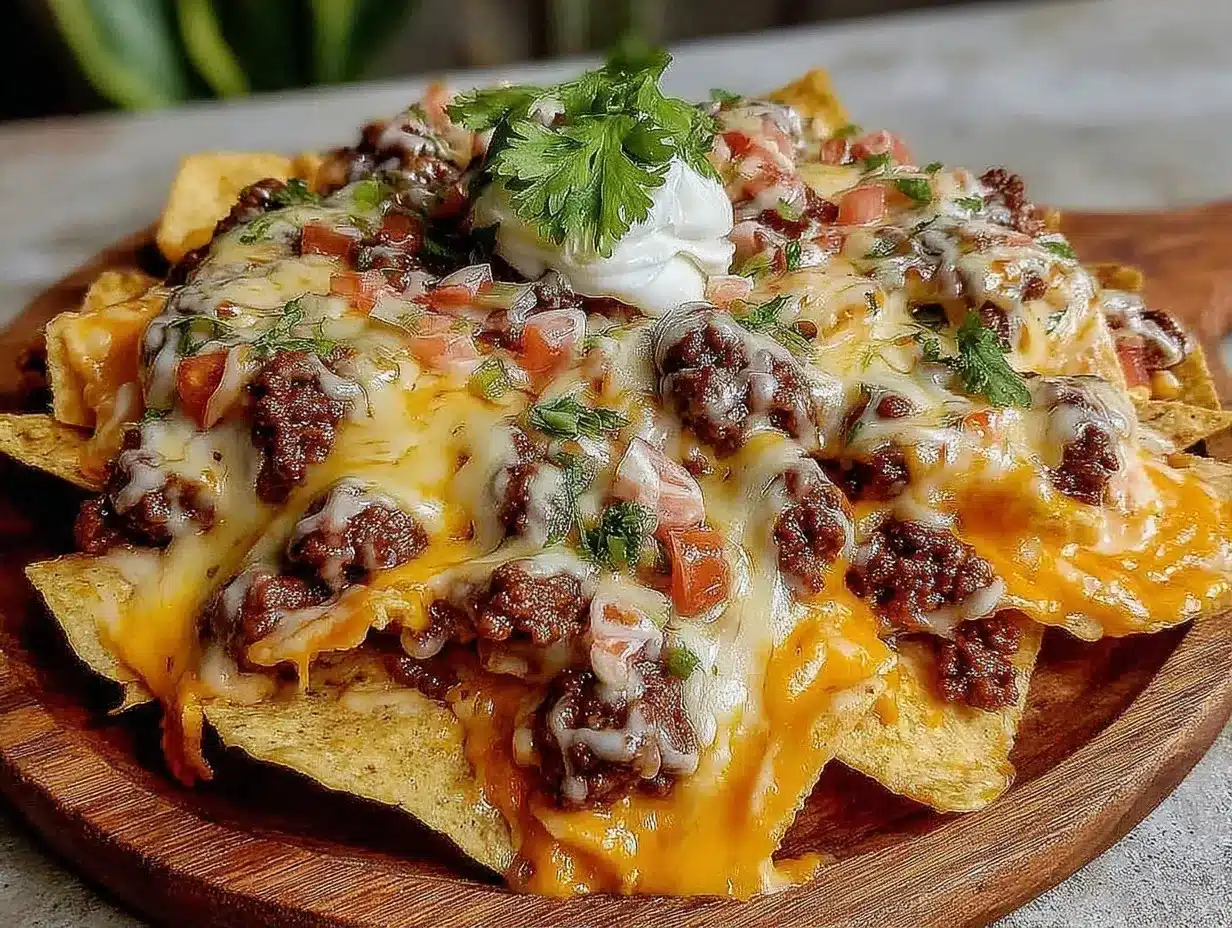
Black Beans (2 cans / 15oz each / drained and rinsed) — They add bulk, fiber, and protein without adding much cost. Rinsing them well is crucial to avoid a metallic taste.
Taco Seasoning (1 packet / 1oz / 28g) — I use a standard packet like Old El Paso. It’s consistent and cheap. If you want to skip the preservatives, mix 1 tbsp chili powder, 1 tsp cumin, 1 tsp paprika, ½ tsp garlic powder, and ½ tsp salt.
Chicken Broth (½ cup / 120ml) — I use low-sodium so I can control the salt. It keeps the meat moist and helps the seasoning adhere.
Tomatoes (2 medium, diced / about 300g) — Fresh Roma tomatoes are best because they’re less watery than beefsteak. If you’re in winter, use a can of diced tomatoes with the liquid drained.
Jalapeños (½ cup, sliced / about 75g) — Fresh or pickled. I like a mix. Fresh for crunch, pickled for tang. Remove the seeds if you want it milder.
For the Cheese Layer
Cheddar Cheese (2 cups / 200g, shredded) — Sharp cheddar has the best flavor. Buy the block and shred it yourself. Pre-shredded cheese has anti-caking agents that prevent it from melting smoothly. Trust me on this.
Mozzarella Cheese (1 cup / 100g, shredded) — This is for the stretch. It melts beautifully and pulls apart in satisfying strings. Mild or medium works fine.
Monterey Jack (1 cup / 100g, shredded) — The secret weapon. It melts like a dream and has a mild, buttery flavor that balances the sharp cheddar.
For the Toppings (The Fresh Finish)
Sour Cream (½ cup / 120g) — Full fat. It cuts the heat and adds creaminess.
Green Onions (4 stalks, sliced) — For a fresh, oniony bite without the harshness of raw yellow onion.
Black Olives (½ cup, sliced) — Optional, but classic. They add a salty brine that pairs well with the cheese.
Cilantro (½ cup, chopped) — Fresh leaves. It brightens up the heavy dish. If your kids hate cilantro, skip it or use parsley.
Avocado (2 ripe, diced) — Or guacamole. I prefer fresh-diced avocado for texture. It adds healthy fats and a cool contrast.
Equipment Needed
You don’t need fancy equipment for this. Here’s what I actually use.
Large Skillet or Dutch Oven — I use a 12-inch cast-iron skillet. It holds heat well and browns the beef nicely. A large saucepan works too, but you want wide surface area for the meat.
Large Baking Sheet or Pie Plates — I use two large rimmed baking sheets. This allows me to make a big batch without overcrowding. If you don’t have two sheets, a 9×13 baking dish works, but the chips might get soggy faster. Individual pie plates are great for single servings.
Sharp Knife — For chopping onions, garlic, and avocados. Dull knives make you cry more—learned this the hard way.
Colander — For rinsing the beans and draining the tomatoes. Or just use the lid to drain—I do this when I’m lazy.
Wooden Spoon — For stirring the meat. Silicone works too. Don’t use metal on non-stick.
Box Grater — For shredding your own cheese. It takes 5 minutes and makes a huge difference in the final texture.
How to Make It: Step-by-Step
Alright, let’s make this! I’m walking you through exactly how I do it, including the little tricks I’ve picked up.
Step 1: Prep Your Ingredients (10 minutes)
Before you start cooking, chop your onion, mince your garlic, and dice your tomatoes. I know it seems fussy, but it makes the actual cooking way less stressful. Shred your cheeses now. Once you start cooking, things move fast. Set out your baking sheets and line them with parchment paper for easy cleanup.
Step 2: Cook the Meat (5-7 minutes)
Heat your large skillet over medium-high heat. Add the ground beef and diced onion. Break up the meat with a wooden spoon as it cooks. Cook until the beef is browned and no longer pink, about 5-7 minutes. If there’s excessive grease, drain it off, but leave a little for flavor.
Step 3: Season the Meat (3 minutes)
Add the taco seasoning and chicken broth to the skillet. Stir well to combine. Let it simmer for 2-3 minutes until the liquid reduces and the sauce thickens slightly. The meat should look glossy and coated, not dry. Add the rinsed black beans and stir them in. Turn off the heat and keep the meat warm.
Step 4: Build the Layers (5 minutes)
Spread a single layer of tortilla chips on your prepared baking sheets. Don’t overlap them too much, or they won’t crisp up. Sprinkle a generous amount of the cheese blend over the chips. Then, spoon a layer of the seasoned meat mixture over the cheese. Top with more cheese. Repeat the layers: chips, cheese, meat, cheese. You want the cheese to be the glue holding everything together.
Step 5: Bake Until Melty (10-12 minutes)
Preheat your oven to 375°F (190°C). Place the baking sheets in the oven and bake for 10-12 minutes. You’ll know they’re ready when the cheese is bubbly and slightly browned in spots. Keep an eye on them—oven temps vary. You want the chips to stay somewhat crisp, not soft.
Step 6: Add the Fresh Toppings (2 minutes)
Remove the nachos from the oven. Immediately top with diced tomatoes, jalapeños, black olives, green onions, and cilantro. The residual heat will wilt the tomatoes and jalapeños slightly, which is perfect. Drizzle with sour cream and scatter the diced avocado over the top. Serve immediately while hot and cheesy.
Total Time: About 30 minutes (15 minutes active, 15 minutes mostly hands-off)
Expert Tips & Tricks
Here’s everything I’ve learned from making this dozens of times. These tips will save you from my mistakes.
Don’t Skimp on the Cheese
The cheese is the binder. If you use too little, the nachos fall apart. If you use too much, it’s just cheese on chips. The 2:1:1 ratio (Cheddar:Mozzarella:Jack) is my sweet spot. It melts well and tastes rich.
Keep the Chips Dry
If your chips are stale or soft, they’ll never crisp up in the oven. If you’re using homemade chips, make sure they’re completely cooled before layering. Store-bought chips usually work fine if the bag isn’t open.
Layer, Don’t Pile
I used to just throw everything in a bowl and call it a day. Big mistake. The bottom chips get soggy from the meat juices. Layering ensures every chip gets a bit of cheese and topping. It’s worth the extra minute.
Make-Ahead Strategy
You can assemble the nachos up to 4 hours ahead. Cover tightly with plastic wrap and refrigerate. When ready to bake, let them sit at room temperature for 15 minutes, then bake as directed. You might need an extra 2-3 minutes in the oven since they’re starting cold.
Pro Trick for Extra Crunch
Toast the chips lightly in the oven for 3 minutes before adding toppings. It gives them a head start on crisping, so they hold up better under the weight of the meat and cheese.
Variations & Substitutions
Once you’ve nailed the basic version, here’s how you can mix it up. I’ve tried all of these.
Chicken Nachos
Swap the ground beef for shredded rotisserie chicken. Toss the chicken with the taco seasoning and a little broth. It’s leaner and faster since the chicken is already cooked. My husband prefers this version for weeknights.
Vegetarian Loaded Nachos
Skip the meat and add an extra can of black beans or some sautéed mushrooms. Sauté 8oz of sliced mushrooms with the onions until golden brown. They add a meaty texture and earthiness that works surprisingly well.
Seafood Nachos
Use cooked, flaked white fish or shrimp. Toss with the seasoning and layer carefully. Top with a lime crema instead of sour cream. This is a lighter option that feels fancy.
Breakfast Nachos
Swap the cheese for a mix of cheddar and pepper jack. Add crumbled cooked bacon and top with fried eggs or scrambled eggs after baking. Add avocado and salsa. This is a game-changer for brunch.
Gluten-Free
Use certified gluten-free tortilla chips. Most standard chips are corn-based and naturally GF, but check the label for cross-contamination warnings. Everything else is naturally gluten-free.
Dairy-Free
Use dairy-free cheese shreds (like Daiya or Violife) and coconut cream instead of sour cream. It’s different but still tasty. My lactose-intolerant friend requests this version.
Serving & Storage
How to Serve:
I usually serve these straight from the baking sheet at the dinner table—it looks rustic and stays warm. But here are other ways I’ve enjoyed it:
- Side Dishes: A simple green salad with balsamic vinaigrette cuts the richness. Roasted broccoli or green beans add a healthy element.
- Toppings Bar: When I have guests, I put out extra sour cream, salsa, hot sauce, and crispy bacon bits. Everyone customizes their bowl.
- Wine Pairing: Not a wine expert, but my wine-snob friend says a crisp Pinot Grigio or a light-bodied Malbec works great with spicy nachos.
Storage Instructions:
Refrigerator:
Store leftovers in an airtight container for up to 3 days. The chips will soften, which is normal. The flavors actually meld and taste better on day two.
Reheating:
Best method: Spread the nachos on a baking sheet and reheat in a 350°F oven for 10 minutes. This restores some crispness.
Microwave method: Heat in 30-second intervals. It will be soft, but it works in a pinch. Add a splash of water if it looks dry.
Freezing:
Honestly, this doesn’t freeze well. The cheese separates and the chips turn to mush when thawed. Make it fresh or store in the fridge for up to 3 days.
Meal Prep Tip:
Make the meat mixture on Sunday, store in the fridge. Cook pasta fresh each night. Takes 10 minutes and tastes way better than fully reheated pasta.
Nutrition Information
I’m not a nutritionist, but here’s the breakdown if you’re tracking.
Per Serving (based on 8 servings):
– Calories: 380
– Protein: 18g
– Carbs: 32g
– Fiber: 4g
– Sugar: 3g
– Fat: 22g
– Saturated Fat: 10g
– Cholesterol: 45mg
– Sodium: 650mg
– Calcium: 200mg
What’s Good:
– Decent protein from beef and cheese
– Fiber from beans and chips
– Calcium from the cheese
– Can add vegetables to boost nutrition
What to Know:
– Higher in calories from cheese and chips
– Contains dairy and gluten
– Moderate sodium (use low-sodium broth and beans to reduce)
My Take:
Look, this is comfort food with cheese and chips. It’s not a diet recipe. But it’s way better than takeout, costs less, and I know exactly what’s in it. When I want to make it lighter, I use the turkey version and load up on vegetables. But usually? I just eat a reasonable portion and enjoy it.
Final Thoughts
So that’s my Loaded Nacho Supreme! I’ve probably talked your ear off at this point, but when you make a recipe this often, you have a lot to say about it.
This has saved weeknight dinners more times than I can count. It’s my answer to “what’s for dinner” when I’m tired, don’t want takeout, and still want something that tastes really good. My kids are happy, my husband’s happy, and I’m happy because I’m not stressed about cooking.
Make it yours! Try different add-ins, swap in your favorite vegetables, adjust the spice level. The best recipes are the ones you adapt to your family’s tastes. If you want to pair this with a refreshing drink, check out our fresh watermelon mint agua fresca—it’s the perfect cool counterpoint to spicy nachos. And for a heartier main course on non-game days, these crispy air fryer chicken wings are always a hit with the same crowd.
If you make this, drop a comment and let me know what you think! I love hearing how recipes turn out in your kitchen. And if something doesn’t work, tell me that too—I’m here to help troubleshoot. Happy cooking! And I hope your kitchen smells half as good as mine does right now.
Frequently Asked Questions
Can I use store-bought shredded cheese?
You can, but the sauce will be less smooth. Pre-shredded cheese has cellulose (anti-caking agent) that prevents clumping but also inhibits melting. For the best texture, buy a block of cheddar and Monterey Jack and shred it yourself. It takes about 5 minutes and makes a noticeable difference in the creaminess.
Why did my nachos turn out soggy?
Usually, this means the chips were too close together or the meat was too wet. Make sure you’re not overcrowding the baking sheet. Also, drain your beans and tomatoes thoroughly before adding them. If the meat mixture is very saucy, let it simmer longer to reduce the liquid before layering.
Can I make this ahead for a party?
Yes! Assemble the nachos (without the fresh toppings) up to 4 hours ahead. Cover tightly and refrigerate. When ready to serve, let them sit at room temperature for 15 minutes, then bake at 375°F for 12-15 minutes. Add the fresh toppings right after taking them out of the oven.
Can I freeze leftover nachos?
Honestly, it’s not recommended. The cheese will separate and become grainy, and the chips will lose all their crunch. It’s best to make them fresh. If you have leftovers, store them in the fridge for up to 3 days and reheat in the oven to restore some crispness.
How do I make these spicier?
Add more jalapeños or swap in pepper jack cheese for the Monterey Jack. You can also add a dash of cayenne pepper to the taco seasoning mix. If you like heat, serve with a bottle of your favorite hot sauce on the side.
Can I use ground turkey instead of beef?
Absolutely. Turkey is leaner and cooks faster. Just make sure to add a little extra broth or olive oil to keep it moist, as turkey can dry out easily. Season it well with the taco spices to compensate for the milder flavor.
What’s the best chip for nachos?
Thick, sturdy tortilla chips are best. Look for “scoop” style chips or restaurant-style thick chips. Thin chips break too easily and get soggy quickly. Avoid corn chips that are too small or delicate.
Pin This Recipe!


Loaded Nacho Supreme for Crowds: Budget-Friendly, Make-Ahead Recipe
- Total Time: 30 minutes
- Yield: 6-8 servings 1x
Description
A quick, budget-friendly, and crowd-pleasing loaded nacho recipe that feeds 6-8 people in about 30 minutes. Perfect for game days or busy weeknights, this make-ahead friendly dish uses pantry staples and layers of cheese, seasoned meat, and fresh toppings.
Ingredients
- 1 large bag (14oz / 400g) sturdy thick-cut tortilla chips
- 1 pound (450g) ground beef (80/20 lean-to-fat ratio)
- 1 medium yellow onion, diced
- 4 cloves garlic, minced
- 2 cans (15oz each) black beans, drained and rinsed
- 1 packet (1oz / 28g) taco seasoning
- 1/2 cup (120ml) low-sodium chicken broth
- 2 medium Roma tomatoes, diced
- 1/2 cup (75g) jalapeños, sliced (fresh or pickled)
- 2 cups (200g) sharp cheddar cheese, shredded
- 1 cup (100g) mozzarella cheese, shredded
- 1 cup (100g) Monterey Jack cheese, shredded
- 1/2 cup (120g) full-fat sour cream
- 4 stalks green onions, sliced
- 1/2 cup (75g) black olives, sliced
- 1/2 cup (15g) fresh cilantro, chopped
- 2 ripe avocados, diced
Instructions
- Preheat oven to 375°F (190°C). Line two large rimmed baking sheets with parchment paper.
- Chop the onion, mince the garlic, and dice the tomatoes. Shred the cheeses.
- Heat a large skillet over medium-high heat. Add ground beef and diced onion. Break up the meat and cook until browned (5-7 minutes). Drain excess grease if necessary, leaving some for flavor.
- Add taco seasoning and chicken broth to the skillet. Stir to combine and simmer for 2-3 minutes until the liquid reduces and thickens.
- Stir in the rinsed black beans. Remove from heat and keep warm.
- Spread a single layer of tortilla chips on the prepared baking sheets. Sprinkle with a generous amount of the cheese blend.
- Spoon a layer of the seasoned meat mixture over the cheese, then top with more cheese. Repeat layers: chips, cheese, meat, cheese.
- Bake for 10-12 minutes until the cheese is bubbly and slightly browned.
- Remove from oven and immediately top with diced tomatoes, jalapeños, black olives, green onions, and cilantro.
- Drizzle with sour cream and scatter diced avocado over the top. Serve immediately.
Notes
For best results, shred your own cheese to avoid anti-caking agents that prevent smooth melting. Use sturdy, thick-cut chips to prevent sogginess. You can assemble the nachos up to 4 hours ahead and refrigerate; let sit at room temperature for 15 minutes before baking. This recipe does not freeze well as the chips will become mushy.
- Prep Time: 15 minutes
- Cook Time: 15 minutes
- Category: Main Course
- Cuisine: American
Nutrition
- Serving Size: 1 serving from a bat
- Calories: 380
- Sugar: 3
- Sodium: 650
- Fat: 22
- Saturated Fat: 10
- Carbohydrates: 32
- Fiber: 4
- Protein: 18
Keywords: loaded nachos, budget dinner, crowd pleaser, game day food, make ahead recipe, easy dinner, family friendly


