Three summers ago, I showed up to a beach party in Malibu carrying a dessert I had spent four hours constructing. It was a towering, multi-layered tiramisu with hand-piped meringue stars and a dusting of gold leaf. I was proud. I was exhausted. And as I set it on the folding table next to a bag of chips, I watched a guest walk past it without even glancing at it, grabbing a handful of chips instead. It stung, but it also taught me a lesson I’ve never forgotten: people don’t always want the most complicated thing on the table. Sometimes, they just want something that tastes like sunshine and feels luxurious without the stress.
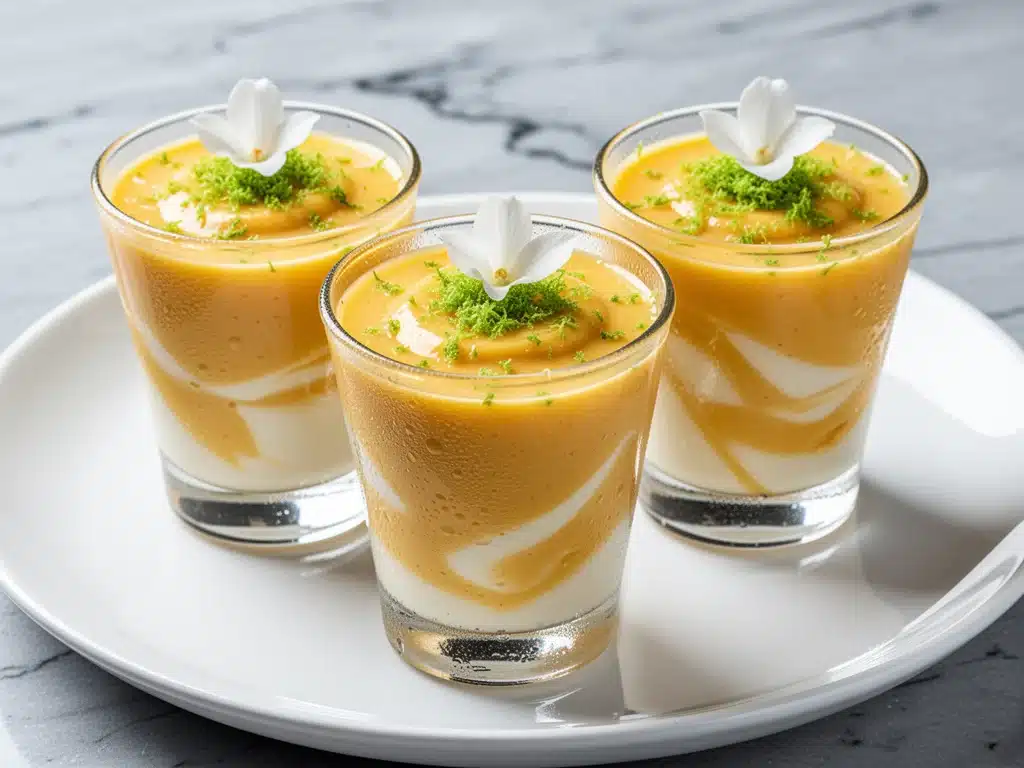
That’s when I fell in love with the ultra-creamy mango coconut panna cotta cups with fresh lime zest. I first tried it at a tiny café in Miami, and it was the kind of dessert that made me close my eyes and forget about the noise around me. It was cool, silky, and bursting with tropical flavor. When I got home, I spent two weeks testing variations—too much gelatin, not enough mango, the coconut flavor getting lost in the crowd. I almost gave up until I realized the secret wasn’t in the technique, but in the ratio. Once I nailed that balance, these cups became my secret weapon for impressing guests without spending hours in the kitchen.
Now, I make these mango coconut panna cotta cups with fresh lime zest at least once a month. They’re the perfect answer to “what’s for dessert?” when you want something elegant but have zero energy to bake. Unlike my cozy fall sticky toffee date pudding, which requires an oven and a lot of waiting, these panna cotta cups are no-bake and set in the fridge while you relax. They’re light enough that you can eat two without feeling heavy, yet rich enough to satisfy a serious sweet tooth. The combination of tropical mango, creamy coconut, and that sharp kick of lime zest is addictive. I’ve served these to food critics, picky teenagers, and my own family, and they always disappear within minutes. It’s the dessert that makes people ask for the recipe, not just the second helping.
Why You’ll Love This Mango Coconut Panna Cotta Recipe
There are a dozen reasons I keep coming back to this mango coconut panna cotta cups with fresh lime zest, but here are the ones that actually matter when you’re planning dinner.
- Zero Baking Required — Seriously. You don’t need to preheat an oven or worry about a water bath. I’ve made this on a Tuesday night after work, and it only took me 10 minutes of active prep. The rest is just fridge time. It’s the ultimate low-effort, high-reward dessert.
- Make-Ahead Magic — This is my best-kept secret for stress-free hosting. You can make these cups up to three days in advance. I often whip them up on Sunday afternoon, so they’re ready for Friday night dinner parties. They actually taste better after sitting for a day because the flavors have time to meld together.
- Light but Indulgent — Unlike my autumn cranberry orange bundt cake, which is dense and floury, these panna cotta cups are airy and cool. They feel like a vacation in a glass. You get that rich, creamy mouthfeel from the coconut cream, but the mango keeps it bright and fresh. It’s the kind of dessert that doesn’t leave you feeling sluggish afterward.
- Gluten-Free by Nature — If you’re hosting guests with dietary restrictions, this is a lifesaver. It’s naturally gluten-free and dairy-free (if you use coconut milk instead of heavy cream). I’ve made this for gluten-free friends, and they’re always surprised by how rich and satisfying it is. No dry, crumbly textures here.
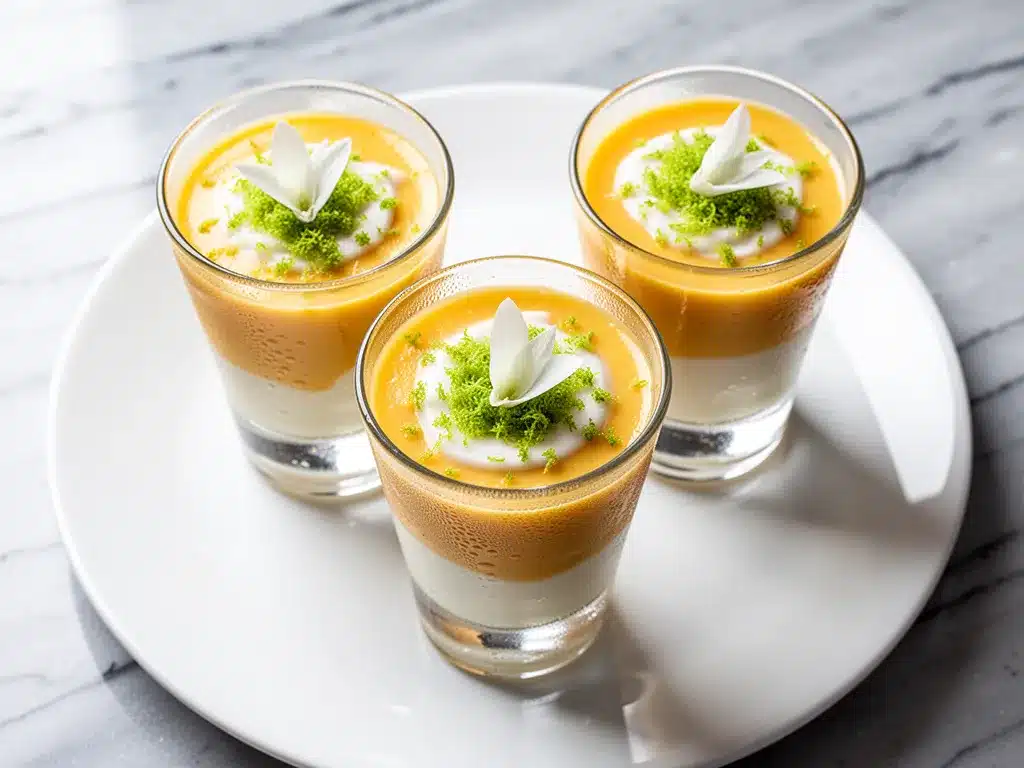
- Restaurant-Quality Presentation — You don’t need fancy piping bags or edible flowers. The natural layers of mango and coconut look stunning on their own. I just add a tiny sprig of mint or a dusting of lime zest, and it looks like it came from a high-end bistro. It’s impressive without being pretentious.
This mango coconut panna cotta cups with fresh lime zest is my go-to when I want to treat myself or my guests to something special. It’s reliable, it’s delicious, and it never fails to get a “wow” reaction. I make it because it works, every single time.
Ingredients You’ll Need
Here’s the best part: you probably have most of these ingredients already, or they’re super easy to find at any grocery store. I’m particular about a few things here, so pay attention to the details.
For the Coconut Base
Full-fat coconut milk (1 can, 13.5 oz / 396ml) — This is non-negotiable. Do not use the carton-style coconut milk meant for drinking. You need the thick, creamy stuff from a can. Shake the can well before opening. If it’s separated, that’s normal—the thick cream on top is where the richness lives. I use Goya or Chaokao brands because they have a consistent texture.
Unsweetened almond milk (½ cup / 120ml) — This thins out the coconut milk just enough to make it pourable and smooth. You can use oat milk or dairy milk if you prefer, but almond milk keeps it light and doesn’t overpower the coconut flavor.
Granulated sugar (¼ cup / 50g) — Adjust to taste. If your mango puree is very sweet, you can reduce this to 2 tablespoons. I like a little sweetness to balance the tart lime zest, but don’t overdo it. We want the fruit to shine.
Unflavored gelatin powder (1 packet / 2 ½ teaspoons) — This is what gives the panna cotta its signature wobble. I use Knox gelatin because it’s reliable and easy to find. Make sure it’s fresh; old gelatin loses its setting power. If you need a vegan option, agar-agar works, but you’ll need to adjust the amount and cooking method slightly.
Vanilla extract (1 teaspoon) — Pure vanilla, not imitation. It adds a warm, comforting background note that ties the tropical flavors together. I use Nielsen-Massey because it’s intense and pure.
For the Mango Layer
Ripe mangoes (2 large / about 3 cups puree) — This is the star of the show. Use Alphonso or Ataulfo mangoes if you can find them—they’re sweeter and less fibrous. If you’re using a large Tommy Atkins mango, make sure it’s completely ripe and soft. You can also use high-quality frozen mango chunks if fresh ones aren’t in season. Just thaw them completely before blending.
Lime zest (1 teaspoon) — Freshly grated lime zest is essential. It cuts through the richness of the coconut and adds a bright, citrusy aroma that makes the whole dessert feel fresh. I use the green limes, not the yellow ones, because they have a sharper, more aromatic zest.
Lime juice (1 tablespoon) — Just a splash to balance the sweetness. Freshly squeezed is best. Bottled lime juice has a weird chemical aftertaste that really shows up in delicate desserts like this.
For Garnish (Optional but Recommended)
Whipped coconut cream — Chill a can of coconut cream overnight, scoop out the solid part, and whip it with a little sugar. It’s a beautiful topping.
Toasted coconut flakes — Adds a nice crunch and visual appeal. Just toast them in a dry pan for 2-3 minutes until golden.
Edible flowers or mint leaves — For that final touch of elegance. I keep dried mint in my pantry for this.
Equipment Needed
You don’t need fancy equipment for this. Here’s what I actually use.
Small saucepan — I use a 1-quart pan. It needs to be big enough to heat the coconut mixture but small enough to control the heat. My old stainless steel pan works fine.
Blender or food processor — For the mango puree. I use a personal blender because it’s easy to clean. A high-speed blender works too, but you’ll need to strain the puree if it’s fibrous.
Mesh strainer — Optional but recommended. If your mango puree has any strings or fibers, strain it through a fine-mesh sieve for a perfectly smooth texture. I do this every time because I’m a perfectionist.
Small glasses or ramekins — I use 6-ounce glass cups. They look elegant and are easy to stack in the fridge. You can also use mason jars if you’re making a larger batch.
Whisk — For mixing the gelatin. A small balloon whisk works best to avoid splashing.
Measuring spoons and cups — Standard stuff. I use metal measuring spoons because they’re precise and easy to clean.
How to Make It: Step-by-Step
Alright, let’s make this! I’m walking you through exactly how I do it, including the little tricks I’ve picked up over the years.
Step 1: Bloom the Gelatin (5 minutes)
Start by sprinkling the gelatin powder over the cold almond milk in a small bowl. Let it sit for 5 minutes. You’ll see it absorb the liquid and turn into a spongy mass. This is called “blooming,” and it’s crucial for getting a smooth texture. If you skip this, you’ll end up with gelatin clumps in your panna cotta, and nobody wants that. I learned this the hard way on my first attempt—my dessert looked like it had little rubbery bits in it. Now, I always bloom the gelatin first.
Step 2: Heat the Coconut Mixture (5 minutes)
Pour the coconut milk and sugar into a small saucepan over medium-low heat. Stir gently until the sugar dissolves and the mixture is warm to the touch. Do not let it boil! Boiling can destroy the gelatin’s setting power. I heat it until it’s about 120°F (49°C), which takes about 3-4 minutes. You’ll see small bubbles forming around the edges. Once it’s warm, remove it from the heat.
Step 3: Dissolve the Gelatin
Add the bloomed gelatin-almond milk mixture to the warm coconut milk. Whisk vigorously for about 1-2 minutes until the gelatin is completely dissolved and the mixture is smooth. If there are any lumps, strain the mixture through a fine-mesh sieve into a measuring cup. This step ensures your panna cotta is perfectly silky. I’ve made this mistake before—skipping the strain—and the texture was ruined. Don’t be lazy here.
Step 4: Prepare the Mango Puree
While the coconut mixture cools, peel and dice your mangoes. Blend them in a blender until completely smooth. Add the lime zest and lime juice, and blend again. Taste it. If it’s too tart, add a teaspoon of sugar. If it’s too sweet, add a squeeze more lime juice. The goal is a bright, vibrant mango flavor. I usually make a bit extra puree because it’s delicious on its own. I’ve used leftover mango puree in chocolate lava cake sauces, but it’s also great in smoothies.
Step 5: Assemble the Cups
Divide the mango puree among your glasses, filling them about halfway. Then, slowly pour the coconut mixture over the mango layer. Use the back of a spoon to guide the liquid and prevent mixing. You want distinct layers. If you pour too fast, the layers will blend, and that’s okay—it still tastes good, but it won’t look as pretty. I take my time here because I like the visual contrast.
Step 6: Chill and Set
Place the cups in the fridge for at least 4 hours, or preferably overnight. They need time to set. I usually make them in the morning so they’re ready by dinner. They’re done when they jiggle slightly but don’t slosh. If you press a finger gently on the surface, it should feel firm but bouncy. Don’t rush this step. If you try to eat them too soon, they’ll be liquid, and that’s a sad experience.
Expert Tips & Tricks
Here’s everything I’ve learned from making this dozens of times. These tips will save you from my mistakes.
Use the Richest Coconut Milk
The quality of your coconut milk determines the richness of your panna cotta. Look for brands with no added gums or stabilizers. The thicker the milk, the creamier the result. I’ve tried cheap brands, and the texture is watery and disappointing. Spend the extra dollar for better coconut milk.
Don’t Skip the Strain
Even if you think your mango puree is smooth, strain it. Mango fibers can be invisible but noticeable in the mouth. A smooth puree makes a smooth panna cotta. It’s worth the extra 30 seconds.
Control the Heat
Gelatin is sensitive. If you boil the coconut mixture, it won’t set properly. Keep the heat low and steady. If you’re unsure, use a candy thermometer. Aim for 120°F (49°C). If it goes above 160°F (71°C), you’re risking the gelatin’s strength.
Balance the Sweetness
Mangoes vary in sweetness depending on the season and variety. Always taste your mango puree before adding sugar to the coconut mixture. Adjust accordingly. I’ve made this dessert too sweet by following a recipe blindly, and it was cloying. Trust your palate.
Layering Technique
To get clean layers, pour the coconut mixture over the back of a spoon held just above the mango layer. This slows the flow and prevents mixing. It’s a small trick that makes a big difference in presentation.
Variations & Substitutions
Once you’ve nailed the basic version, here’s how you can mix it up. I’ve tried all of these.
Passion Fruit Twist
Swap the mango puree for passion fruit puree. The tartness pairs beautifully with the coconut. I’ve made this for tropical-themed parties, and it’s always a hit.
Strawberry Coconut
Use fresh strawberries instead of mango. Blend them with a little sugar and lime juice. The pink and white layers are stunning. This is a great option for summer picnics.
Dairy-Free Heavy Cream Version
If you want a richer texture, substitute half the almond milk with full-fat coconut cream. Whip the coconut cream first, then fold it into the mixture after it has cooled slightly. It’s like a mousse now.
Vegan Gelatin Alternative
Use agar-agar instead of gelatin. Use 1 teaspoon of agar powder mixed with 2 tablespoons of water. Bring the coconut mixture to a boil for 1-2 minutes to activate the agar, then pour into cups. It sets faster and has a slightly firmer texture.
Serving & Storage
How to Serve:
I serve these chilled, straight from the fridge. They’re best when they’re cold and firm. I garnish with a dollop of whipped coconut cream, a sprinkle of toasted coconut flakes, and a tiny mint leaf. It’s simple but elegant.
Side Dishes:
These are best served as a standalone dessert. They’re light enough to follow a heavy meal. I’ve served them after cozy fall sweet potato pie bars, and the contrast is nice, but usually, they stand alone just fine.
Storage Instructions:
Store in the fridge for up to 3 days. Keep them covered with plastic wrap or in an airtight container to prevent them from absorbing fridge odors. They do not freeze well because the texture changes when thawed. The coconut cream can separate, and the mango can become watery. Make them fresh or store in the fridge.
Pro Tip:
If you’re making these for a party, prepare them the day before. They’ll set perfectly, and you’ll have one less thing to worry about on the day of. Just add the garnish right before serving.
Nutrition Information
I’m not a nutritionist, but here’s the breakdown if you’re tracking. This is per serving (based on 6 cups).
- Calories: 180
- Protein: 2g
- Carbs: 28g
- Fiber: 2g
- Sugar: 24g
- Fat: 8g
- Saturated Fat: 6g
- Cholesterol: 0mg
- Sodium: 15mg
What’s Good:
Low in fat compared to traditional cheesecakes. Dairy-free and gluten-free. Good source of vitamin C from the mango.
What to Know:
Higher in sugar due to the mango and added sugar. If you’re watching sugar, reduce the added sugar and use unsweetened mango puree. It’s still sweet from the fruit, but less so.
My Take:
Look, this is a dessert. It’s meant to be enjoyed. The mango provides natural sweetness, but we add a little sugar to balance the lime. It’s not a health food, but it’s lighter than most desserts. When I want to make it healthier, I use less sugar and add more mango. But usually? I just enjoy a cup and savor the flavor.
Final Thoughts
So that’s my ultra-creamy mango coconut panna cotta cups with fresh lime zest! I’ve probably talked your ear off at this point, but when you make a recipe this often, you have a lot to say about it. This has saved my dessert game more times than I can count. It’s my answer to “what’s for dessert?” when I want something fancy but don’t want to stress. My guests are happy, my family is happy, and I’m happy because I’m not stuck in the kitchen for hours.
Make it yours! Try different fruits, adjust the sweetness, or play with the layers. The best recipes are the ones you adapt to your tastes. The key is to keep it simple, fresh, and creamy. If you make this, drop a comment and let me know what you think! I love hearing how recipes turn out in your kitchen. And if something doesn’t work, tell me that too—I’m here to help troubleshoot.
Happy cooking! And I hope your kitchen smells half as good as mine does right now.
Frequently Asked Questions
Can I use canned mango instead of fresh?
Yes, you can. Use canned mango chunks in syrup, but drain them well and pat them dry before blending. You might need to add a little extra lime juice to balance the added syrup sweetness. I’ve used canned mango when fresh ones weren’t in season, and it worked fine, just slightly less vibrant.
Why didn’t my panna cotta set?
Usually, this means the gelatin was exposed to too much heat or not enough. Did you boil the coconut mixture? Boiling can destroy gelatin. Also, make sure your gelatin is fresh. Old gelatin loses its strength. If you’re using agar-agar, did you bring the mixture to a full boil for 1-2 minutes? Agar needs heat to activate. Check your ratios too—too much liquid will prevent setting.
Can I make this ahead for a dinner party?
Absolutely. This is one of the best make-ahead desserts. You can make them up to 3 days in advance. Just keep them covered in the fridge. Add the garnish right before serving. This is my go-to strategy for stress-free entertaining. I often make them on Sunday for a Friday dinner party.
Is this recipe dairy-free?
Yes, if you use coconut milk and almond milk. It’s naturally dairy-free. If you want to use heavy cream for a richer texture, it won’t be dairy-free. I usually stick to the coconut and almond milk version because it’s lighter and fits more dietary needs.
Can I freeze the panna cotta?
I don’t recommend it. The texture changes when frozen and thawed. The coconut cream can separate, and the mango can become watery. It’s best enjoyed fresh or refrigerated. If you must freeze it, do so for no more than a week, but expect some texture loss. I’ve tried it, and it’s not worth the risk.
What kind of lime should I use for zest?
Use Persian limes (the small, green ones). They have a thinner skin and more aromatic zest than key limes. Key limes are smaller and more tart, which can overpower the dessert. I’ve used both, but Persian limes give a cleaner, brighter flavor that pairs better with coconut.
Can I use agar-agar instead of gelatin?
Yes, but the method changes slightly. Use 1 teaspoon of agar powder mixed with 2 tablespoons of water. Bring the coconut mixture to a boil for 1-2 minutes to activate the agar, then pour into cups. Agar sets faster and has a slightly firmer, more brittle texture than gelatin. It’s a great vegan alternative, but the mouthfeel is different.
Pin This Recipe!
Ultra-Creamy Mango Coconut Panna Cotta Cups: 5-Min Dessert
- Total Time: 4 hours 15 minutes
- Yield: 6 servings 1x
Description
A no-bake, gluten-free, and dairy-free tropical dessert featuring layers of silky coconut cream and bright mango puree with fresh lime zest. It is light, elegant, and perfect for make-ahead entertaining.
Ingredients
- 1 can (13.5 oz / 396ml) full-fat coconut milk
- 1/2 cup (120ml) unsweetened almond milk
- 1/4 cup (50g) granulated sugar
- 1 packet (2 1/2 teaspoons) unflavored gelatin powder
- 1 teaspoon vanilla extract
- 2 large ripe mangoes (about 3 cups puree)
- 1 teaspoon fresh lime zest
- 1 tablespoon fresh lime juice
- Optional garnish: whipped coconut cream, toasted coconut flakes, mint leaves
Instructions
- Bloom the gelatin: Sprinkle gelatin powder over cold almond milk in a small bowl and let sit for 5 minutes until spongy.
- Heat the coconut mixture: Pour coconut milk and sugar into a small saucepan over medium-low heat. Stir until sugar dissolves and mixture is warm (approx. 120°F/49°C). Do not boil.
- Dissolve the gelatin: Add the bloomed gelatin mixture to the warm coconut milk. Whisk vigorously for 1-2 minutes until fully dissolved. Strain through a fine-mesh sieve if needed to ensure smoothness.
- Prepare mango puree: Blend peeled mangoes until smooth. Mix in lime zest and lime juice. Taste and adjust sweetness if necessary.
- Assemble the cups: Divide mango puree among 6-ounce glasses, filling halfway. Slowly pour the coconut mixture over the mango layer using the back of a spoon to create distinct layers.
- Chill and set: Refrigerate for at least 4 hours or overnight until firm but jiggly.
Notes
Use full-fat canned coconut milk, not carton-style drinking milk. Ensure gelatin is fresh for proper setting. Do not boil the coconut mixture as high heat destroys gelatin’s setting power. Strain mango puree to remove fibers for a silky texture. Can be made up to 3 days in advance. Do not freeze as texture will suffer.
- Prep Time: 10 minutes
- Cook Time: 5 minutes
- Category: Dessert
- Cuisine: Tropical
Nutrition
- Serving Size: 1 cup
- Calories: 180
- Sugar: 24
- Sodium: 15
- Fat: 8
- Saturated Fat: 6
- Carbohydrates: 28
- Fiber: 2
- Protein: 2
Keywords: mango panna cotta, coconut dessert, no-bake dessert, gluten-free dessert, dairy-free dessert, tropical dessert, lime zest, make-ahead dessert


