It was a Tuesday in November, the kind where the sun sets at 5:30 PM and my kids are already arguing over who got the bigger plate. I was staring into the fridge, which was essentially just condiments and half a lemon, when I realized I had no plans for dinner. No meal prep. No leftovers. Just four hungry kids and a husband who was going to be home in 30 minutes.
I could have ordered pizza. But let’s be real: by the time it arrived, it would be lukewarm, cost $25, and leave me with a stack of cardboard boxes to throw away. So I did the only thing I could think of. I grabbed the big black cast iron skillet from the back of the cupboard, pulled out some dough, and threw together what I thought would be a mediocre emergency meal.
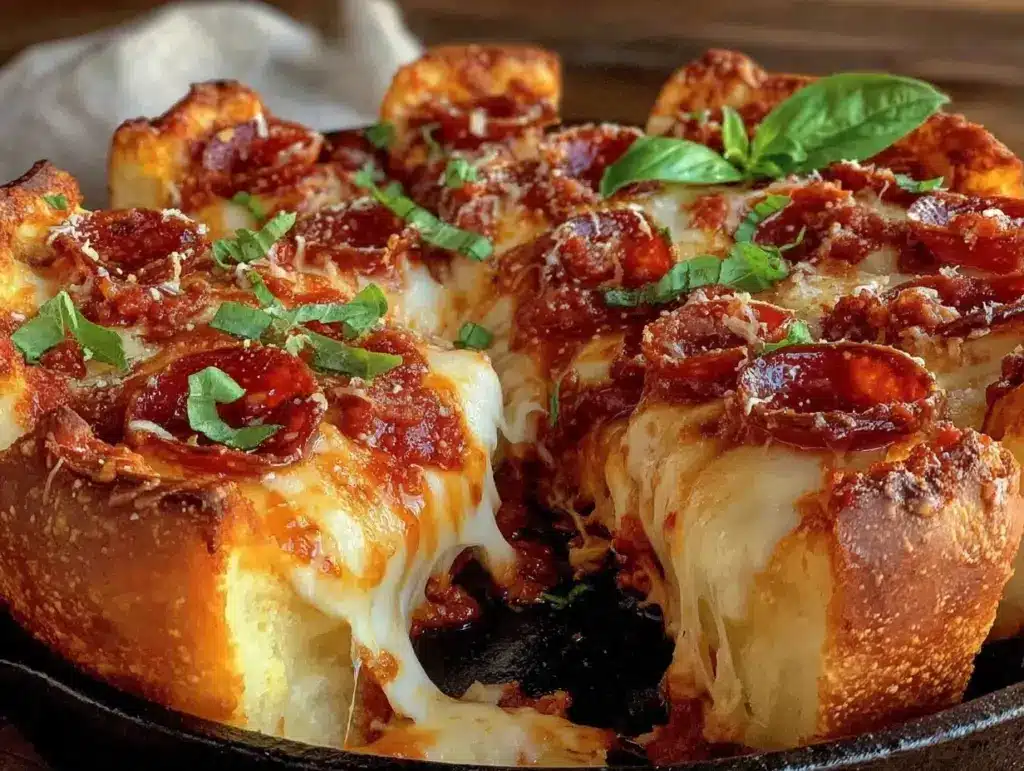
Thirty minutes later, the smell of bubbling cheese and crispy pepperoni filled the house. The kids stopped arguing. My husband walked in, sniffed the air, and said, “Did you order pizza?” When I told him I made it from scratch in 30 minutes, he didn’t believe me. He took one bite of the crust—crispy on the outside, soft and chewy on the inside—and asked for seconds. That was the night I fell in love with this cast iron deep dish pepperoni pizza.
I’ve made this pizza at least 15 times since then. It’s become my go-to when I need dinner to just work. It’s cheap, it’s filling, and it tastes like something from a fancy pizzeria but costs a fraction of the price. If you’ve been looking for a way to get your family off the couch and into the kitchen (or just fed without breaking the bank), this is the recipe for you.
Why You’ll Love This Cast Iron Deep Dish Pepperoni Pizza
There are about ten reasons I keep making this pizza every week, but here are the big ones. This isn’t just a quick dinner; it’s a game-changer for family meals.
Stupid Simple — Seriously, if you can stretch dough and sprinkle cheese, you can make this. I’ve walked my teenage son through it over FaceTime while I was at work. There’s no kneading, no proofing, and no fancy techniques. Just layer, bake, eat.
Lightning Fast — 30 minutes from start to finish. I know, I know, pizza usually takes hours because of rising time. But this recipe uses store-bought dough (or even a shortcut method) so you’re eating hot pizza before the kids can complain about being bored.
Pantry-Friendly — You probably have 80% of these ingredients already. Flour, yeast, salt, olive oil, tomato sauce, cheese, pepperoni. If you don’t have pepperoni, use sausage or just extra cheese. I keep a bag of frozen pepperoni slices in the freezer specifically for these nights.
Crowd-Pleaser — I’ve served this to my picky eater son (who only eats chicken nuggets) and my foodie friend. The deep dish style means it’s hearty and satisfying, like eating a meal, not just a snack. It’s the kind of dinner that makes everyone feel full and happy.
Makes Amazing Leftovers — Actually tastes better the next day. The flavors meld together overnight. I deliberately make a double batch on Sunday so I have lunch for the next two days. Cold or reheated, it’s still amazing.
Budget-Smart — Feeds 4-6 people for under $10. That’s less than one meal at a fast-food place. And unlike takeout, you control the quality of the ingredients. No mystery meats, just real pepperoni and real cheese.
This is my answer to “what’s for dinner” when I’m tired, don’t want takeout, and still want something that tastes really good. My kids are happy, my husband’s happy, and I’m happy because I’m not stressed about cooking.
Ingredients You’ll Need
Here’s the best part: you probably have most of this already. This cast iron deep dish pepperoni pizza relies on simple, affordable ingredients. I’m particular about three things here, and I’ll tell you exactly why.
For the Dough
All-purpose flour (2 ½ cups / 315g) — I use regular all-purpose. You don’t need fancy bread flour for this. It gives a nice chew without being too dense. If you’re out, pastry flour works too, but it’ll be softer.
Active dry yeast (1 packet / 2 ¼ teaspoons) — Standard packet. I keep them in the fridge to keep them fresh. You can use instant yeast, but you might need to skip the first rise if you’re in a huge rush (though I recommend the rise for better texture).
Warm water (1 cup / 240ml) — It should be about 110°F (43°C). If you don’t have a thermometer, it should feel like a warm bath. Too hot kills the yeast; too cold won’t activate it. I learned this the hard way with a flat, sad dough.
Olive oil (2 tablespoons / 30ml) — For the dough. It adds flavor and helps the crust brown. Use whatever you have on hand. I keep a cheap bottle for cooking and a better one for finishing.
Sugar (1 teaspoon) — Just a pinch to feed the yeast. You won’t taste it, but it helps the dough rise and brown nicely.
Salt (1 teaspoon) — Essential for flavor. Don’t skip it. Undersalted dough tastes bland no matter how good the sauce is.
For the Toppings
Tomato sauce (1 cup / 240ml) — I use a simple canned crushed tomato or pizza sauce. No fancy artisanal stuff needed. I like a bit of sweetness, so I add a teaspoon of sugar to the sauce if it’s too acidic.
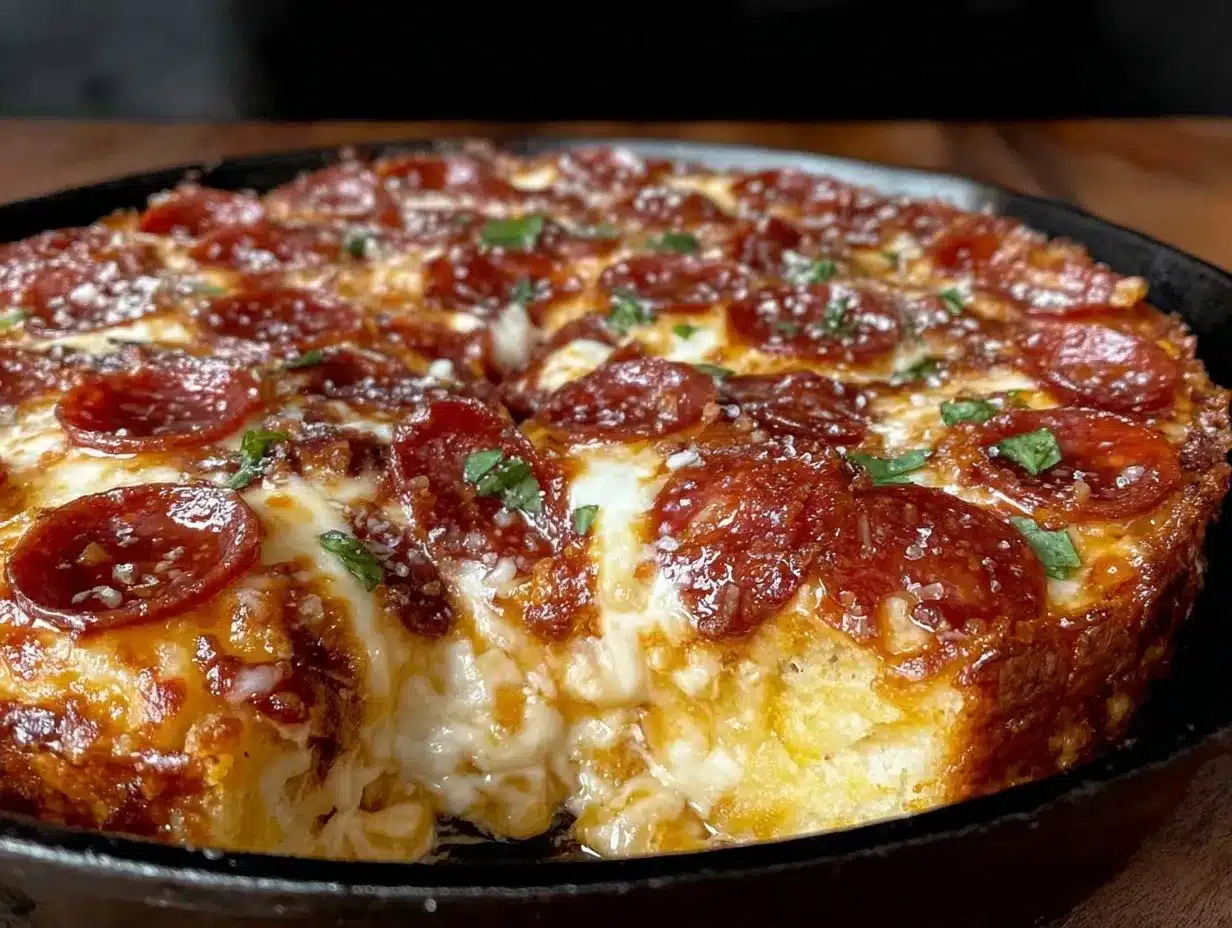
Mozzarella cheese (2 cups / 200g, shredded) — Buy the block and shred it yourself. Pre-shredded cheese has anti-caking agents that make it melt poorly. I’ve tasted the difference, and it’s huge. Block mozzarella melts into gooey perfection.
Pepperoni slices (1 package / about 20-25 slices) — The star of the show. Look for the kind that curls up and gets crispy edges. I buy the generic brand from the grocery store—it’s cheaper and tastes just as good.
Optional: Red pepper flakes (1 teaspoon) — For a little kick. I always have these on hand. If you like spice, don’t be shy.
Optional: Fresh basil (2 tablespoons, chopped) — Adds freshness at the end. Not traditional for deep dish, but I love the pop of color and flavor.
For the Pan
Olive oil (1 tablespoon) — To grease the cast iron. This ensures the bottom crust gets crispy and doesn’t stick. Cast iron needs seasoning, but a little oil goes a long way.
Equipment Needed
You don’t need fancy equipment for this. Here’s what I actually use.
10-12 inch Cast Iron Skillet — I use my well-seasoned Lodge skillet. It needs to be oven-safe. If you don’t have cast iron, a heavy-bottomed oven-safe skillet works, or even a deep-dish pie pan. But cast iron gives the best crust.
Mixing Bowl — Any size works. I use a large plastic bowl because it’s easy to clean.
Measuring Cups and Spoons — Standard stuff. Dollar store versions work fine.
Pizza Peel or Baking Sheet — Optional. If you’re worried about transferring the pizza, you can bake it directly in the skillet. I usually just lift the edges with a spatula to check doneness.
Oven Mitts — Cast iron gets HOT. Do not touch the pan with bare hands. I’ve burned myself enough times to know this is non-negotiable.
Pastry Brush or Spoon — For spreading the sauce. I use the back of a spoon because it’s easier to control.
How to Make It: Step-by-Step
Alright, let’s make this! I’m walking you through exactly how I do it, including the little tricks I’ve picked up.
Step 1: Make the Dough (5 minutes + 1 hour rise)
In a large bowl, combine the warm water, sugar, and yeast. Stir gently and let it sit for 5-10 minutes until it gets foamy. This means the yeast is alive and working. If it doesn’t foam, your water was too hot or cold, or your yeast is old. Start over.
Add the flour, salt, and olive oil. Stir with a wooden spoon or mix with your hands until a shaggy dough forms. Turn it out onto a floured surface and knead for 5-7 minutes until smooth and elastic. If it’s too sticky, add a little more flour. If it’s too dry, add a splash of water.
Place the dough in a lightly oiled bowl, cover with plastic wrap or a damp towel, and let it rise in a warm place for 1 hour, or until doubled in size. This is the only long wait, but you can do other things while it rises.
Step 2: Prep the Pan and Oven (5 minutes)
Preheat your oven to 450°F (230°C). Place your cast iron skillet in the oven while it preheats. Heating the pan beforehand helps create that crispy bottom crust. Grease the skillet with olive oil, making sure to coat the bottom and sides.
Step 3: Shape the Dough (5 minutes)
Punch down the risen dough to release air. Roll it out on a floured surface into a circle that’s about 10-12 inches wide. If it shrinks back, let it rest for 5 minutes and try again. Gently place the dough into the hot skillet. Press it into the corners and up the sides. Don’t worry if it’s not perfect; this is a rustic, family-style pizza.
Step 4: Add the Toppings (5 minutes)
Spoon the tomato sauce over the dough, spreading it evenly but leaving a small border for the crust. Sprinkle the shredded mozzarella generously over the sauce. Then, layer the pepperoni slices. I like to overlap them slightly so you get maximum pepperoni in every bite.
If you’re adding other toppings like mushrooms or peppers, add them now. But keep it simple. Too many toppings can make the pizza soggy.
Step 5: Bake (15-20 minutes)
Place the skillet back in the oven. Bake for 15-20 minutes, or until the crust is golden brown and the cheese is bubbling and slightly browned. Check it at 15 minutes. If the crust is browning too fast, you can cover the edges with foil.
Step 6: Cool and Serve (5 minutes)
Remove the skillet from the oven (use your oven mitts!). Let the pizza cool for 5 minutes before slicing. This allows the cheese to set slightly so it doesn’t slide off when you cut it. Slice into wedges and serve with extra red pepper flakes if you like.
Total Time: About 30 minutes active, 1 hour rising (mostly hands-off)
Expert Tips & Tricks
Here’s everything I’ve learned from making this dozens of times. These tips will save you from my mistakes.
Don’t Rush the Rise
I know it’s tempting to skip the rise if you’re hungry, but it makes a huge difference. The dough will be denser and less flavorful. If you’re in a rush, you can use store-bought pizza dough, but homemade is worth the wait. I often make the dough on Sunday and let it rise slowly in the fridge overnight. Then I just shape and bake during the week.
Preheat the Pan
This is the secret to crispy crust. Putting the skillet in the oven while it preheats ensures the bottom of the pizza starts cooking immediately. It prevents that soggy bottom issue that plagues homemade pizza.
Shred Your Own Cheese
I cannot stress this enough. Pre-shredded cheese has cornstarch to prevent clumping, which stops it from melting properly. Block cheese melts into a creamy, stretchy pool of goodness. It takes 2 minutes to grate, and it’s worth it.
Don’t Overload the Toppings
Less is more. Too many toppings can weigh down the dough and prevent it from cooking evenly. Keep it simple with sauce, cheese, and pepperoni. You can always add veggies on the side.
Let It Cool
I know it’s hard to wait, but slicing immediately can cause the cheese to slide off. Letting it rest for 5 minutes helps the structure set. Plus, it’s safer to eat when it’s not lava-hot.
Common Mistakes (and how to avoid them):
- Soggy Bottom: Usually means the pan wasn’t preheated or the sauce was too watery. Use thick sauce or drain canned tomatoes.
- Raw Dough in Middle: Oven temperature too low. Make sure your oven is fully preheated and the cast iron is hot.
- Burnt Crust: Oven too high or pizza too close to the top element. Check at 15 minutes.
Variations & Substitutions
Once you’ve nailed the basic version, here’s how you can mix it up. I’ve tried all of these.
Meat Lover’s Deep Dish
Add cooked Italian sausage or crumbled bacon along with the pepperoni. My husband loves this version. It’s rich and hearty.
Vegetarian Delight
Skip the pepperoni and add sliced mushrooms, green peppers, onions, and olives. Sauté the veggies first to remove excess moisture, or they’ll make the pizza soggy.
Hawaiian Style
Add diced ham and pineapple chunks. I know some people hate pineapple on pizza, but I think it’s a perfect sweet-and-savory combo. The heat caramelizes the pineapple nicely.
White Pizza
Skip the tomato sauce and use a base of ricotta and mozzarella. Add garlic and spinach. It’s creamy and delicious. I like to drizzle with olive oil after baking.
Gluten-Free
Use a gluten-free pizza dough mix. Follow the package instructions for rising. The texture will be different, but it’s still tasty. I’ve used Bob’s Red Mill and it works well.
Dairy-Free
Use dairy-free mozzarella and skip the butter/oil in the dough if needed. Many brands have improved their vegan cheese, so look for one that melts well.
Serving & Storage
How to Serve:
I usually serve this straight from the skillet at the dinner table—it looks rustic and stays warm. But here are other ways I’ve enjoyed it:
- Garlic Bread: Obviously. Always.
- Simple Green Salad: A light arugula salad with balsamic vinaigrette cuts through the richness of the pizza.
- Roasted Vegetables: Broccoli or asparagus on the side.
Storage Instructions:
Refrigerator: Store leftovers in an airtight container for up to 4 days. The pizza will keep well in the fridge.
Reheating: Best method: Reheat in a skillet over medium-low heat. This restores the crispy crust. Cover with a lid to melt the cheese. Microwave works in a pinch, but the crust will get chewy. Heat in 30-second intervals.
Freezing: You can freeze baked pizza slices for up to 2 months. Wrap tightly in plastic wrap and foil. Thaw in the fridge and reheat in the oven or toaster oven.
Meal Prep: Make the dough on Sunday, portion it into balls, and freeze. Thaw overnight in the fridge. When you need dinner, just shape and bake. It’s a lifesaver for busy weeknights.
Nutrition Information
I’m not a nutritionist, but here’s the breakdown if you’re tracking. This is comfort food, so it’s not diet food, but it’s balanced enough for a family meal.
Per Serving (based on 8 slices):
- Calories: 350
- Protein: 14g
- Carbs: 40g
- Fiber: 2g
- Fat: 15g
- Sodium: 600mg
Look, this is pizza. It’s supposed to be indulgent. But making it at home means you know exactly what’s in it. You can reduce the sodium by using low-sodium sauce and cheese. You can add more veggies to boost the nutrition. But usually? I just eat a reasonable portion and enjoy it.
Final Thoughts
So that’s my cast iron deep dish pepperoni pizza! I’ve probably talked your ear off at this point, but when you make a recipe this often, you have a lot to say about it.
This has saved weeknight dinners more times than I can count. It’s my answer to “what’s for dinner” when I’m tired, don’t want takeout, and still want something that tastes really good. My kids are happy, my husband’s happy, and I’m happy because I’m not stressed about cooking.
Make it yours! Try different add-ins, swap in your favorite vegetables, or adjust the cheese. The best recipes are the ones you adapt to your family’s tastes. If you make this, drop a comment and let me know what you think! I love hearing how recipes turn out in your kitchen. And if something doesn’t work, tell me that too—I’m here to help troubleshoot.
Happy cooking! And I hope your kitchen smells half as good as mine does right now.
Frequently Asked Questions
Can I use store-bought dough?
Absolutely! I use store-bought dough all the time when I’m in a rush. Just roll it out and press it into the skillet. You might not get the same rise, but it’s still delicious and saves a lot of time. It’s a great option for busy weeknights.
Why did my pizza stick to the pan?
Usually means the pan wasn’t greased well enough or wasn’t preheated. Make sure to coat the skillet generously with olive oil. Also, let the pizza cool for a few minutes before trying to remove it. The cheese acts like glue when it’s hot.
Can I make this ahead for a party?
You can prep the dough ahead, but bake it fresh. Assemble the pizza up to 2 hours ahead and keep it covered in the fridge. Take it out 30 minutes before baking to let it come to room temperature. This ensures even cooking.
Why is my crust soggy?
Too much sauce or wet toppings. Use a thick sauce and drain any canned veggies. Also, make sure your oven is fully preheated and the cast iron is hot. The high heat is crucial for a crispy crust.
Can I freeze the dough?
Yes! After the first rise, punch down the dough, wrap it tightly in plastic wrap, and freeze for up to 3 months. Thaw in the fridge overnight before shaping and baking.
What’s the best cheese for deep dish?
Low-moisture mozzarella is best because it melts well without making the pizza watery. I also like to add a little Parmesan on top for extra flavor.
How do I reheat leftovers?
Skillet reheating is best. Heat a little oil in a skillet, add the pizza slice, and cover. This restores the crispiness. Avoid the microwave if you can—it makes the crust chewy.
Pin This Recipe!

Cast Iron Deep Dish Pepperoni Pizza: 5-Ingredient Family Dinner
- Total Time: 35 minutes
- Yield: 8 servings 1x
Description
A quick, budget-friendly deep dish pepperoni pizza made in a cast iron skillet. Features a crispy, chewy crust and gooey cheese, ready in about 30 minutes of active time.
Ingredients
- 2 ½ cups (315g) all-purpose flour
- 1 packet (2 ¼ teaspoons) active dry yeast
- 1 cup (240ml) warm water (110°F/43°C)
- 2 tablespoons (30ml) olive oil (for dough)
- 1 teaspoon sugar
- 1 teaspoon salt
- 1 cup (240ml) tomato sauce
- 2 cups (200g) shredded mozzarella cheese
- 1 package (20-25 slices) pepperoni
- 1 tablespoon olive oil (for greasing pan)
- 1 teaspoon red pepper flakes (optional)
- 2 tablespoons fresh basil, chopped (optional)
Instructions
- In a large bowl, combine warm water, sugar, and yeast. Let sit for 5-10 minutes until foamy.
- Add flour, salt, and 2 tablespoons olive oil. Stir until a shaggy dough forms.
- Knead on a floured surface for 5-7 minutes until smooth and elastic.
- Place dough in an oiled bowl, cover, and let rise in a warm place for 1 hour until doubled.
- Preheat oven to 450°F (230°C). Place cast iron skillet in the oven to preheat.
- Grease the hot skillet with 1 tablespoon olive oil.
- Punch down risen dough and roll into a 10-12 inch circle.
- Press dough into the hot skillet, ensuring it covers the bottom and goes up the sides.
- Spread tomato sauce evenly, leaving a border for the crust.
- Sprinkle shredded mozzarella cheese generously over the sauce.
- Layer pepperoni slices over the cheese.
- Bake for 15-20 minutes until crust is golden brown and cheese is bubbling.
- Remove from oven and let cool for 5 minutes before slicing.
Notes
Preheating the cast iron skillet is crucial for a crispy crust. Shred your own cheese for better melting. Let the pizza cool for 5 minutes before slicing to prevent cheese from sliding off. For leftovers, reheat in a skillet to restore crispiness.
- Prep Time: 15 minutes
- Cook Time: 20 minutes
- Category: Main Course
- Cuisine: American
Nutrition
- Serving Size: 1 slice (1/8 of pizz
- Calories: 350
- Sugar: 4
- Sodium: 600
- Fat: 15
- Saturated Fat: 6
- Carbohydrates: 40
- Fiber: 2
- Protein: 14
Keywords: deep dish pizza, cast iron pizza, pepperoni pizza, family dinner, quick dinner, homemade pizza, budget meals


