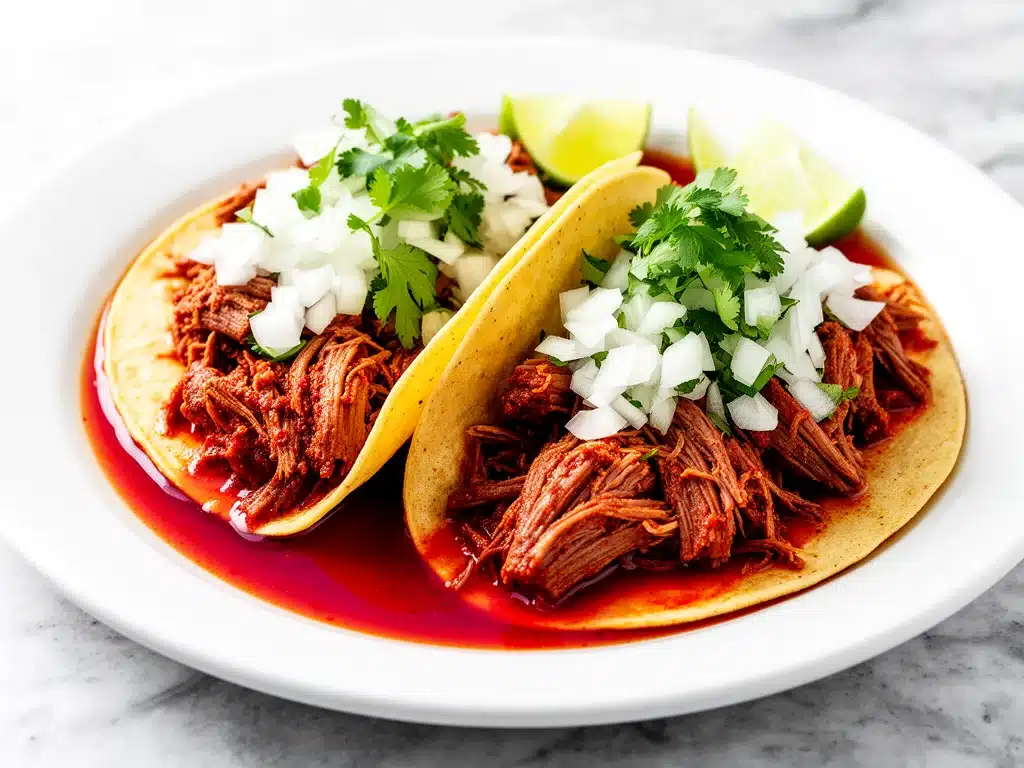
I still remember the first time I had real beef birria. It wasn’t in a fancy restaurant with white tablecloths. It was at a crowded, fluorescent-lit taqueria in East LA, standing in line with my uncle, holding a paper plate that was already dripping with red oil. The taco was dipped in that consomme, fried until the edges were crispy and lacy, then stuffed with melted cheese and tender beef. I took one bite, and my mind was officially blown. It was spicy, savory, rich, and completely addictive. I stood there on the sidewalk, trying not to burn my fingers, thinking, “I need to learn how to make this at home.”
For years, I tried. I bought jars of sauce. I followed complicated recipes that called for twelve different dried chilies I couldn’t pronounce. I ended up with tacos that were either too dry or tasted like pure vinegar. It was frustrating. I wanted that deep, complex flavor—the kind that comes from slow-cooking beef until it falls apart—but I didn’t have hours to spare or a pantry full of exotic spices.
Then, a few months ago, I finally cracked the code. It turns out, the secret isn’t a magic ingredient; it’s about balancing the chilies and giving the beef enough time to break down. I’ve made this homemade beef birria tacos recipe probably twenty times since then. I’ve tweaked the spice levels, tested different cuts of meat, and perfected the dipping sauce (consomme) that ties everything together. And now, I’m sharing it with you. This is the version that makes my family fight over the last taco. It’s the version that impresses every time, whether you’re hosting a dinner party or just want to treat yourself on a Tuesday night.
There’s something deeply satisfying about pulling a pot of braised beef out of the oven, smelling that aroma fill the house, and knowing you’re about to eat something that tastes like it took all day. Spoiler alert: it does take a while, but most of that time is hands-off. You set it, you forget it, you come back to magic. Let’s get into how you can make this restaurant-quality dish in your own kitchen.
Why You’ll Love This Recipe
Okay, so why should you add this to your rotation? Here’s the honest truth. This recipe has completely changed how I think about tacos. It’s not just another weeknight meal; it’s an event. And it’s the kind of event that brings people together.
Deep, Complex Flavor — Most taco recipes rely on simple spices. This one uses a blend of guajillo, ancho, and chipotle chilies, plus aromatics like garlic, onion, and spices. The result is a sauce that’s smoky, slightly sweet, and deeply savory. It’s layers of flavor in every bite. I’ve served this to my picky eater brother-in-law, and he actually asked for the recipe. That’s saying something.
Tender, Fall-Apart Beef — The secret is the low-and-slow braise. By cooking the beef in the chili-consomme mixture for several hours, the connective tissues break down completely. The meat becomes so tender it literally falls apart when you touch it. No chewing required. It’s pure comfort.
Crispy, Cheesy Tacos — We’re not just steaming these tacos. We’re dipping them in the consomme and frying them in oil. This creates a crispy, golden shell that holds the melted cheese and beef inside. It’s the contrast of textures that makes this recipe addictive. Crunchy outside, soft and juicy inside.
Rich Consomme for Dipping — You can’t have birria without the broth. This consomme is flavorful enough to drink on its own (and trust me, you will want to). It adds an extra layer of moisture and spice to the tacos, and it’s perfect for dipping. I usually make extra just so we have more to sip on.
Make-Ahead Friendly — Here’s the best part: this recipe gets better the next day. In fact, I often make it on Sunday and reheat it on Wednesday. The flavors meld together over time, making the beef even more flavorful. It’s perfect for meal prep or when you want dinner ready to go with minimal effort.
Customizable Spice Level — Want it mild? Leave out the chipotle. Want it fiery? Add more. This recipe is flexible. I usually make it medium-spicy because my kids can handle it, but I add an extra chipotle for myself. You control the heat.
Impress Your Guests — If you want to be the hero of the party, make this. It looks impressive on the table, smells amazing, and tastes incredible. I’ve made this for potlucks, game days, and family dinners, and it’s always the first dish to disappear. People ask me to make it again and again.
So basically, if you love tacos, cheese, and rich flavors, this is your new favorite. It’s worth the effort, and I promise you’ll be hooked.
Ingredients You’ll Need
Before we start, let’s talk about what you need. This recipe might look like a lot, but most of it is pantry staples or easy-to-find ingredients. I’m going to break it down so you know exactly what to buy and why it matters.
For the Chili Sauce (The Base):
Guaajillo chilies (6 dried, stems and seeds removed) — These are the backbone of the birria sauce. They’re mild, slightly sweet, and add a beautiful red color. If you can’t find them, you can substitute with more ancho chilies, but guajillo gives that classic tang.
Ancho chilies (4 dried, stems and seeds removed) — Anchos are like mild, dried poblano peppers. They add a raisin-like sweetness and depth. Don’t skip these; they balance the heat from the chipotle.
Chipotle peppers in adobo sauce (2-3 peppers, minced) — This is where the smoky heat comes from. Start with two if you want medium spice, or three if you like it hot. The adobo sauce adds extra flavor, so chop the peppers and use a spoonful of the sauce too.
Garlic (6 cloves, peeled) — Fresh garlic is non-negotiable. It adds a pungent, aromatic base that ties the spices together. I use a lot because I love garlic, and you will too.
White onion (1 large, quartered) — This caramelizes in the sauce and adds natural sweetness. You don’t need to dice it; just quarter it. We’ll blend it up later.
Fresh cilantro (1 bunch, stems included) — Cilantro adds freshness and brightness. Don’t throw away the stems! They have tons of flavor. Blend them all together.
Spices:
Dried oregano (Mexican preferred) (1 tablespoon) — Mexican oregano is more citrusy and robust than Mediterranean oregano. If you only have Mediterranean, it’ll work, but the flavor will be slightly different.
Ground cumin (1 teaspoon) — Adds earthiness and warmth. A little goes a long way.
Ground black pepper (1 teaspoon) — Freshly cracked is best. It adds a subtle heat and depth.
Bay leaves (2 dried) — These infuse the sauce with a subtle herbal note. Remove them before blending.
For the Beef:
Beef chuck roast (3-4 pounds) — This is the best cut for braising. It has enough fat and connective tissue to stay juicy and tender during the long cook. Look for a roast with good marbling. You can also use beef brisket or shanks, but chuck is my go-to for balance.
Salt (2 teaspoons, or to taste) — You’ll salt the beef before searing it, and then the sauce will add more salt. Use kosher salt for better control.
For the Tacos:
Corn tortillas (12-16 small, 6-inch) — Authentic birria uses corn tortillas. They hold up better to the consomme and have a better texture. Flour tortillas get too soggy. Look for fresh, soft corn tortillas.
Monterey Jack cheese (2 cups, shredded) — This cheese melts beautifully and has a mild flavor that doesn’t overpower the beef. You can also use a mix of Monterey Jack and cheddar, or even Oaxaca cheese if you can find it.
Vegetable or canola oil (for frying) — You’ll need enough oil to lightly coat the bottom of your skillet. Don’t use olive oil; it has a low smoke point and will burn.
Optional Toppings:
White onion, diced — For crunch and freshness.
Fresh cilantro, chopped — For garnish.
Lime wedges — A squeeze of lime brightens up the rich, heavy flavors.
Queso fresco or cotija cheese — Crumbled on top for extra saltiness.
Avocado or guacamole — Adds creaminess and cools the spice.
Consomme — For dipping. Save some of the braising liquid!
That’s it! Nothing too crazy. If you have a good butcher, you can probably get them to trim the chuck for you, but it’s easy to do yourself.
Equipment Needed
You don’t need fancy gadgets for this. Here’s what I actually use, and what you can swap if needed.
Large pot or Dutch oven — I use a 6-quart Dutch oven. It needs to be big enough to hold the beef and the sauce comfortably. If you don’t have a Dutch oven, a large stockpot works fine. Just make sure it has a tight-fitting lid.
Blender — You’ll need a high-powered blender to puree the chili sauce. A regular blender works too, but you might need to blend in batches. Make sure it’s clean before you start!
Large skillet or cast-iron pan — For frying the tacos. A 12-inch skillet is ideal. Cast iron retains heat well, which helps get that crispy edge. Non-stick works too, but you won’t get quite as much crunch.
Sharp knife and cutting board — For trimming the beef and chopping aromatics. A dull knife will make this process miserable.
Measuring cups and spoons — Standard stuff. I use metal spoons for spices and glass cups for liquids.
Tongs — For handling the beef and flipping the tacos. Tongs are much easier than a spatula for turning the tortillas.
Sieve or fine-mesh strainer — Optional, but I like to strain the sauce after blending to remove any tough chili bits. It makes the sauce smoother.
Slotted spoon — For lifting the beef out of the pot. Keeps the liquid separate.
Aluminum foil — To cover the pot during the braise. Or just use the lid if it fits well.
That’s basically it. Nothing fancy. Just standard kitchen tools you probably already have.
How to Make It: Step-by-Step
Alright, let’s make this! I’m walking you through exactly how I do it, including the little tricks I’ve picked up over the years. It’s a multi-step process, but each step is straightforward.
Step 1: Prep the Chilies (10 minutes)
Start by removing the stems and seeds from the dried guajillo and ancho chilies. You want to keep the pods intact. Place them in a large bowl and cover with boiling water. Let them soak for 10-15 minutes until they’re soft and pliable. This rehydrates them and makes them easy to blend. Don’t skip this step; dry chilies won’t blend smoothly.
Step 2: Blend the Sauce (5 minutes)
Drain the chilies and put them in your blender. Add the minced chipotle peppers (with some adobo sauce), garlic cloves, quartered onion, cilantro (stems and all), oregano, cumin, black pepper, and bay leaves. Add 1 cup of water. Blend on high until you have a smooth, vibrant red paste. If your blender struggles, add a little more water. The sauce should be smooth, not chunky. Strain it if you want it extra silky, but it’s not strictly necessary.
Step 3: Sear the Beef (10 minutes)
Pat the beef chuck roast dry with paper towels. Season generously with salt on all sides. Heat a little oil in your Dutch oven over medium-high heat. Sear the beef on all sides until it’s browned and crispy. This takes about 3-4 minutes per side. Don’t crowd the pot; if your roast is huge, sear it in two batches. Searing locks in flavor and adds a nice crust.
Step 4: Braise the Beef (2-3 hours)
Pour the blended chili sauce over the seared beef. The liquid should come about halfway up the roast. If it doesn’t, add a little more water or beef broth. Cover the pot with a tight-fitting lid or aluminum foil. Place it in a 325°F (160°C) oven. Braise for 2-3 hours, or until the beef is fork-tender. Check it after 2 hours; if it’s still tough, give it another 30 minutes. The beef should pull apart easily with a fork.
Step 5: Shred the Beef (10 minutes)
Remove the pot from the oven. Carefully take out the beef and place it on a cutting board or large plate. Discard the bay leaves. Let the beef rest for 5 minutes, then shred it using two forks. Pull the meat apart into bite-sized pieces. Don’t worry if it’s not perfect; rustic is good here. Set the shredded beef aside.
Step 6: Prepare the Consomme (5 minutes)
Strain the braising liquid through a fine-mesh sieve into a bowl. This is your consomme. You can skim off excess fat if you want a lighter broth, but I usually leave some in for flavor. Taste it and adjust salt if needed. This liquid is gold. Save it for dipping and for frying the tacos.
Step 7: Assemble and Fry the Tacos (15 minutes)
Heat a large skillet over medium heat. Add a thin layer of oil. Take a corn tortilla, dip it quickly into the warm consomme (don’t soak it, just coat both sides). Place it in the hot skillet. Immediately sprinkle shredded cheese on one half of the tortilla. Add a generous amount of shredded beef on top of the cheese. Fold the tortilla in half, pressing down gently. Cook for 2-3 minutes until the bottom is golden and crispy. Flip and cook the other side for another 2-3 minutes. The cheese should be melted and the tortilla crispy. Repeat with the remaining tortillas.
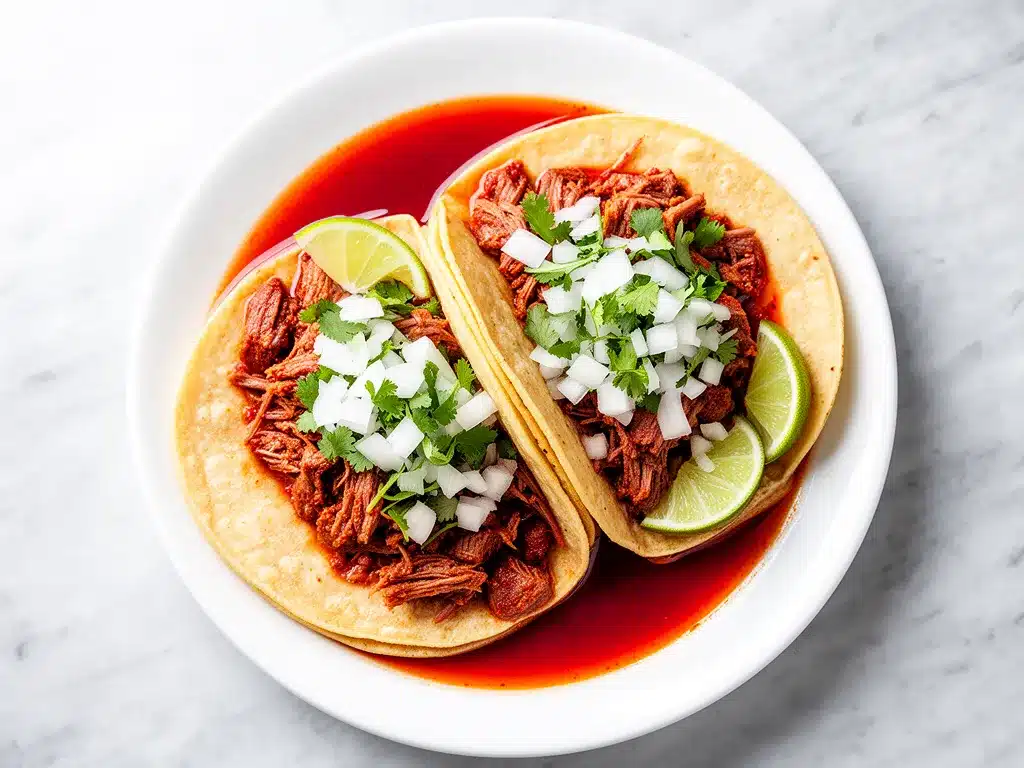
Serve immediately with extra consomme, diced onions, cilantro, and lime wedges. Dig in!
Expert Tips & Tricks
Here’s everything I’ve learned from making this dozens of times. These tips will save you from my mistakes.
Don’t Rush the Sear
I know it’s tempting to just throw the beef in the sauce, but searing it first adds a depth of flavor that you can’t get otherwise. It creates a Maillard reaction that makes the beef taste richer. Take the time to brown it well.
Soak the Chilies Properly
If your chilies aren’t soft enough, they’ll leave gritty bits in your sauce. Make sure they’re fully rehydrated. If you’re in a hurry, you can microwave them with water for 2 minutes, but soaking in hot water is more even.
Save the Consomme
This liquid is the heart of the dish. Don’t throw it away! Use it to dip the tacos, drink it as a soup, or even use it to cook rice for extra flavor. It’s packed with chili essence.
Don’t Over-soak the Tortillas
When dipping the tortillas, just a quick dip is enough. If you soak them too long, they’ll fall apart in the skillet. You want them coated, not soggy.
Use Enough Oil
You need enough oil to fry the tortillas properly. If the oil is too shallow, the tortillas will steam instead of crisp up. Aim for about 1/4 inch of oil in the skillet.
Keep the Consomme Warm
Keep your consomme warm in a small pot or bowl while you’re frying the tacos. Cold consomme will make the tortillas cool down too quickly and won’t coat them as well.
Shred Beef While Warm
Shred the beef while it’s still warm. It’s much easier to pull apart. If you let it cool completely, it gets tough and hard to shred.
Double the Batch
This recipe freezes well. I often make a double batch and freeze the shredded beef and consomme separately. Then I just reheat and fry when I want tacos again. It’s a lifesaver for busy weeknights.
Variations & Substitutions
Once you’ve nailed the basic version, here’s how you can mix it up. I’ve tried all of these.
Chicken Birria
Use boneless, skinless chicken thighs instead of beef. Chicken cooks faster, so braise for only 1-1.5 hours. The flavor is slightly lighter but still delicious.
Pork Birria
Use pork shoulder (butt) instead of beef. Pork is naturally sweeter and pairs beautifully with the chilies. Braise for 2-3 hours until tender.
Vegetarian Birria
Skip the meat and use portobello mushrooms or cauliflower steaks. Marinate them in the chili sauce and roast them. Add beans for protein. It’s surprisingly hearty.
Spicy Version
Add more chipotle peppers or a diced jalapeño to the sauce. You can also sprinkle cayenne pepper for extra heat.
Mild Version
Use only guajillo and ancho chilies, and leave out the chipotle. The sauce will still be flavorful but much milder.
Cheese Swap
Use queso quesadilla or asadero cheese for a more authentic melt. But Monterey Jack works great too.
Tortilla Swap
If you can’t find corn tortillas, you can use flour tortillas, but they won’t get as crispy. Corn is definitely preferred for authenticity.
Instant Pot Version
You can make this in an Instant Pot. Sear the beef, add the sauce, and pressure cook on high for 60 minutes. Natural release for 15 minutes. It’s faster but doesn’t get quite as tender.
Serving & Storage
How to Serve:
I usually serve these tacos on a large platter with bowls of consomme on the side. Let everyone dip their own tacos. It’s interactive and fun. Add a topping bar with diced onions, cilantro, lime wedges, and avocado slices.
Side Dishes:
These tacos are rich, so pair them with lighter sides. A simple cilantro-lime rice, Mexican street corn (elote), or a crisp cabbage slaw works well. I also like to serve them with a side of refried beans.
Storage:
Refrigerator: Store leftover shredded beef and consomme in airtight containers for up to 4 days. The tortillas and fried tacos are best eaten fresh, but you can reheat them in a skillet.
Freezing: Freeze the shredded beef and consomme separately for up to 3 months. Thaw in the fridge overnight before reheating. Do not freeze the fried tacos; they will get soggy.
Reheating: Reheat the beef and consomme in a pot over low heat, stirring occasionally. You can also microwave them in 30-second intervals. Once warm, dip and fry the tortillas as usual.
Pro Tip: If you’re meal prepping, freeze the beef and sauce in portions. Then you just need to dip and fry the tortillas for a quick, delicious meal any night of the week.
Nutrition Information
I’m not a nutritionist, but here’s the breakdown if you’re tracking. Keep in mind that this is a rich, indulgent dish, so portion control is key.
Per Serving (2 tacos with consomme dip):
- Calories: 450
- Protein: 25g
- Carbs: 35g
- Fat: 22g
- Fiber: 4g
- Sodium: 600mg
What’s Good:
- High in protein from the beef.
- Good source of fiber from the corn tortillas and chilies.
- Contains healthy fats from the beef.
What to Know:
- Higher in calories due to cheese and oil.
- Contains sodium from the seasoning and consomme.
- Gluten-free if using corn tortillas.
Look, this is comfort food. It’s not a diet recipe. But it’s made from real ingredients, and it’s way better than takeout. When I want to make it lighter, I use less cheese and skip the extra oil dip. But usually? I just enjoy it in moderation.
Final Thoughts
So that’s my homemade beef birria tacos recipe! I’ve probably talked your ear off at this point, but when you make a recipe this often, you have a lot to say about it. This dish has saved my weeknight dinners more times than I can count. It’s my answer to “what’s for dinner” when I want something fancy but don’t want to order takeout. My family loves it, my friends beg for it, and I’m always happy to make it again.
Make it yours! Try different cheeses, adjust the spice level, or add your favorite toppings. The best recipes are the ones you adapt to your family’s tastes. And don’t be afraid to make a double batch; leftovers are even better the next day.
If you make this, drop a comment and let me know what you think! I love hearing how recipes turn out in your kitchen. And if something doesn’t work, tell me that too—I’m here to help troubleshoot. Happy cooking! And I hope your kitchen smells half as good as mine does right now.
Frequently Asked Questions
Q: Can I use a slow cooker instead of the oven?
A: Yes! After searing the beef, add it to the slow cooker with the chili sauce. Cook on low for 6-8 hours or high for 3-4 hours. It’s a great hands-off option. Just make sure the beef is tender before shredding.
Q: Why is my consomme too thin?
A: The consomme might need more time to reduce. Simmer it on the stove for 10-15 minutes to thicken it. You can also add a little cornstarch slurry if you’re in a hurry, but reducing is the best way.
Q: Can I make the chili sauce ahead of time?
A: Absolutely. Blend the sauce and store it in an airtight container in the fridge for up to 5 days, or freeze it for up to 3 months. It saves time on the day you cook.
Q: What kind of cheese melts best?
A: Monterey Jack and cheddar are great for melting. Oaxaca cheese is the most authentic, but it can be hard to find. Queso quesadilla is another good option. Avoid pre-shredded cheese; it has anti-caking agents that prevent melting.
Q: Can I use beef broth instead of water for the braise?
A: Yes, using beef broth instead of water will add more depth to the flavor. Just make sure it’s low-sodium so you can control the saltiness.
Q: How do I store leftover fried tacos?
A: Fried tacos are best eaten fresh. If you must store them, keep them in the fridge for 1-2 days. Reheat them in a skillet or oven to restore crispiness. The microwave will make them soggy.
Q: Is birria spicy?
A: It can be! The spice level depends on how many chipotle peppers you use. Start with 2 for medium heat, and add more if you like it hot. You can always tone it down with cheese and lime.
Pin This Recipe!
Homemade Beef Birria Tacos: 7-Step Consomme Recipe
- Total Time: 2 hours 40 minutes
- Yield: 12-16 tacos 1x
Description
A rich, flavorful recipe for beef birria tacos featuring tender, fall-apart braised beef, a smoky chili-consomme sauce, and crispy, cheese-filled corn tortillas.
Ingredients
- 6 dried guajillo chilies (stems and seeds removed)
- 4 dried ancho chilies (stems and seeds removed)
- 2–3 chipotle peppers in adobo sauce (minced)
- 6 cloves garlic (peeled)
- 1 large white onion (quartered)
- 1 bunch fresh cilantro (stems included)
- 1 tablespoon dried oregano (Mexican preferred)
- 1 teaspoon ground cumin
- 1 teaspoon ground black pepper
- 2 dried bay leaves
- 3–4 pounds beef chuck roast
- 2 teaspoons salt (kosher)
- 12–16 small corn tortillas (6-inch)
- 2 cups shredded Monterey Jack cheese
- Vegetable or canola oil (for frying)
- Optional toppings: diced white onion, chopped cilantro, lime wedges, queso fresco or cotija, avocado or guacamole
Instructions
- Prep the Chilies: Remove stems and seeds from guajillo and ancho chilies. Place in a bowl, cover with boiling water, and soak for 10-15 minutes until soft.
- Blend the Sauce: Drain chilies and add to a blender with chipotle peppers (and adobo sauce), garlic, onion, cilantro, oregano, cumin, black pepper, bay leaves, and 1 cup water. Blend until smooth. Strain if desired.
- Sear the Beef: Pat beef chuck roast dry and season with salt. Heat oil in a Dutch oven over medium-high heat. Sear beef on all sides until browned (3-4 minutes per side).
- Braise the Beef: Pour blended sauce over seared beef. Add water or broth if needed so liquid comes halfway up the roast. Cover and braise in a 325°F (160°C) oven for 2-3 hours until fork-tender.
- Shred the Beef: Remove beef from pot and discard bay leaves. Let rest for 5 minutes, then shred using two forks.
- Prepare the Consomme: Strain the braising liquid through a fine-mesh sieve. Skim excess fat if desired. Taste and adjust salt.
- Assemble and Fry Tacos: Heat oil in a skillet. Dip tortillas briefly in warm consomme, place in skillet, add cheese and beef to one half, fold, and fry for 2-3 minutes per side until crispy and golden. Serve with extra consomme and toppings.
Notes
The recipe gets better the next day as flavors meld. You can make a double batch and freeze the shredded beef and consomme separately for up to 3 months. Do not freeze fried tacos as they will get soggy. Ensure chilies are fully rehydrated for a smooth sauce. Use corn tortillas for authenticity and texture.
- Prep Time: 10 minutes
- Cook Time: 2 hours 30 minutes
- Category: Main Course
- Cuisine: Mexican
Nutrition
- Serving Size: 2 tacos with consomm
- Calories: 450
- Sodium: 600
- Fat: 22
- Carbohydrates: 35
- Fiber: 4
- Protein: 25
Keywords: beef birria, birria tacos, consomme recipe, Mexican tacos, braised beef, cheesy tacos, homemade birria, spicy tacos