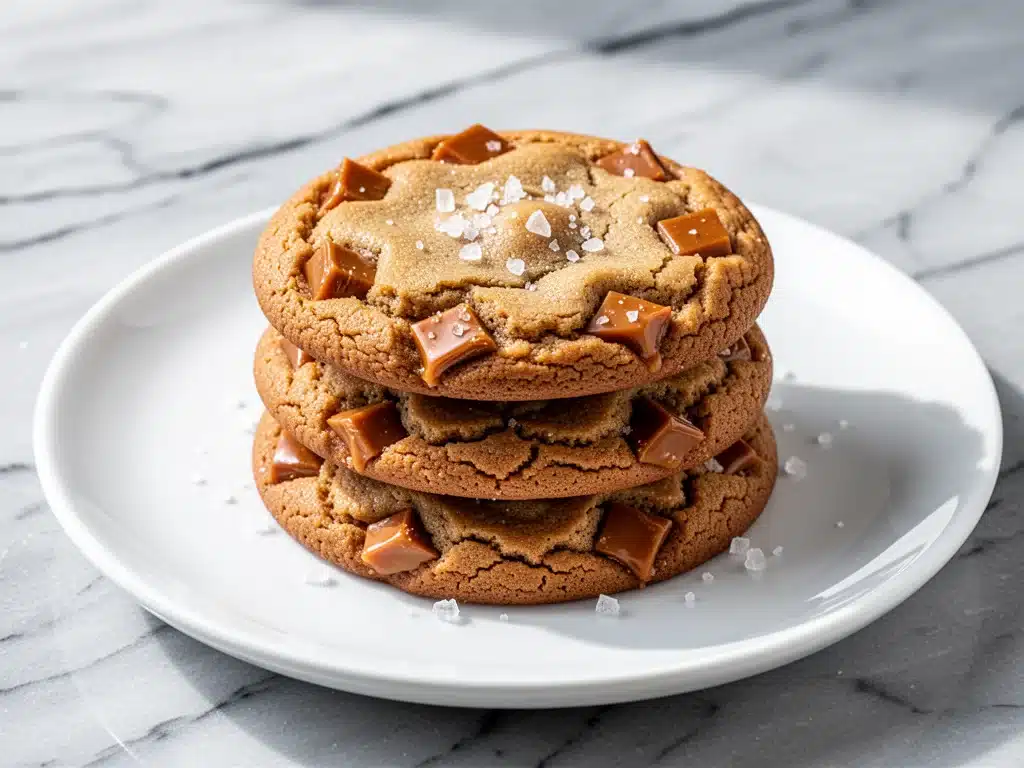
It was 9 PM on a Tuesday in November, and I was staring at a bag of brown sugar like it held the secrets to the universe. My holiday cookie plate was supposed to be done. I had already baked the pumpkin snickerdoodle cookies (which were delicious, don’t get me wrong), and I’d even tackled the classic sugar cookies. But something was missing. The plate felt… safe. Predictable. It lacked that warm, nutty depth that screams “winter.” That’s when I remembered the stick of butter sitting on my counter, waiting to be browned.
I’ve made chewy brown butter toffee cookies dozens of times over the last three years, and let me tell you: once you cross that threshold into brown butter territory, you never go back. These aren’t just cookies; they’re little pockets of caramelized nuttiness wrapped in a soft, chewy exterior. The toffee bits add these incredible salty-sweet crunches that contrast perfectly with the tender dough. They are the kind of cookie that disappears within hours of being put on the counter, leaving behind only crumbs and disappointed family members asking, “Are there any left?”
What I love most about these chewy brown butter toffee cookies is how they elevate simple baking into something that feels fancy but is actually ridiculously easy. You don’t need fancy gadgets or rare ingredients. You just need patience with the butter and a love for chocolate and salt. I’ve tested this recipe with everything from dark chocolate chips to milk chocolate buttons, and while I always come back to the toffee, the beauty of this dough is its versatility. It’s my go-to when I want to impress neighbors, fill a holiday gift tin, or just treat myself to something that tastes like a high-end bakery item.
There’s a specific magic that happens when butter browns. That smell alone—nutty, rich, almost like hazelnuts—is enough to make anyone happy in the kitchen. And when you combine that with the gooey, salty-sweet crunch of toffee pieces? It’s a flavor combination that just works. I remember the first time I pulled these out of the oven, I immediately took a bite while they were still warm. It was a bit risky (burnt fingers are no fun), but the taste was so good I didn’t even care. The toffee had melted into little ribbons of caramel, and the brown butter gave the whole cookie a depth of flavor that regular butter just can’t match. That was the moment I knew these chewy brown butter toffee cookies had to become a holiday staple.
Why You’ll Love This Recipe
If you’re looking for a cookie that strikes the perfect balance between sweet, salty, chewy, and crunchy, look no further. I’ve made these for every holiday party, office potluck, and last-minute gift box since I perfected this recipe. Here’s why they keep coming back to the menu:
Flavor That Actually Lasts — Regular butter cookies taste good, but brown butter cookies taste *complex*. The Maillard reaction in the butter adds a nutty, toasted flavor that lingers. When you add toffee, you get this layered taste experience where every bite is slightly different. I’ve had people ask for the recipe three times at one party. That’s a sign.
Texture Nirvana — The secret to the “chewy” in chewy brown butter toffee cookies is the ratio of brown sugar to white sugar, plus under-baking them slightly. These cookies have a crisp edge that gives way to a soft, gooey center. Plus, the toffee pieces provide little bursts of crunch. It’s not just soft; it has dimension.
Superior to Chocolate Chip — I know, I know, chocolate chip is king. But these cookies compete. In fact, I’d argue they beat out even my brown butter chocolate chip cookies because the toffee adds a salty element that balances the sweetness perfectly. It’s the kind of cookie you crave when you’re tired of plain chocolate.
Make-Ahead Friendly — Holiday baking is stressful enough without worrying about timing. The dough for these cookies can be made up to 5 days in advance and stored in the fridge, or frozen for up to 3 months. I often make a double batch in December, freeze half, and bake fresh ones throughout the season. It saves so much stress.
Perfect for Gifting — These cookies hold their shape well and travel nicely. I pack them in tins with parchment paper between layers, and they stay fresh for a week. They look elegant and taste expensive, making them perfect for teachers, neighbors, or hosts. Just don’t blame me if they eat your gifts before you deliver them.
Ingredients You’ll Need
This list looks long, but honestly, you probably have 80% of it in your pantry already. The key here is quality. Since there are only a few ingredients, each one needs to shine. I’m not exaggerating when I say that using good-quality butter and toffee makes a noticeable difference.
For the Dough
Unsalted Butter (1 cup / 226g) — This is non-negotiable. You need enough fat to brown properly. I use high-fat butter like Kerrygold or Land O’Lakes. Salted butter throws off the salt balance in the recipe. You’ll brown this until it smells like toasted nuts and turns amber-colored.
Dark Brown Sugar (1 cup / 200g, packed) — Dark brown sugar has more molasses than light, giving these cookies a deeper, more caramel-like flavor. It’s crucial for the chewiness. If you only have light brown sugar, it works, but the flavor won’t be as rich.
Granulated White Sugar (½ cup / 100g) — This helps with the crisp edges. Don’t skip it. The combination of sugars creates that perfect chewy-crisp texture.
Eggs (2 large, room temperature) — Room temperature eggs emulsify better into the butter mixture. If you’re in a rush, just put them in a bowl of warm water for 5 minutes. Cold eggs can cause the butter to seize up.
Egg Yolk (1 large) — This is my little secret. Adding an extra yolk adds richness and moisture, contributing to that soft, chewy center. It’s what separates a good cookie from a great one.
Vanilla Extract (2 teaspoons) — Use real vanilla, not imitation. I love using a high-quality bourbon vanilla extract for holidays. It adds a warm, spicy note that pairs beautifully with toffee.
All-Purpose Flour (2 ¼ cups / 280g) — Spoon and level your flour. Don’t scoop it directly from the bag, or you’ll pack it down and end up with dry cookies. I always use King Arthur Flour for baking because it’s consistent.
Baking Soda (1 teaspoon) — This helps the cookies spread and brown. Make sure it’s fresh; old baking soda won’t give you the lift you need.
Baking Powder (½ teaspoon) — A little extra lift to keep them cakey and chewy rather than flat and crisp.
Salt (1 teaspoon) — Since we’re using unsalted butter, salt is essential to balance the sweetness. I use fine sea salt.
The Mix-Ins
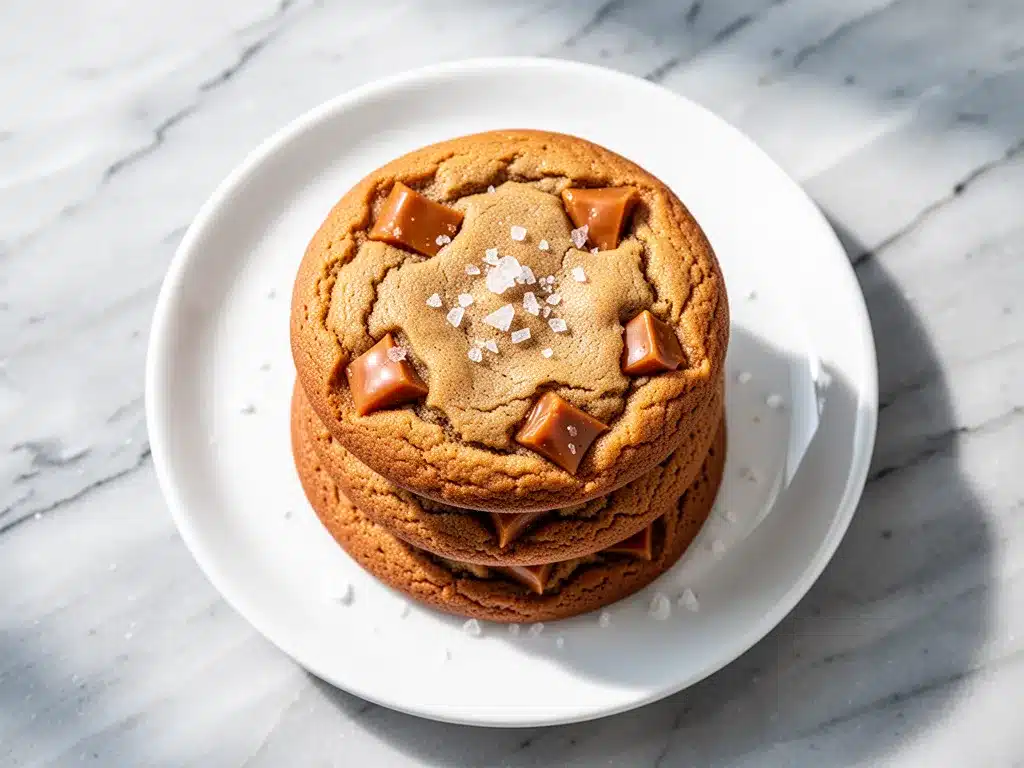
Toffee Bits (1 ½ cups / 170g) — I use Heath bars or generic toffee bits. You want the small, crunchy pieces, not the large shards. They distribute better throughout the cookie. If you can’t find toffee bits, chop up a couple of Heath bars yourself.
White Chocolate Chips (1 cup / 170g) — I prefer white chocolate here because it’s sweeter and creamier, complementing the toffee. Dark chocolate works too, but it changes the flavor profile significantly. Milk chocolate is a happy medium.
Flaky Sea Salt (for topping) — This is the finisher. Sprinkling Maldon sea salt on top right after baking adds that professional bakery look and enhances the toffee flavor. Don’t skip this step.
Substitutions
Gluten-Free? — You can swap the all-purpose flour for a 1:1 gluten-free flour blend like Bob’s Red Mill or King Arthur’s. Add ½ teaspoon of xanthan gum if your blend doesn’t include it. The texture will be slightly more tender but still delicious.
Dairy-Free? — Use vegan butter (like Miyoko’s or Earth Balance) and dairy-free chocolate chips and toffee bits. The brown butter flavor won’t be exactly the same, but it will still be tasty.
Nut Allergy? — Toffee usually contains almonds. Check your toffee bits label. If you need to avoid nuts entirely, swap the toffee for caramel bits or white chocolate chips with a sprinkle of sea salt.
Equipment Needed
You don’t need a fancy kitchen to make these. Here’s what I actually use:
Large Saucepan — I use a heavy-bottomed stainless steel saucepan for browning the butter. It allows you to see the color change clearly and prevents burning. A light-colored pan is best so you can spot the amber color.
Stand Mixer or Hand Mixer — I prefer my stand mixer for creaming the butter and sugars, but a hand mixer works fine. You need to beat the mixture until it’s light and fluffy for about 3-4 minutes. This incorporates air, which helps with the texture.
Whisk — For mixing the dry ingredients. A simple wire whisk works perfectly.
Mixing Bowls — One large bowl for wet ingredients, one medium for dry. Make sure they’re clean and dry.
Baking Sheets — I use half-sheet pans. Light-colored aluminum pans are best because they conduct heat evenly. Dark pans can cause the bottoms to burn too quickly.
Parchment Paper — Line your baking sheets with parchment. It prevents sticking and makes cleanup a breeze. I never bake these directly on the pan; the toffee can melt and create a sticky mess.
Cooling Rack — Essential for letting the cookies cool so they set properly. If you try to move them while they’re hot, they’ll fall apart.
Ice Cream Scoop — I use a medium cookie scoop (about 1.5 tablespoons) to portion the dough. It ensures uniform size and baking time. If you don’t have one, use two spoons.
How to Make It: Step-by-Step
Alright, let’s get baking! This process is straightforward, but browning the butter requires a bit of attention. Here’s exactly how I do it.
Step 1: Brown the Butter (10 minutes)
Start by melting the butter in your saucepan over medium heat. Stir it constantly with a wooden spoon or silicone spatula. At first, it will foam up and bubble. Listen to it—it will start to crackle and pop. Keep stirring. You’ll notice the milk solids at the bottom turning from white to golden brown. This is where the magic happens. The foam will start to settle, and you’ll smell a distinct nutty aroma, like hazelnuts or toasted almonds. As soon as you see dark brown specks at the bottom and the butter smells amazing, remove it from the heat immediately. Pour it into a heat-proof bowl to stop the cooking. Let it cool for 10-15 minutes until it’s still liquid but not hot. If it’s too hot, it will melt the chocolate chips later.
Step 2: Mix the Wet Ingredients (5 minutes)
In your stand mixer fitted with the paddle attachment, combine the cooled brown butter, dark brown sugar, and granulated sugar. Beat on medium-high speed for about 3-4 minutes. The mixture should look light, fluffy, and slightly pale. This step is crucial for texture. Scrape down the sides of the bowl. Add the eggs and egg yolk one at a time, beating well after each addition. Mix in the vanilla extract. The mixture should be smooth and homogeneous.
Step 3: Combine Dry Ingredients (2 minutes)
In a separate medium bowl, whisk together the flour, baking soda, baking powder, and salt. Whisking ensures the leavening agents are evenly distributed, so your cookies rise uniformly.
Step 4: Make the Dough (3 minutes)
With the mixer on low speed, gradually add the dry ingredients to the wet ingredients. Mix just until combined. Do not overmix! Overmixing develops gluten, which leads to tough cookies. As soon as you no longer see streaks of flour, stop. The dough will be thick and sticky.
Step 5: Fold in the Mix-Ins (2 minutes)
Using a spatula or your hands, gently fold in the toffee bits and white chocolate chips. Make sure they’re distributed evenly throughout the dough. If you’re using large toffee pieces, chop them a bit smaller so they don’t poke through the bottom of the cookies.
Step 6: Chill the Dough (30 minutes – 24 hours)
Here’s the trick for chewy brown butter toffee cookies: chill the dough. Cover the bowl with plastic wrap and refrigerate for at least 30 minutes. If you have time, chill it overnight. Chilling solidifies the fat, which prevents the cookies from spreading too much in the oven. This results in thicker, chewier cookies with more concentrated flavor. If you bake the dough warm, you’ll get thin, crispy cookies instead.
Step 7: Scoop and Bake (15 minutes)
Preheat your oven to 350°F (175°C). Line two baking sheets with parchment paper. Scoop the dough onto the sheets, spacing them about 2 inches apart. They will spread. Bake for 10-12 minutes. The edges should be set and lightly golden, but the centers should still look soft and slightly underbaked. This is key! They will continue to cook on the hot baking sheet after you take them out. If you bake them until they look fully done in the oven, they’ll be hard when they cool.
Step 8: The Salt Finish (1 minute)
Immediately after removing the cookies from the oven, sprinkle a pinch of flaky sea salt on top of each cookie. The residual heat will help the salt adhere. Let the cookies cool on the baking sheet for 5 minutes, then transfer them to a wire rack to cool completely. They might seem fragile at first, but they’ll firm up as they cool.
Expert Tips & Tricks
I’ve learned a few things the hard way so you don’t have to. Here’s how to guarantee success every time.
Don’t Rush the Butter Browning — Brown butter can go from perfect to burnt in seconds. If it smells acrid or bitter, start over. Burnt butter cannot be fixed and will ruin the entire batch of cookies. It’s better to under-brown slightly than to burn it.
Chill, Chill, Chill — I know it’s tempting to bake them right away, but chilling the dough is non-negotiable for chewy brown butter toffee cookies. It also makes the dough easier to scoop. If you’re short on time, at least chill for 30 minutes. If you forget, the cookies will spread too thin and lose that chewy center.
Underbake Intentionally — This is the biggest mistake people make. They wait until the cookies look done. They don’t. Pull them out when the edges are just set and the centers still look soft. They will firm up as they cool. Overbaking is the enemy of chewiness.
Use Room Temperature Eggs — Cold eggs can cause the brown butter to solidify slightly, creating a curdled look. Room temperature eggs blend seamlessly, creating a smooth, emulsified dough.
Don’t Skip the Salt — The flaky sea salt on top isn’t just for looks. It cuts through the sweetness of the toffee and chocolate, balancing the flavors. It makes the cookie taste more sophisticated. Use Maldon or similar large-flake sea salt for the best texture and visual appeal.
Storage is Key — Store cookies in an airtight container at room temperature for up to 5 days. Add a piece of bread to the container to keep them soft. The moisture from the bread will migrate to the cookies, keeping them chewy. This is a baker’s secret!
Variations & Substitutions
Once you’ve mastered the base recipe, here are some fun ways to mix it up. I’ve tried all of these, and they’re all winners.
Dark Chocolate Toffee — Swap the white chocolate chips for high-quality dark chocolate chunks (60-70% cocoa). This creates a richer, less sweet cookie. It’s more adult-focused and pairs beautifully with the nutty butter.
Peanut Butter Swirl — Add 2 tablespoons of peanut butter to the wet ingredients before chilling. Or, swirl a teaspoon of peanut butter into each cookie dough ball before baking. The saltiness of the peanut butter complements the toffee perfectly.
Orange Zest — Add the zest of one orange to the dry ingredients. Orange and toffee are a classic combination (think of an Orange Turducken or cranberry orange bundt cake). It adds a bright, citrusy note that cuts the richness.
Espresso Powder — Add 1 teaspoon of instant espresso powder to the dry ingredients. It enhances the chocolate and toffee flavors without making the cookies taste like coffee. It’s a subtle depth booster.
Chewy Brown Butter Toffee Bars — Instead of scooping individual cookies, press the dough into a lined 9×13 inch pan. Bake at 350°F for 20-25 minutes until golden. Cut into squares. This is great for parties because it’s easier to serve and portion.
Vegan Version — Use vegan butter (stick form, not tub), dairy-free chocolate chips, and dairy-free toffee bits (check labels, as some contain milk). The texture might be slightly different, but the flavor will be similar.
Gluten-Free — As mentioned, use a 1:1 gluten-free flour blend. Add xanthan gum if needed. The cookies will be slightly more tender and crumbly, so handle them gently.
Serving & Storage
These cookies are best enjoyed fresh, but they’re also great for gifting and meal prep. Here’s how to keep them perfect.
How to Serve — I serve these warm, right out of the oven, with a glass of cold milk. The toffee is gooey and the chocolate is melted. But they’re also excellent at room temperature for parties. For holiday gifts, pack them in tins with parchment paper between layers. They look elegant with the flaky salt on top.
Side Dishes — These cookies pair well with hot coffee, tea, or a glass of milk. For a holiday spread, serve them alongside sweet potato pie bars or apple cider doughnut cake for a dessert table with fall and winter vibes.
Refrigerator Storage — Store in an airtight container at room temperature for up to 5 days. Add a slice of bread to keep them soft. If your kitchen is very humid, store them in the fridge, but let them come to room temperature before eating for the best texture.
Freezing — You can freeze the baked cookies for up to 3 months. Place them in a single layer in an airtight container or freezer bag. Thaw at room temperature before serving. The texture might change slightly, but they’ll still be delicious.
Dough Freezing — This is my favorite method. Scoop the dough onto a baking sheet and freeze until solid (about 2 hours). Then transfer the dough balls to a freezer bag. You can bake them straight from frozen, just add 1-2 minutes to the baking time. This is perfect for having fresh cookies on demand.
Pro Tip — If your cookies seem too soft after cooling, don’t worry. They continue to firm up as they cool completely. Resist the urge to overbake them to fix this. Patience is key!
Nutrition Information
I’m not a nutritionist, but here’s the breakdown if you’re tracking. Keep in mind that these are rich, indulgent cookies, so portion control is key.
Per Cookie (based on 24 cookies):
Calories: 180
Total Fat: 10g
Saturated Fat: 6g
Cholesterol: 35mg
Sodium: 120mg
Total Carbs: 22g
Fiber: 1g
Sugars: 15g
Protein: 2g
What’s Good: — They provide some energy from the carbs and fat. The brown butter adds some flavor complexity without extra calories. The toffee bits add a bit of protein and calcium.
What to Know: — These are high in sugar and saturated fat due to the butter, sugars, and chocolate. Enjoy them as a treat, not a staple. If you’re watching your sugar intake, consider making half-batch with fewer chips and toffee.
Dietary Notes: — Contains: gluten, dairy, eggs. Can be made: gluten-free (with substitutions), vegetarian. Not suitable for: vegan (without modifications), nut-free (toffee often contains almonds).
Final Thoughts
So, there you have it—my recipe for chewy brown butter toffee cookies. I’ve probably talked your ear off at this point, but when you make a recipe this often, you have a lot to say about it. These cookies have saved my holiday gifting game, impressed my pickiest eaters, and provided comfort on cold winter nights.
This recipe is my answer to “what should I bake for the holidays?” when I want something special but manageable. The brown butter adds a sophistication that feels gourmet, but the process is simple enough for beginners. My kids love the toffee crunch, my husband loves the nutty butter flavor, and I love that I can make the dough ahead of time.
Make it yours! Try different chocolates, add nuts, or play with the spices. The best recipes are the ones you adapt to your family’s tastes. If you make these, drop a comment and let me know what you think! I love hearing how recipes turn out in your kitchen. And if something doesn’t work, tell me that too—I’m here to help troubleshoot.
Happy baking! And I hope your kitchen smells half as amazing as mine does right now.
Frequently Asked Questions
Can I use salted butter instead of unsalted?
You can, but you’ll need to reduce the added salt in the recipe by half. Salted butters vary widely in salt content, so it’s hard to guess how much to cut. I strongly recommend using unsalted butter so you can control the salt level. If you must use salted butter, taste the dough before adding the extra salt.
Why did my cookies spread too much?
This usually happens if the butter was too warm when you mixed the dough, or if you didn’t chill the dough long enough. Brown butter cools down quickly, but if you rush it, the dough will be too soft. Also, make sure your oven is fully preheated. If the oven isn’t hot enough when the cookies go in, they’ll spread before they set.
Can I make these cookies ahead for a party?
Absolutely. The dough can be made up to 5 days in advance and stored in the fridge, or frozen for up to 3 months. I often make the dough on Sunday, bake a few batches during the week, and freeze the rest. This makes holiday entertaining so much easier. Just bake them fresh a day or two before the party for the best texture.
Why did my cookies come out cakey instead of chewy?
Cakey cookies usually result from overmixing the dough (developing gluten) or overbaking. Make sure you mix the dry ingredients just until combined. Also, pull the cookies out of the oven when the edges are set but the centers still look soft. They will firm up as they cool. If you bake them until they look fully done, they’ll be cakey and dry.
Can I use milk chocolate chips instead of white?
Yes, you can. Milk chocolate will make the cookies less sweet and more balanced. Some people prefer this because the toffee is very sweet, and the milk chocolate cuts the sweetness. It’s a personal preference. I like white chocolate because it’s creamier and complements the toffee’s caramel notes, but milk chocolate is a great alternative.
How do I store these cookies to keep them chewy?
Store them in an airtight container at room temperature. Add a slice of bread to the container. The moisture from the bread will migrate to the cookies, keeping them soft and chewy. This is a classic baker’s trick. They’ll stay fresh for up to 5 days. If they start to dry out, you can revive them by microwaving one for 10 seconds.
Can I freeze the cookie dough?
Yes! This is my preferred method. Scoop the dough onto a baking sheet and freeze until solid (about 2 hours). Then transfer the dough balls to a freezer-safe bag. You can bake them straight from frozen, just add 1-2 minutes to the baking time. This way, you always have fresh cookies on hand. The dough can be frozen for up to 3 months.
Pin This Recipe!
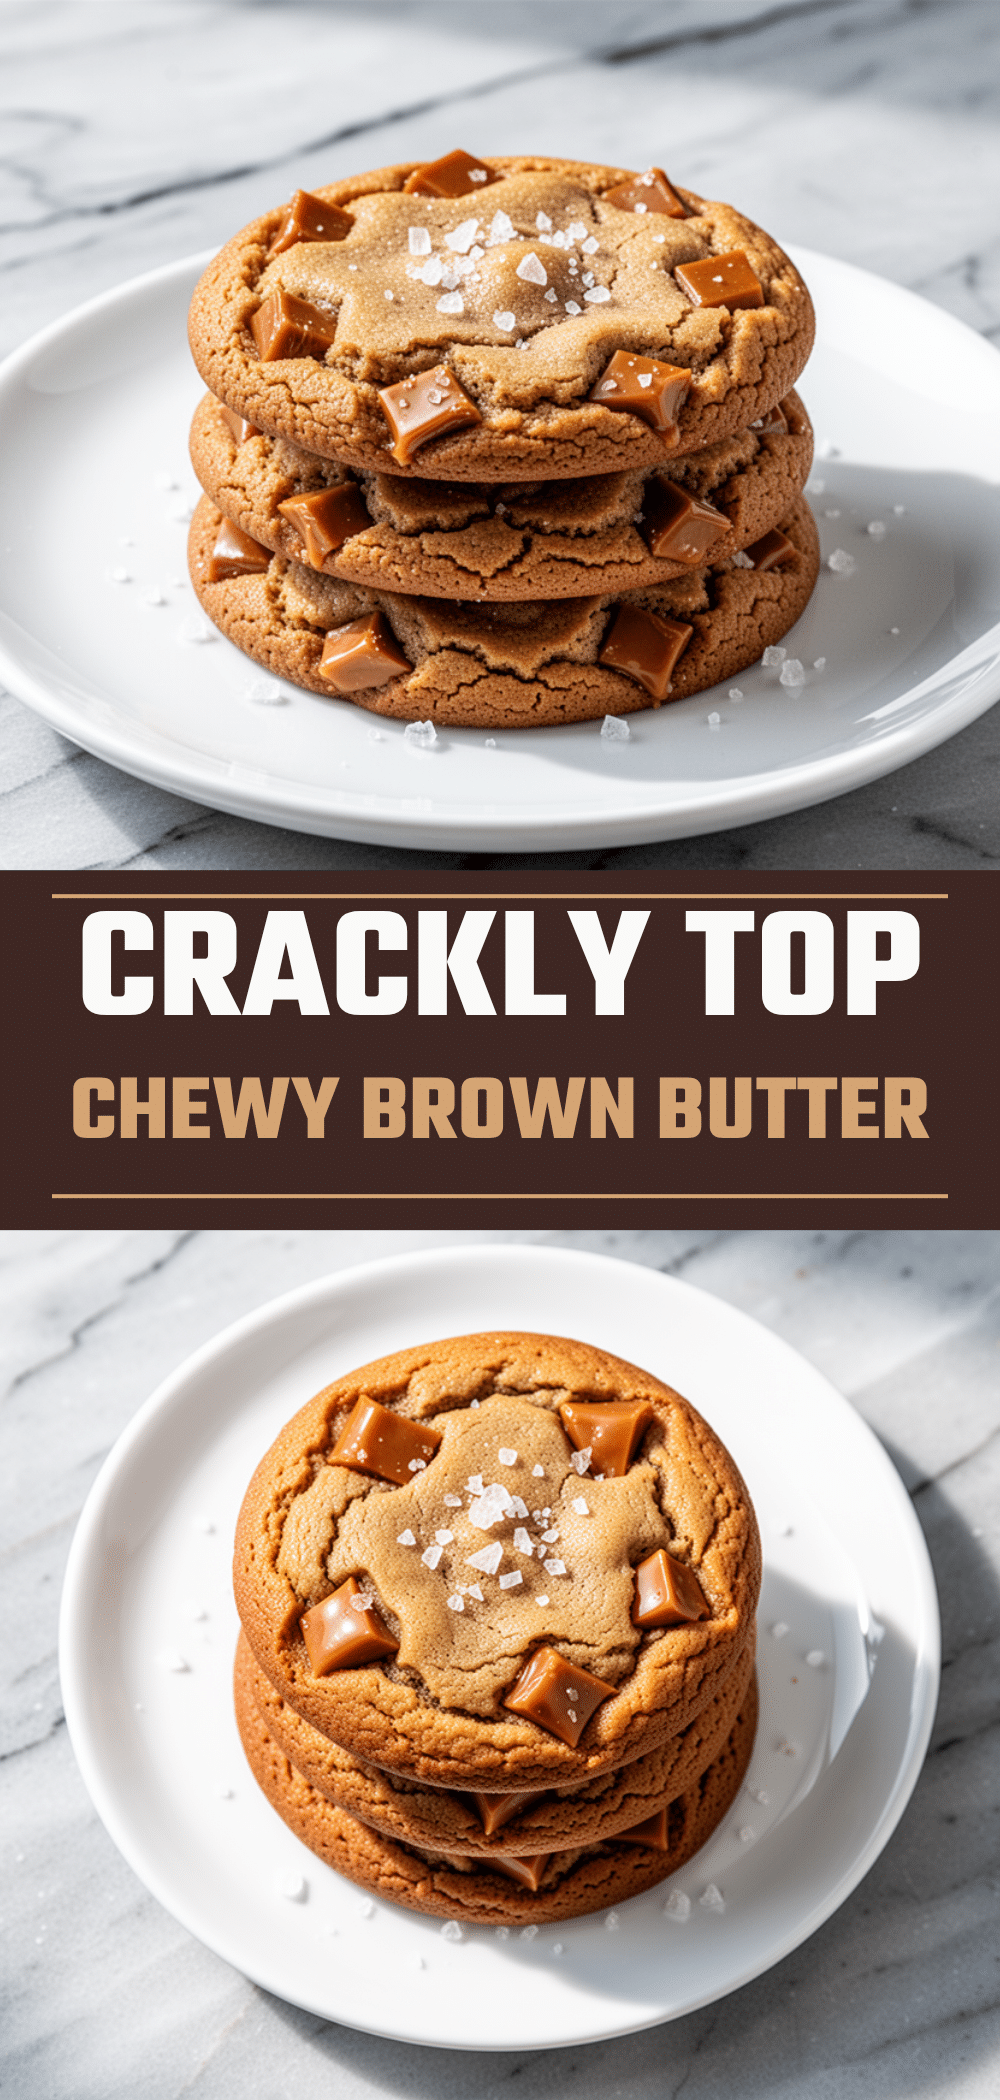
Chewy Brown Butter Toffee Cookies
- Total Time: 45 minutes
- Yield: 24 cookies 1x
Description
These chewy brown butter toffee cookies feature a soft, gooey center with crisp edges, enriched by nutty brown butter and studded with salty-sweet toffee bits and white chocolate chips.
Ingredients
- 1 cup (226g) unsalted butter
- 1 cup (200g) dark brown sugar, packed
- 1/2 cup (100g) granulated white sugar
- 2 large eggs, room temperature
- 1 large egg yolk, room temperature
- 2 teaspoons vanilla extract
- 2 1/4 cups (280g) all-purpose flour
- 1 teaspoon baking soda
- 1/2 teaspoon baking powder
- 1 teaspoon fine sea salt
- 1 1/2 cups (170g) toffee bits
- 1 cup (170g) white chocolate chips
- Flaky sea salt (for topping)
Instructions
- Brown the butter: Melt butter in a heavy-bottomed saucepan over medium heat. Stir constantly until it foams, then crackles, and finally settles with a nutty aroma and amber color with dark specks. Remove from heat and pour into a heat-proof bowl to cool for 10-15 minutes.
- Mix wet ingredients: In a stand mixer with paddle attachment, beat the cooled brown butter, brown sugar, and granulated sugar on medium-high speed for 3-4 minutes until light and fluffy. Scrape down sides. Add eggs and egg yolk one at a time, beating well after each. Mix in vanilla extract.
- Combine dry ingredients: In a separate medium bowl, whisk together flour, baking soda, baking powder, and salt.
- Make the dough: With mixer on low, gradually add dry ingredients to wet ingredients. Mix just until combined; do not overmix. The dough will be thick and sticky.
- Fold in mix-ins: Gently fold in toffee bits and white chocolate chips using a spatula or hands until evenly distributed.
- Chill the dough: Cover the bowl and refrigerate for at least 30 minutes (or up to 24 hours) to solidify the fat and prevent excessive spreading.
- Preheat oven to 350°F (175°C). Line baking sheets with parchment paper.
- Scoop and bake: Scoop dough onto prepared sheets, spacing 2 inches apart. Bake for 10-12 minutes until edges are set and lightly golden, but centers still look soft.
- Finish with salt: Immediately after removing from oven, sprinkle flaky sea salt on top. Let cool on baking sheet for 5 minutes, then transfer to a wire rack to cool completely.
Notes
Do not rush the butter browning process as it can burn quickly. Chilling the dough is essential for chewy texture. Underbake intentionally; cookies will firm up as they cool. Store in an airtight container with a slice of bread to maintain softness. Dough can be frozen for up to 3 months.
- Prep Time: 30 minutes
- Cook Time: 15 minutes
- Category: Dessert
- Cuisine: American
Nutrition
- Serving Size: 1 cookie
- Calories: 180
- Sugar: 15
- Sodium: 120
- Fat: 10
- Saturated Fat: 6
- Carbohydrates: 22
- Fiber: 1
- Protein: 2
Keywords: brown butter cookies, toffee cookies, holiday baking, chewy cookies, easy holiday treats, brown butter toffee, white chocolate toffee cookies


