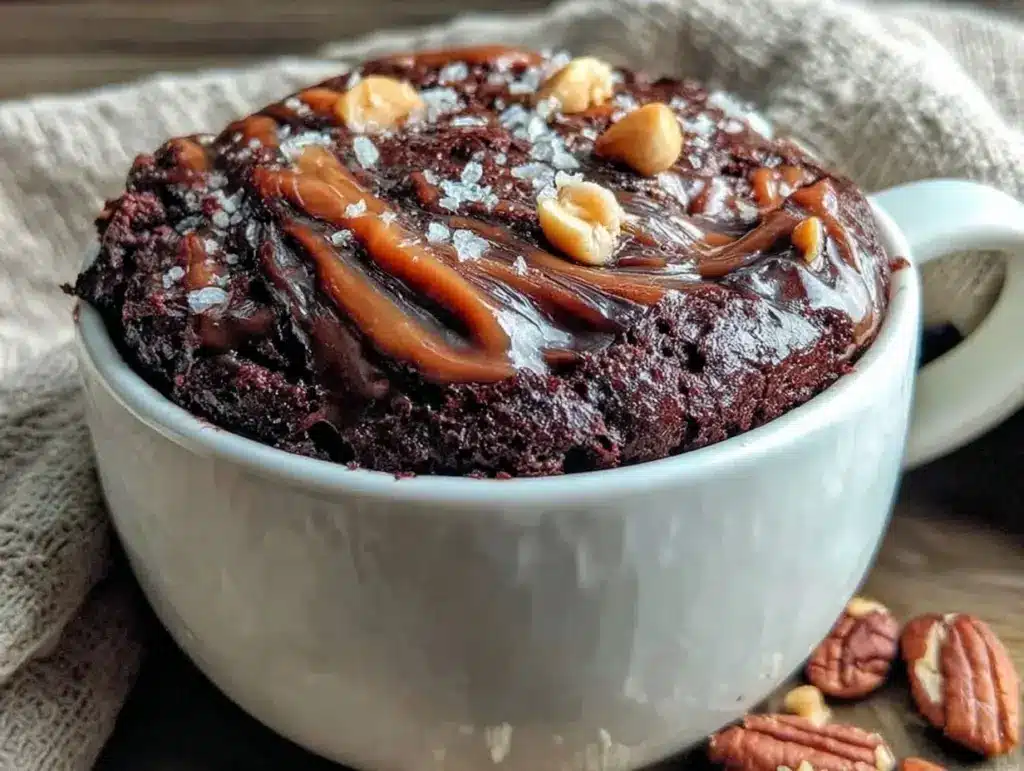
Last Tuesday night, my 8-year-old came home from school looking like the world had ended because he’d forgotten his snack for the afternoon carpool. We had nothing in the pantry except a half-empty bag of flour, a dusty jar of cocoa powder, and a jar of peanut butter that had been sitting there since last Christmas. I was already stressed about dinner and didn’t have the energy to bake a whole batch of cookies or make anything that required an oven (because let’s be honest, turning on the oven in July is a crime against humanity).
So I did what any desperate parent does: I threw everything into a microwave-safe mug and hoped for the best. Five minutes later, I handed him a warm, gooey, chocolatey treat that he devoured in three bites. He looked at me like I’d just handed him the keys to a Ferrari. That was the moment I realized that sometimes, the best recipes aren’t the ones from fancy cookbooks—they’re the ones you cobbled together in a panic at 4:30 PM.
This microwave mug brownie with peanut butter swirl has become our go-to rescue mission. It’s my answer to those sudden sugar cravings when I’m tired, broke, and lazy. I’ve tested this microwave mug brownie with peanut butter swirl dozens of times—sometimes with just flour, sometimes with oats, sometimes with weird substitutions—but the 4-ingredient version is the winner. It’s cheap, it’s fast, and it satisfies that chocolate-peanut butter craving without costing a fortune. I keep it in my regular rotation because it works every single time.
Why You’ll Love This Recipe
I’ve made this microwave mug brownie with peanut butter swirl for everyone from my picky toddler (who thinks it’s “magic cake”) to my husband, who claims he’s “too old for mug cakes.” The best part? It actually tastes like a real brownie. Not a dry, rubbery microwave mess, but a fudgy, rich dessert that makes you feel like a genius.
Here’s why this budget sweet treat has earned a permanent spot in our kitchen:
- Stupid Simple — Seriously, if you can stir, you can make this. I’ve walked my teenager through it over FaceTime while he was at a friend’s house. No oven, no mixer, no mess.
- Lightning Fast — 5 minutes from start to finish. I make this on weeknights when I get home at 7pm and need something sweet but don’t want to spend an hour baking.
- Pantry-Friendly — You probably have 90% of these ingredients already. I keep flour, sugar, cocoa, and peanut butter stocked just so I can make this on a whim. It’s cheaper than buying a single cupcake at the gas station.
- Kid-Approved — My kids love helping me make this. It’s safe (no hot stove, just the microwave), and the peanut butter swirl looks cool when you cut into it. It’s a great way to get them involved in the kitchen without a big cleanup.
- Budget-Smart — This costs about 40 cents to make. That’s less than a pack of gum. For a family trying to stretch every dollar, this is a lifesaver.
This is my go-to when I need a sweet treat to just work. No complicated techniques, no weird ingredients, just reliable, delicious food that makes everyone happy. And if you’re looking for other easy budget-friendly desserts, you might also enjoy my no-bake chocolate peanut butter bars for when you want something that lasts a few days.
Ingredients You’ll Need
Here’s the best part: you probably have most of this already. This microwave mug brownie with peanut butter swirl relies on basic pantry staples. I’m not particular about brands here, but I am particular about quality where it counts. You don’t need fancy chocolate chips or artisanal flour. Just keep it simple.
For the Brownie Base
All-purpose flour (4 tablespoons / 30g) — Standard white flour works perfectly. I use whatever is in the big bag in my pantry. Cake flour makes it too delicate; bread flour makes it too chewy. Stick with all-purpose.
Granulated sugar (3 tablespoons / 40g) — White sugar gives that classic brownie crust. Brown sugar works too and makes it chewier, but I usually just use what’s in the jar. If you’re watching sugar, you can reduce to 2 tablespoons, but it won’t be as sweet.
Unsweetened cocoa powder (2 tablespoons / 10g) — This is the most important ingredient. Use good quality cocoa. Hershey’s is fine, but if you have a bag of Dutch-processed cocoa, use that. It makes the chocolate flavor deeper and richer. Avoid “hot cocoa mix”—that has sugar and milk solids in it and will ruin the texture.
Milk (3 tablespoons / 45ml) — Any milk works. Whole milk is creamier, but I often use what’s left in the carton (skim, 1%, almond—whatever). Don’t skimp on the liquid, or it’ll be dry.
Vegetable oil or melted butter (2 tablespoons / 30ml) — Oil keeps it fudgy. Butter adds flavor. I usually use oil because it’s cheaper and keeps the brownie moist for longer. If you use butter, melt it first. Olive oil works too if you’re out of vegetable oil, but it might add a slight savory note.
Vanilla extract (½ teaspoon) — Optional, but it rounds out the chocolate flavor. I use the cheap imitation vanilla because I’m not going to waste the good stuff in a mug cake. Taste the difference? Maybe. Is it worth $15? Nope.
For the Peanut Butter Swirl
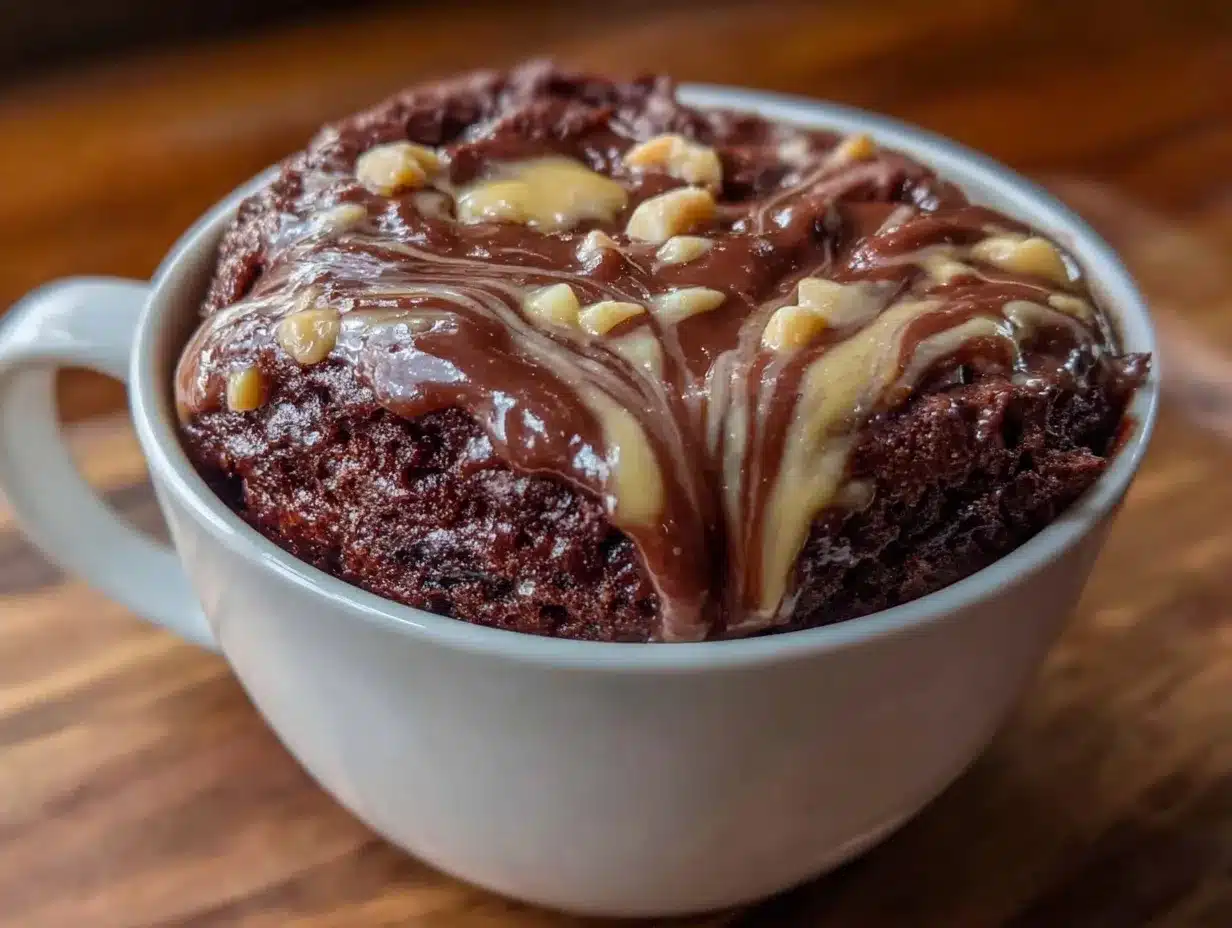
Creamy peanut butter (1 tablespoon / 15g) — This is the star of the show. Use standard creamy peanut butter, like Jif or Skippy. Natural peanut butter with oil separation can be tricky because the oil might make the swirl runny. If you only have natural, stir it *very* well before using. Crunchy peanut butter works if you like texture, but creamy is smoother.
Optional: Powdered sugar (1 teaspoon) — If your peanut butter is very sweet, a tiny pinch of powdered sugar helps balance it. If it’s unsweetened, you definitely need this. I usually skip it because Jif is sweet enough.
Pinch of salt — Just a tiny pinch in the brownie batter enhances the chocolate. Don’t skip it. It makes the sweet taste sweeter and the chocolate taste more chocolatey.
Equipment Needed
You don’t need fancy equipment for this. Here’s what I actually use. If you don’t have these, you can probably improvise.
Large microwave-safe mug — This is crucial. Use a standard 12-ounce coffee mug. If you use a tiny espresso cup, it’ll overflow. If you use a huge bowl, it’ll take too long to cook and turn out dry. I use a sturdy ceramic mug with a handle. Glass mugs work too, but they get hot, so be careful.
Small mixing bowl — I use a 1-cup measuring cup or a small ramekin to mix the batter. It’s easier to clean than the mug itself. A large bowl works, but you’ll have to scrape the sides more.
Small spoon or teaspoon — For stirring the batter and creating the swirl. I use a regular teaspoon from the silverware drawer. No need for a special tool.
Microwave — Obviously. I have a standard countertop microwave. Power levels vary, so you might need to adjust the time. If your microwave is old, it might have hot spots. Rotate the mug halfway through if you’re unsure.
Paper towel — I put a paper towel under the mug in the microwave. If it overflows (which it might, if you’re not careful), your microwave won’t be a disaster. This is a lifesaver for cleaning.
How to Make It: Step-by-Step
Alright, let’s make this! I’m walking you through exactly how I do it, including the little tricks I’ve picked up over the years. This microwave mug brownie with peanut butter swirl is foolproof if you follow these steps.
Step 1: Mix the Dry Ingredients (2 minutes)
In your small mixing bowl or directly in the mug (if you want to skip a dish), combine the flour, sugar, cocoa powder, and salt. Whisk them together with your spoon until there are no lumps of cocoa. Cocoa powder tends to clump, so take a second to break those up. If you don’t whisk well, you’ll get bitter chunks in your brownie.
Step 2: Add the Wet Ingredients (1 minute)
Add the milk, oil (or melted butter), and vanilla extract to the dry mixture. Stir vigorously with your spoon. You want a smooth, thick batter. It should look like thick chocolate pudding. If it’s too dry (looks like sand), add another teaspoon of milk. If it’s too runny (looks like chocolate milk), add another teaspoon of flour. The consistency should be thick enough to hold its shape but loose enough to stir.
Step 3: Microwave the Base (1-2 minutes)
Microwave the mug on high for 1 minute. Stop and check. The top should look set, not wet and glossy. If it’s still very liquidy, microwave for another 30 seconds. Do not overcook! You want it moist. If you cook it for 3 minutes, it’ll be like eating a brick. I usually do 1 minute and 10 seconds for my microwave. Your mileage may vary, so start with 1 minute.
Step 4: Add the Peanut Butter Swirl
Take the mug out of the microwave. It will be hot. Immediately drop a spoonful of creamy peanut butter onto the center of the brownie. Don’t spread it out. Just let it sit on top. The residual heat will start to soften it.
Step 5: Create the Swirl
Take the tip of your knife or spoon and gently drag it through the peanut butter and into the brownie batter. Make a zig-zag pattern or a simple swirl. Don’t overmix it. You want distinct ribbons of peanut butter and chocolate, not a muddy brown blob. This is the fun part—get creative.
Step 6: Final Microwave (30 seconds)
Put the mug back in the microwave for 30 seconds. This melts the peanut butter slightly so it sinks in a bit and creates that gooey swirl effect. Watch it closely. It can explode if you leave it too long.
Step 7: Cool and Eat
Let it sit for 2 minutes. It’s incredibly hot inside. The brownie will continue to cook slightly from the residual heat. This also lets the texture set. Dig in with a spoon. Eat it straight from the mug. There are no plates involved here. That’s the rule.
Total Time: About 5 minutes (2 minutes active, 3 minutes mostly hands-off)
Expert Tips & Tricks
Here’s everything I’ve learned from making this dozens of times. These tips will save you from my mistakes.
Don’t Overmix the Batter
Mixing too much develops gluten, which makes the brownie tough. Stir just until the ingredients are combined. It’s okay if there are a few tiny flour streaks left.
Watch the Microwave Power
Microwaves vary wildly. A 700-watt microwave will take longer than a 1100-watt one. If your microwave is powerful, start with 45 seconds. If it’s old and weak, you might need 1 minute 30 seconds. The key is to stop when it looks slightly undercooked in the center. It will finish cooking as it cools.
Use a Paper Towel
I cannot stress this enough. Mug cakes expand. If you use too much batter or microwave it too long, it will bubble up over the rim. A paper towel under the mug saves you from cleaning the inside of your microwave. Trust me.
Room Temperature Ingredients
If your milk and oil are cold, the batter might not mix as smoothly. I don’t usually worry about this, but if you’re in a rush, warm the milk for 10 seconds in the microwave. It helps everything emulsify better.
The Swirl Technique
If you’re worried about the peanut butter sinking too much, freeze it for 10 seconds before dropping it in. It helps it hold its shape a bit longer. But honestly, a little sinking is part of the charm.
Common Mistakes (and how to avoid them):
- Mistake: Brownie is dry and crumbly. Fix: You microwaved it too long. Next time, reduce time by 15 seconds. Or add a splash more milk.
- Mistake: Batter is raw in the middle. Fix: Microwave for another 15-30 seconds. But be careful not to overcook the edges.
- Mistake: Messy mug. Fix: Mix in a separate bowl, then transfer to mug. It’s less messy than mixing directly in the mug.
Pro Tricks I’ve Learned:
- For Extra Fudginess: Add a square of chocolate on top before the final microwave. It melts into a gooey layer.
- For Better Texture: Add a tablespoon of sour cream or Greek yogurt to the batter. It adds moisture and tang. I do this when I have leftovers.
- For a “Real” Dessert Feel: Serve it with a dollop of whipped cream or a scoop of vanilla ice cream. It elevates it from a snack to a meal.
Variations & Substitutions
Once you’ve nailed the basic version, here’s how you can mix it up. I’ve tried all of these, and they all work.
Double Chocolate Version
Add 1 tablespoon of chocolate chips to the batter before microwaving. My kids love this version—it’s extra chocolatey. I use semi-sweet chips.
Strawberry Swirl
Swap the peanut butter for strawberry jam or Nutella. Nutella is delicious but sweeter. Jam adds a fruity tartness. I use strawberry jam when I have strawberries in the fridge.
Protein-Packed
Swap 1 tablespoon of flour for protein powder. Use a chocolate or vanilla whey protein. Add an extra splash of milk because protein powder absorbs liquid. It’s not as fudgy, but it’s a decent post-workout snack. I make this when I’m trying to be “healthy.”
Gluten-Free
Use gluten-free all-purpose flour blend. Everything else is naturally gluten-free. I’ve used Bob’s Red Mill and it works great. The texture is slightly different but still good.
Vegan
Use plant-based milk (almond or oat) and oil instead of butter. Use dairy-free peanut butter (some natural PBs have honey, so check the label). It’s surprisingly good. My vegan friend requests this version.
Mini Mug Cakes
Divide the batter into two smaller mugs or ramekins. Cooking time will be shorter—start with 45 seconds. Great for portion control or sharing with a friend.
Flavor Add-ins:
- Espresso powder: Add ¼ teaspoon to enhance chocolate flavor.
- Mini marshmallows: Stir in before microwaving for a s’mores vibe.
- Crushed pretzels: Sprinkle on top for a sweet-salty combo.
Serving & Storage
I usually serve this straight from the mug at the dinner table—it looks rustic and stays warm. But here are other ways I’ve enjoyed it:
Side Dishes:
- Vanilla ice cream (classic)
- Whipped cream
- A glass of cold milk
- A side of fresh berries to balance the sweetness
Storage Instructions:
Refrigerator: You can store leftovers in an airtight container for up to 2 days. But honestly, it’s best fresh. The texture changes as it sits—it gets denser. I rarely have leftovers.
Reheating: Microwave for 15-20 seconds. It will soften up again. Don’t overheat it, or it’ll dry out.
Freezing: I don’t recommend freezing mug cakes. The texture becomes weird and crumbly after thawing. Make it fresh. It’s too fast to freeze anyway.
Meal Prep: You can prep the dry ingredients in a small baggie or container for up to a week. Just add wet ingredients when you’re ready to eat. This is great for school lunches or quick snacks.
Pro tip: If you’re making this for a party, prep the dry mixes in small jars or bags. Label them “Add 3 tbsp milk, 2 tbsp oil, microwave 1 min.” It’s a cute gift idea.
Nutrition Information
I’m not a nutritionist, but here’s the breakdown if you’re tracking. Keep in mind, this is an estimate based on standard ingredients.
Per Serving (1 mug):**
- Calories: 350-400
- Protein: 8g
- Carbs: 45g
- Fiber: 2g
- Sugar: 30g
- Fat: 18g
- Saturated Fat: 4g
- Cholesterol: 0mg
- Sodium: 150mg
What’s Good:
- Decent protein from peanut butter and flour
- Quick and easy, so you’re not tempted to eat more
- Portion controlled—one mug, one serving
What to Know:
- Higher in sugar from the cocoa mix and peanut butter
- Contains gluten and dairy (unless modified)
- Calorie-dense, so one mug is enough
My Take:
Look, this is a dessert. It’s not a diet recipe. But it’s way better than buying a pre-made brownie from the store, costs less, and I know exactly what’s in it. When I want to make it lighter, I reduce the sugar and use almond milk. But usually? I just enjoy one mug and move on.
Final Thoughts
So that’s my microwave mug brownie with peanut butter swirl! I’ve probably talked your ear off at this point, but when you make a recipe this often, you have a lot to say about it. This has saved my sanity more times than I can count. It’s my answer to “what’s for dessert” when I’m tired, don’t want to bake a whole cake, and still want something that tastes really good. My kids are happy, my husband’s happy, and I’m happy because I’m not stressed about cooking.
Make it yours! Try different swirls, swap in your favorite nut butter, adjust the sugar. The best recipes are the ones you adapt to your family’s tastes. If you make this, drop a comment and let me know what you think! I love hearing how recipes turn out in your kitchen. And if something doesn’t work, tell me that too—I’m here to help troubleshoot.
Happy cooking! And I hope your kitchen smells half as good as mine does right now.
Frequently Asked Questions
Q: Can I use almond butter instead of peanut butter?
A: Absolutely! Almond butter works great. It’s slightly sweeter and creamier. I use it when I’m out of peanut butter. Just make sure it’s smooth, not chunky, unless you like texture.
Q: My brownie came out dry—what happened?
A: Usually means you microwaved it too long. Microwaves vary, so start with 1 minute and check. The brownie should look slightly wet in the center. It will finish cooking as it cools. If it’s already dry, next time add another teaspoon of milk.
Q: Can I make this ahead for a party?
A: Sort of. Prep the dry ingredients in advance and store in a jar. When it’s time, just add wet ingredients and microwave. It won’t be quite as good as fresh, but it’s close and saves you stress during the party. I do this all the time.
Q: Why did my mug overflow?
A: You probably microwaved it too long or used too much batter. Mug cakes expand significantly. Use a large mug (12 oz) and don’t fill it more than halfway. Also, always put a paper towel under the mug.
Q: Can I use dark cocoa powder?
A: Yes! Dark cocoa powder makes the brownie taste more chocolatey and less sweet. It’s my preference. Just make sure it’s unsweetened cocoa powder, not hot cocoa mix.
Q: How do I reheat leftovers without it getting dry?
A: Microwave for 15-20 seconds only. If it’s already dry, add a splash of milk and microwave for 10 more seconds. The extra liquid brings back the moisture.
Q: Can I double this recipe?
A: No, not in the same mug. If you double it, it’ll overflow. Make two separate mugs. The cooking time stays the same. I do this when I’m meal-prepping for two people.
Pin This Recipe!
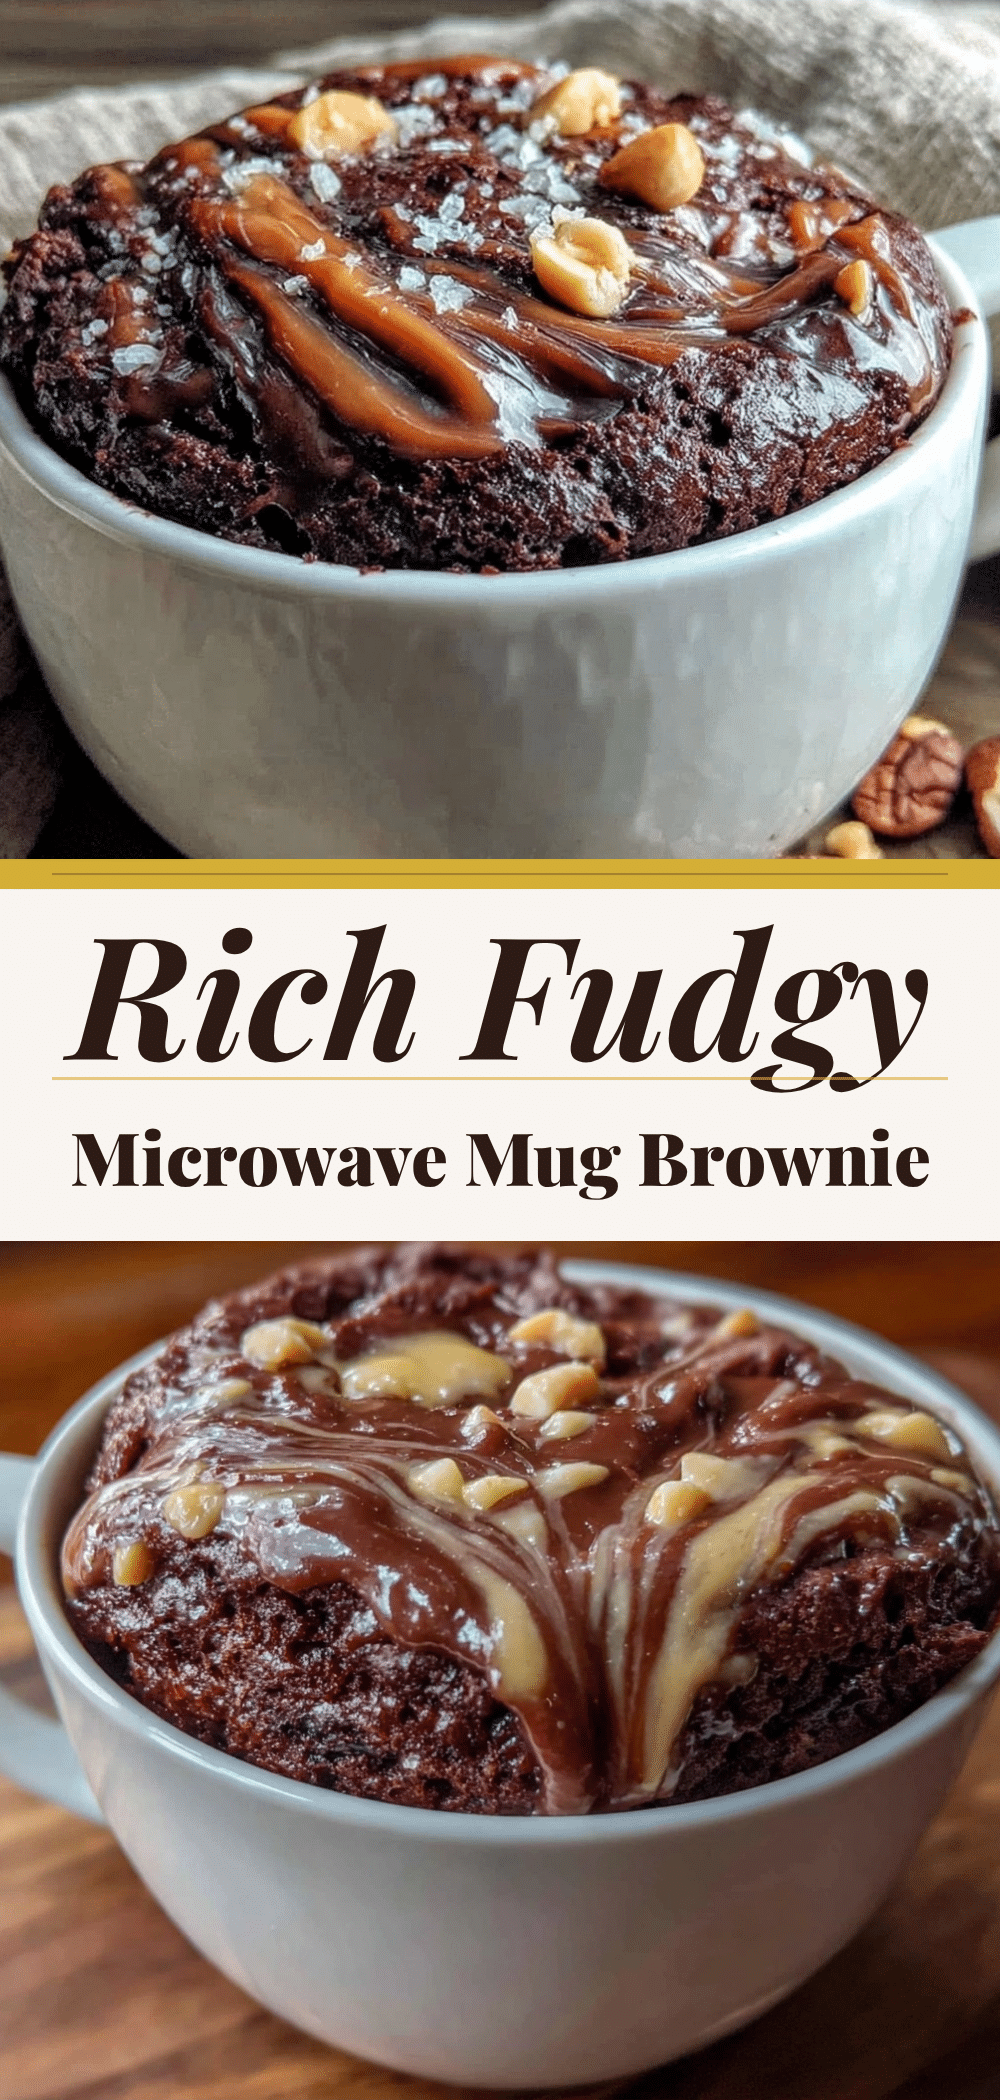
Microwave Mug Brownie with Peanut Butter Swirl
- Total Time: 5 minutes
- Yield: 1 serving 1x
Description
A quick, 4-ingredient budget-friendly dessert that combines a fudgy chocolate brownie base with a creamy peanut butter swirl, ready in just 5 minutes.
Ingredients
- 4 tablespoons all-purpose flour
- 3 tablespoons granulated sugar
- 2 tablespoons unsweetened cocoa powder
- 3 tablespoons milk
- 2 tablespoons vegetable oil or melted butter
- 1/2 teaspoon vanilla extract
- 1 pinch salt
- 1 tablespoon creamy peanut butter
- 1 teaspoon powdered sugar (optional, if peanut butter is unsweetened)
Instructions
- In a small mixing bowl or directly in a large microwave-safe mug, whisk together the flour, sugar, cocoa powder, and salt until no lumps remain.
- Add the milk, oil (or melted butter), and vanilla extract to the dry ingredients. Stir vigorously until a smooth, thick batter forms resembling chocolate pudding.
- Microwave the mug on high for 1 minute. Check the top; it should look set but not wet. If still liquidy, microwave for another 30 seconds. Do not overcook.
- Remove the mug from the microwave. Immediately drop a spoonful of creamy peanut butter onto the center of the brownie.
- Using the tip of a knife or spoon, gently drag through the peanut butter and into the batter to create a swirl pattern.
- Microwave the mug again for 30 seconds to melt the peanut butter slightly and create a gooey swirl effect.
- Let the brownie sit for 2 minutes to cool and set before eating directly from the mug.
Notes
Use a large mug to prevent overflow. Microwaves vary in power, so start with 1 minute and check frequently. The brownie continues to cook slightly after removal due to residual heat. For extra fudginess, add a square of chocolate before the final microwave. Store leftovers in an airtight container for up to 2 days, though best served fresh.
- Prep Time: 2 minutes
- Cook Time: 3 minutes
- Category: Dessert
- Cuisine: American
Nutrition
- Serving Size: 1 mug
- Calories: 375
- Sugar: 30
- Sodium: 150
- Fat: 18
- Saturated Fat: 4
- Carbohydrates: 45
- Fiber: 2
- Protein: 8
Keywords: microwave brownie, mug cake, peanut butter swirl, budget dessert, quick snacks, 4-ingredient recipe, chocolate dessert, kid-friendly treats


