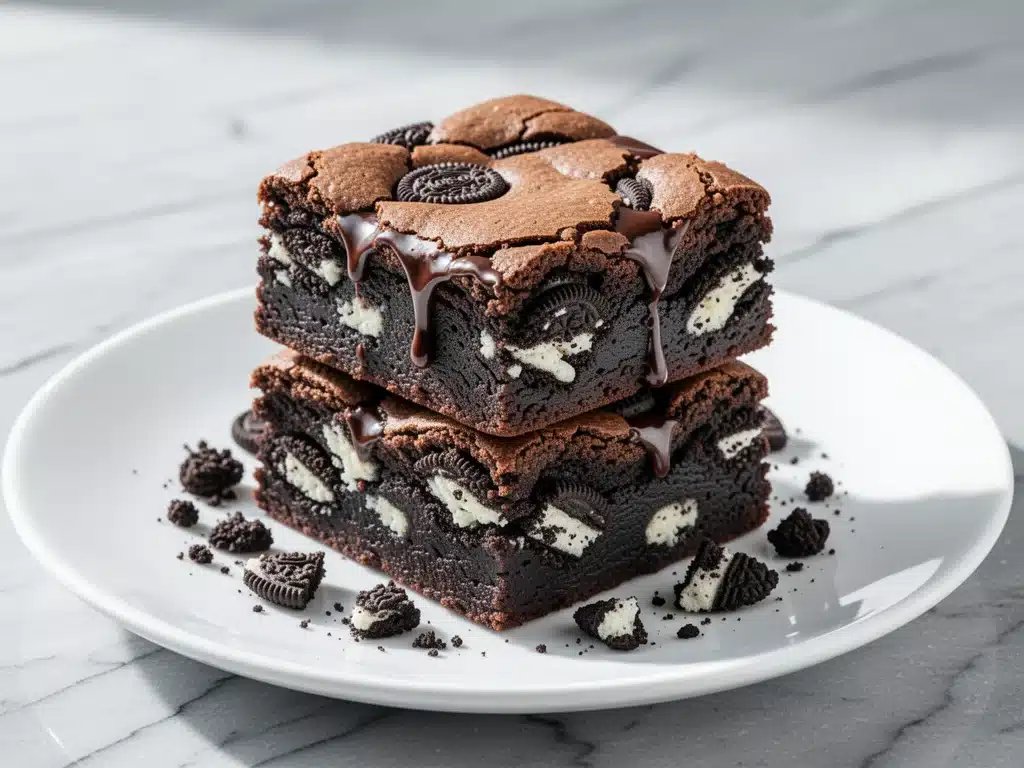
I have a confession to make. Last Saturday, I made a batch of these fudgy Oreo brookie bars, and I essentially hid them in the back of the pantry. Not because I was trying to be sneaky (okay, maybe a little), but because I knew that if I left them out on the counter, they would vanish before the sun went down. My husband, my two kids, and my neighbor who “just wanted to drop off some mail” all played a game of musical chairs with the last bar. By Sunday morning, the pan was empty, and I was left with just crumbs and a profound sense of accomplishment.
There is something magical about the combination of a chewy chocolate cookie and a fudgy brownie, but adding Oreos? That’s next-level comfort food. The crackly, paper-thin sugar top gives you that professional bakery finish, while the inside stays moist and dense. It’s the kind of dessert that feels indulgent but is actually incredibly easy to throw together. I’ve tested this recipe at least eight times, tweaking the flour ratios and baking temperatures, until I landed on the perfect balance. This isn’t just a cookie or a brownie; it’s a bar that demands to be shared (even if you’re tempted to eat the whole pan yourself).
If you’ve ever wondered how to get that signature crinkly top on your brownies or how to keep brookies from turning into dry bricks, you’re in the right place. I’m going to walk you through exactly how I make these fudgy Oreo brookie bars with crackly tops everyone always asks for. It’s sweet, it’s chocolatey, and it’s about to become your new favorite weekend project.
Why You’ll Love This Fudgy Oreo Brookie Bars with Crackly Tops Everyone Always Asks For
There are plenty of dessert recipes out there, but this one has earned its spot as a permanent fixture in my rotation. Here’s why these bars are worth the oven time:
- The Ultimate Texture Clash — We’re talking about a crackly, sugary crust on top, a dense, fudgy brownie center, and the satisfying crunch of crushed Oreos mixed in. It’s a texture party in every bite. I love that contrast because it keeps the dessert from feeling too one-dimensional.
- Stupid Simple Ingredients — You don’t need fancy chocolate chips or rare extracts. This uses pantry staples: butter, sugar, eggs, flour, cocoa powder, and Oreos. If you can make a cake from a box, you can make these. I’ve even made them while wearing pajamas at 7 AM.
- Perfect for Sharing (Or Not) — These bars cut cleanly and travel well. I’ve taken them to potlucks, office parties, and family dinners. They always disappear fast, which means you’ll want to make a double batch. They also freeze beautifully, so you can have dessert ready for unexpected guests.
- Looks Professional, Tastes Homemade — That crackly top makes them look like they came from a high-end patisserie, but they’re actually made with basic ingredients. It’s a great way to impress friends without spending hours in the kitchen.
- Customizable Fun — While the classic version is amazing, you can add white chocolate chips, peanut butter, or even a drizzle of caramel. I sometimes swap half the Oreos for fudgy brownies chunks for an extra chocolate hit.
This recipe is my go-to when I need to bake something that feels special but doesn’t require a degree in pastry arts. It’s reliable, delicious, and always a crowd-pleaser.
Ingredients You’ll Need
Here’s the best part: you probably have most of this already in your kitchen. I’m particular about a few things here, so let’s break down exactly what you need and why.
For the Brookie Base
Unsalted butter (1 cup / 226g) — I use high-quality butter like Kerrygold or Plugra. The flavor makes a huge difference in cookies and brownies. Melt it completely.
Granulated sugar (1 cup / 200g) — This is key for that crackly top. The sugar creates a thin layer on top that hardens as it cools. Don’t use brown sugar for this part; it makes them too chewy.
Dark brown sugar (1 cup / 220g) — This adds moisture and depth. The molasses content helps keep the bars fudgy. Pack it firmly into the cup.
Large eggs (2 large) — Room temperature eggs blend better into the batter. If you forget to take them out, just put them in a bowl of warm water for 5 minutes.
Vanilla extract (2 teaspoons) — Use real vanilla, not imitation. It enhances the chocolate flavor without overpowering it.
All-purpose flour (1 ½ cups / 190g) — Don’t overmeasure! Spoon it into the cup and level it off. Too much flour makes the bars cakey instead of fudgy.
Cocoa powder (½ cup / 50g) — Use unsweetened cocoa powder. I prefer Dutch-processed for a darker, richer color and smoother taste, but regular works too.
Baking powder (½ teaspoon) — Just a little helps the bars rise slightly and create that crackly top.
Salt (½ teaspoon) — Essential to balance the sweetness. Don’t skip it.
For the Filling and Topping
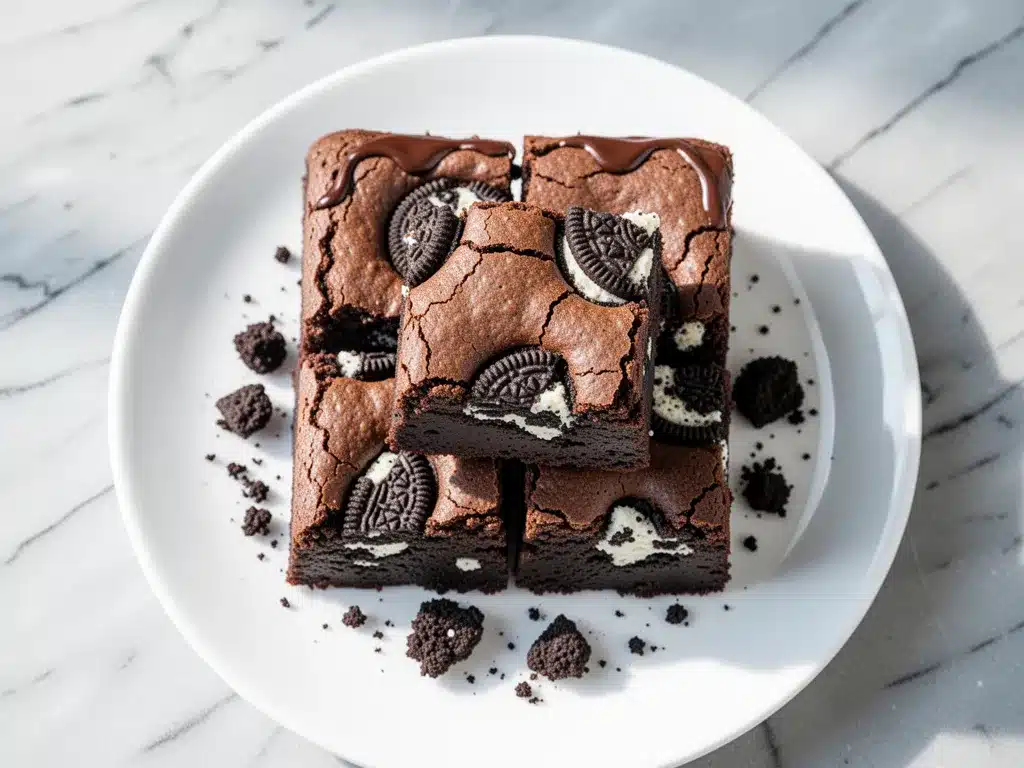
Oreo cookies (1 package / about 36 cookies) — Standard Oreos work best. You’ll crush some for the batter and use whole ones for the top. If you’re not a fan of the classic, try snickerdoodle cookies for a spicy twist, but stick to Oreos for the authentic brookie experience.
Chocolate chips (1 cup / 170g) — Semi-sweet or dark chocolate chips add extra pockets of melty chocolate. I like to use a mix of semi-sweet and white chocolate for variety.
Extra crushed Oreos (for garnish) — A handful of crushed cookies to sprinkle on top before baking for that bakery look.
Common Substitutions
Gluten-Free: Use a 1:1 gluten-free flour blend. The texture will be slightly more tender, but still delicious.
Dairy-Free: Use vegan butter and dairy-free chocolate chips. Note that vegan butter can have higher water content, so chill the dough longer if needed.
Less Sweet: Reduce the granulated sugar by ¼ cup, but you may lose some of the crackly top. It’s a trade-off.
Equipment Needed
You don’t need fancy gadgets for this. Here’s what I actually use:
9×9 Inch Baking Pan — This is the standard size for these bars. Line it with parchment paper, leaving an overhang on the sides. This makes it easy to lift the bars out once they cool. I’ve tried using a 9×13 pan, but the bars are too thin and dry out quickly.
Mixing Bowls — One large bowl for the wet ingredients and one medium for the dry. I use glass bowls because I can see how well everything is mixing.
Electric Mixer or Whisk — A hand mixer makes it easy to cream the butter and sugars. But if you’re feeling athletic, a whisk works fine. It takes a bit of elbow grease, but it’s good exercise.
Measuring Cups and Spoons — Accuracy matters in baking. I use metal measuring cups for dry ingredients and a liquid measuring cup for butter and eggs.
Spatula — A silicone spatula is great for scraping the bowl and folding in the Oreos without overmixing.
Aluminum Foil and Parchment Paper — Essential for lining the pan. I double-layer the parchment for extra protection against sticking.
Cooling Rack — Helps the bars cool evenly and prevents the bottom from getting soggy.
How to Make It: Step-by-Step
Alright, let’s make this! I’m walking you through exactly how I do it, including the little tricks I’ve picked up over the years.
Step 1: Prep Your Pan and Oven (5 minutes)
Preheat your oven to 350°F (175°C). Line your 9×9 inch baking pan with parchment paper, leaving a slight overhang on the sides. This is crucial for easy removal. I also lightly grease the parchment with butter or cooking spray to ensure nothing sticks.
Step 2: Melt the Butter (2 minutes)
Melt the butter in a microwave-safe bowl or saucepan. Let it cool slightly so it’s warm but not hot. If it’s too hot, it’ll cook the eggs when you add them, which is not what we want. Warm butter blends smoothly into the sugar.
Step 3: Mix the Wet Ingredients (3 minutes)
In a large bowl, whisk together the melted butter, granulated sugar, and brown sugar until well combined. The mixture should look like wet sand. Add the eggs and vanilla extract, and whisk vigorously for about 1-2 minutes. This step is important for creating that crackly top. The sugar needs to be well-incorporated with the fat and eggs.
Step 4: Add the Dry Ingredients (2 minutes)
Stir in the flour, cocoa powder, baking powder, and salt. Mix until just combined. Do not overmix! Overmixing develops gluten, which leads to tough bars. The batter will be thick and chunky. If it seems too dry, add a tablespoon of milk, but it should hold together easily.
Step 5: Fold in the Oreos and Chips (3 minutes)
Crush about 12 Oreo cookies into small chunks (not dust). Fold these into the batter along with the chocolate chips. You want chunks of cookie and chocolate distributed throughout, not a uniform mixture. This gives you those surprise bites of crunch.
Step 6: Press into the Pan and Top (5 minutes)
Transfer the batter to the prepared pan. Press it down firmly with a spatula or your hands to create an even layer. Crush the remaining Oreos into larger pieces and arrange them on top of the batter. You don’t need to push them in; they’ll sink slightly as they bake. Sprinkle a few more crushed Oreos on top for decoration.
Step 7: Bake (25-30 minutes)
Bake for 25-30 minutes. The bars are done when the edges are set and the center is just slightly soft. A toothpick inserted into the center should come out with a few moist crumbs, not wet batter. If you want a fudgier center, take them out a minute earlier. If you prefer a firmer texture, leave them in for the full 30 minutes.
Step 8: Cool Completely (1 hour)
This is the hardest part. Let the bars cool in the pan for at least 30 minutes, then lift them out using the parchment overhang and let them cool completely on a wire rack. If you cut them while they’re warm, they’ll be messy and crumbly. Patience pays off with clean cuts and that perfect crackly top.
Expert Tips & Tricks
Here’s everything I’ve learned from making these dozens of times. These tips will save you from my mistakes.
The Crackly Top Secret
The granulated sugar is the key. Brown sugar makes things chewy, but white sugar creates that thin, crisp layer on top. Make sure you whisk the butter and sugars thoroughly before adding the eggs. This helps the sugar dissolve slightly, which contributes to the crackly texture.
Don’t Overbake
These bars continue to cook in the pan after you take them out of the oven. If you wait until the center is completely firm, they’ll be dry. Aim for a slightly soft center when you pull them out. They’ll firm up as they cool.
Chill the Dough (Optional)
If your kitchen is very warm, the dough might be too soft to press into the pan. Chill it in the fridge for 15-20 minutes before baking. This helps the bars hold their shape better.
Use Quality Chocolate
Good chocolate chips make a huge difference. I prefer Guittard or Ghirardelli for their rich flavor. Avoid the cheapest chips, as they often have waxy textures and less chocolate flavor.
Store Properly
Store the bars in an airtight container at room temperature for up to 4 days. If your house is hot, refrigerate them to prevent the chocolate from melting. They also freeze well for up to 3 months. Wrap individual bars in plastic wrap before freezing for easy snacking.
Variations & Substitutions
Once you’ve nailed the basic version, here’s how you can mix it up. I’ve tried all of these.
Peanut Butter Oreo Brookies
Drizzle melted peanut butter over the batter before baking, then swirl it with a knife. Add a handful of peanuts on top for crunch. This combination is irresistible.
White Chocolate Chip Version
Swap the semi-sweet chips for white chocolate chips. This adds a creamy, vanilla flavor that contrasts nicely with the dark Oreos. It’s sweeter, so reduce the sugar slightly if you’re sensitive to sweetness.
Double Chocolate
Add an extra ½ cup of cocoa powder and use dark chocolate chips. For the ultimate chocolate lovers, this version is intense and rich. Pair it with a glass of cold milk.
Red Velvet Twist
Add 1 teaspoon of red food coloring and ½ teaspoon of white vinegar to the batter. Top with crushed red velvet Oreos for a festive look. This version is great for holidays.
Gluten-Free
Use a 1:1 gluten-free flour blend. The texture will be slightly more tender, but still delicious. Ensure your Oreos are certified gluten-free if you have celiac disease.
Vegan
Use vegan butter and dairy-free chocolate chips. There are vegan Oreos available in many stores. The result is surprisingly close to the original.
Serving & Storage
How to Serve
I usually serve these bars plain, but here are some ways to elevate them:
- With Ice Cream: A scoop of vanilla bean ice cream is classic. The cold ice cream contrasts with the warm, fudgy bar.
- With Coffee: These bars are rich, so they pair perfectly with a strong cup of coffee or espresso.
- With Whipped Cream: A dollop of homemade whipped cream adds a light, airy touch.
Storage Instructions
Room Temperature: Store in an airtight container for up to 4 days. Place a piece of bread in the container to keep them soft.
Refrigerator: Store in the fridge for up to 1 week. Bring to room temperature before serving for the best texture.
Freezer: Wrap individual bars in plastic wrap, then place in a freezer-safe bag. Freeze for up to 3 months. Thaw at room temperature for 30 minutes before eating.
Nutrition Information
I’m not a nutritionist, but here’s the breakdown if you’re tracking. Note that these are estimates based on standard ingredients.
Per Serving (based on 16 bars):
- Calories: 320
- Protein: 4g
- Carbs: 42g
- Fiber: 2g
- Sugar: 28g
- Fat: 16g
- Saturated Fat: 9g
- Cholesterol: 35mg
- Sodium: 220mg
These bars are indulgent, so enjoy them in moderation. They’re a treat, not a health food. If you’re looking for a lighter option, try my microwave mug brownie for a single-serving dessert.
Final Thoughts
So that’s my go-to fudgy Oreo brookie bars with crackly tops everyone always asks for. I’ve probably talked your ear off at this point, but when you make a recipe this often, you have a lot to say about it.
This has saved dessert nights more times than I can count. It’s my answer to “what’s for dessert” when I want something sweet but don’t feel like baking a whole cake. My kids are happy, my husband’s happy, and I’m happy because I’m not stressed about cooking.
Make it yours! Try different add-ins, swap in your favorite cookies, or adjust the chocolate. The best recipes are the ones you adapt to your family’s tastes.
If you make this, drop a comment and let me know what you think! I love hearing how recipes turn out in your kitchen. And if something doesn’t work, tell me that too—I’m here to help troubleshoot.
Happy baking! And I hope your kitchen smells half as good as mine does right now.
Frequently Asked Questions
Can I use a different pan size?
You can use an 8×8 pan for thicker bars, but reduce the baking time by 5-10 minutes. An 9×13 pan will make thin bars that bake faster (about 20 minutes) but might be too dry. The 9×9 pan is the sweet spot for the perfect thickness.
Why didn’t my bars get a crackly top?
This usually happens if the sugar wasn’t whisked enough with the butter, or if the oven temperature was too low. Make sure you whisk the butter and sugars vigorously, and check your oven temperature with a thermometer to ensure it’s accurate.
Can I make these ahead of time?
Yes! You can make the batter up to 24 hours ahead and refrigerate it in the pan. Let it come to room temperature before baking. You can also bake them ahead and store them at room temperature for up to 4 days.
Why are my bars dry?
Overbaking is the most common cause. Pull them out when the center is slightly soft. Also, make sure you’re measuring your flour correctly. Spooning and leveling prevents packing too much flour into the cup.
Can I use chocolate cookies other than Oreos?
Absolutely! Try brown butter pecan cookies for a nutty twist, or sandwich cookies with different flavors like mint or peanut butter. Just make sure they’re similar in size to Oreos.
How do I cut clean bars?
Cool them completely. Use a sharp knife and wipe it clean between cuts. For even cleaner cuts, dip the knife in hot water and dry it before each slice. This prevents the chocolate from sticking to the blade.
Can I freeze the batter?
It’s better to bake them first and then freeze the finished bars. Freezing the batter can affect the texture of the leavening agents. If you must freeze the batter, do so for no more than 24 hours, then let it thaw in the fridge before baking.
Pin This Recipe!
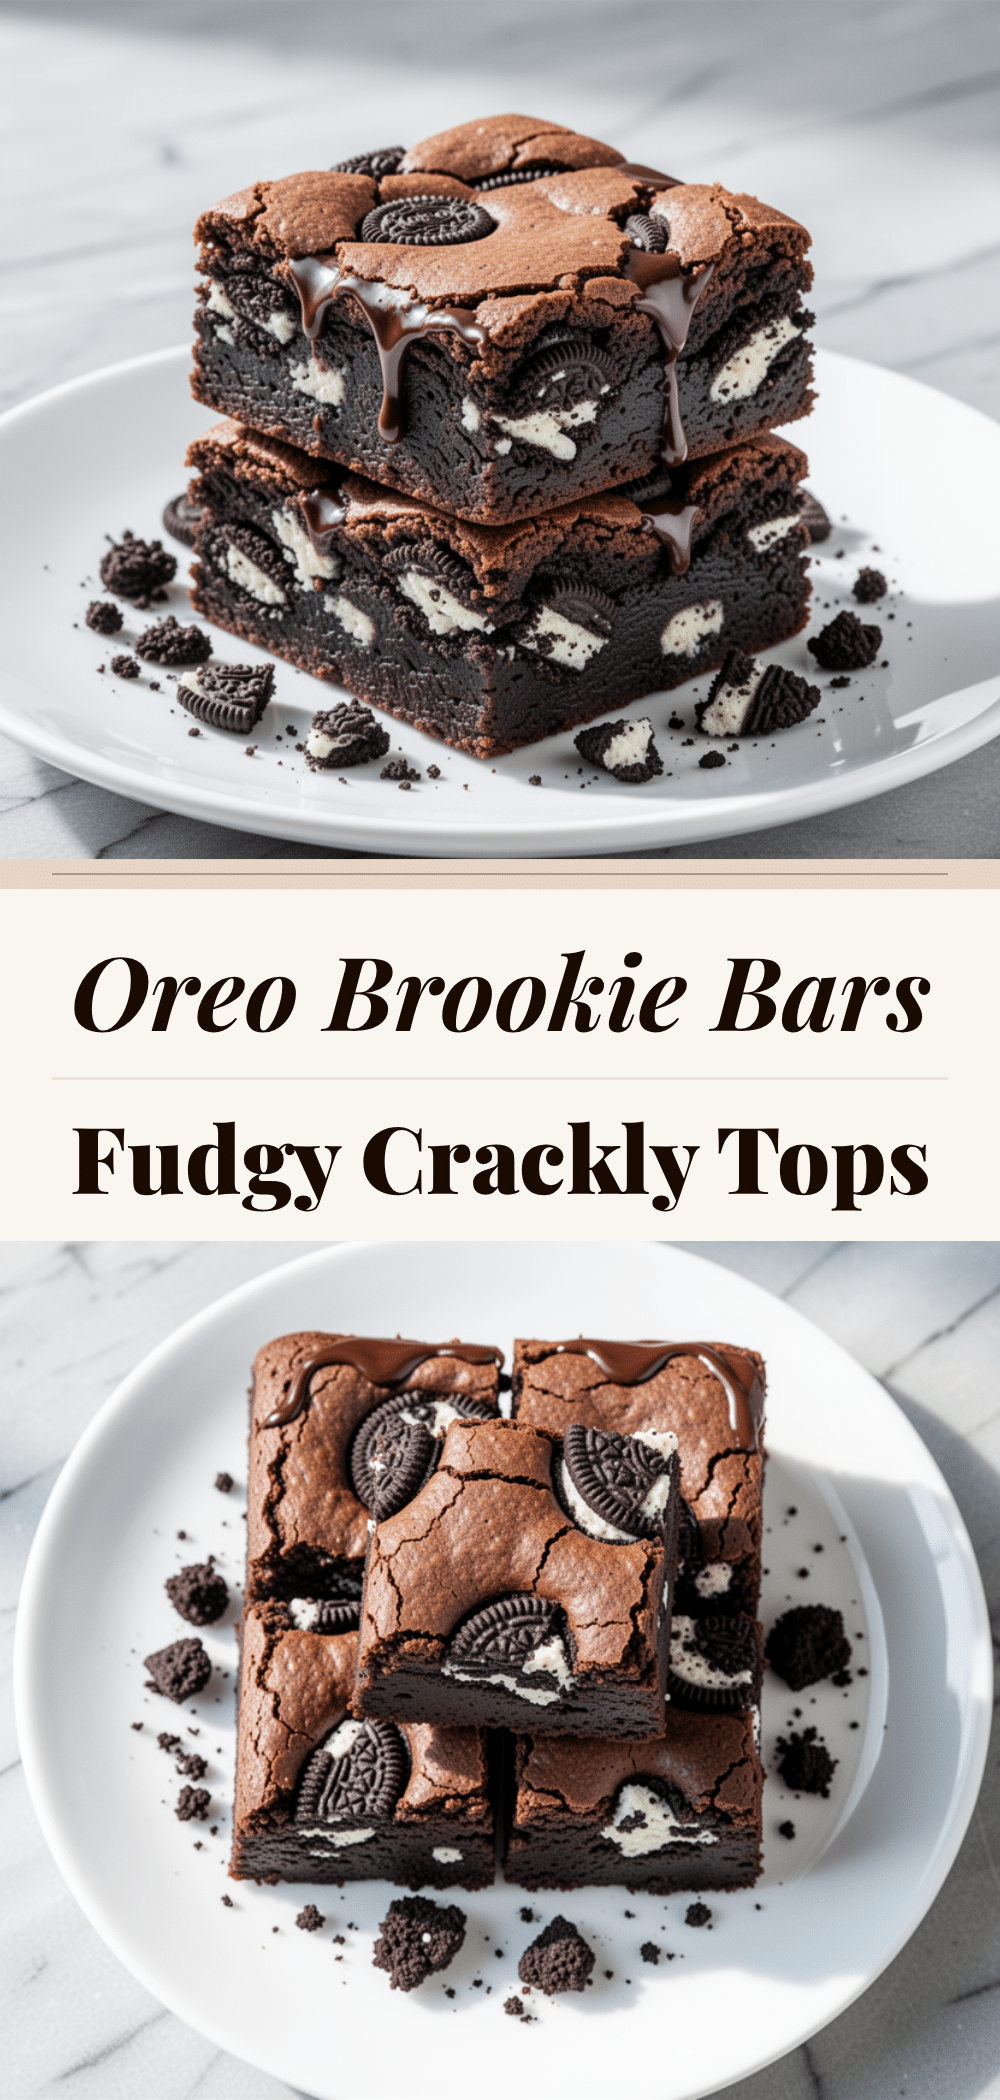
Fudgy Oreo Brookie Bars: Easy Crackly Top Recipe
- Total Time: 45 minutes
- Yield: 16 servings 1x
Description
These fudgy Oreo brookie bars combine a chewy chocolate cookie and a dense brownie center with a signature crackly sugar top. Packed with crushed Oreos and chocolate chips, they are an easy, indulgent dessert that is perfect for sharing or freezing.
Ingredients
- 1 cup (226g) unsalted butter, melted
- 1 cup (200g) granulated sugar
- 1 cup (220g) dark brown sugar, packed
- 2 large eggs, room temperature
- 2 teaspoons vanilla extract
- 1 ½ cups (190g) all-purpose flour
- ½ cup (50g) unsweetened cocoa powder
- ½ teaspoon baking powder
- ½ teaspoon salt
- 1 package (about 36 cookies) Oreo cookies
- 1 cup (170g) semi-sweet or dark chocolate chips
Instructions
- Preheat oven to 350°F (175°C). Line a 9×9 inch baking pan with parchment paper, leaving an overhang on the sides, and lightly grease.
- Melt the butter in a microwave-safe bowl or saucepan and let it cool slightly until warm but not hot.
- In a large bowl, whisk together the melted butter, granulated sugar, and brown sugar until well combined.
- Add the eggs and vanilla extract, whisking vigorously for 1-2 minutes to incorporate the sugar for the crackly top.
- Stir in the flour, cocoa powder, baking powder, and salt until just combined. Do not overmix.
- Crush about 12 Oreo cookies into small chunks and fold them into the batter along with the chocolate chips.
- Transfer the batter to the prepared pan and press down firmly to create an even layer.
- Arrange remaining crushed Oreos on top of the batter and sprinkle with extra crushed Oreos for garnish.
- Bake for 25-30 minutes, or until edges are set and the center is slightly soft. A toothpick should come out with moist crumbs.
- Cool completely in the pan for at least 30 minutes, then lift out using the parchment overhang and cool on a wire rack before cutting.
Notes
For the best crackly top, ensure you whisk the butter and sugars thoroughly. Do not overbake; the bars will continue to cook in the pan. Store in an airtight container at room temperature for up to 4 days, or freeze for up to 3 months. For gluten-free, use a 1:1 gluten-free flour blend. For dairy-free, use vegan butter and dairy-free chocolate chips.
- Prep Time: 15 minutes
- Cook Time: 30 minutes
- Category: Dessert
- Cuisine: American
Nutrition
- Serving Size: 1 bar
- Calories: 320
- Sugar: 28
- Sodium: 220
- Fat: 16
- Saturated Fat: 9
- Carbohydrates: 42
- Fiber: 2
- Protein: 4
Keywords: Oreo brookie bars, fudgy brownies, crackly top, easy dessert, chocolate cookie bars, weekend baking, family dessert


